Have you ever thought you could repurpose old hubcaps into wall decor?
Hubcaps might seem like an odd choice for a child’s bedroom decor, but with a little imagination and elbow grease, they can add a unique flair to your space.
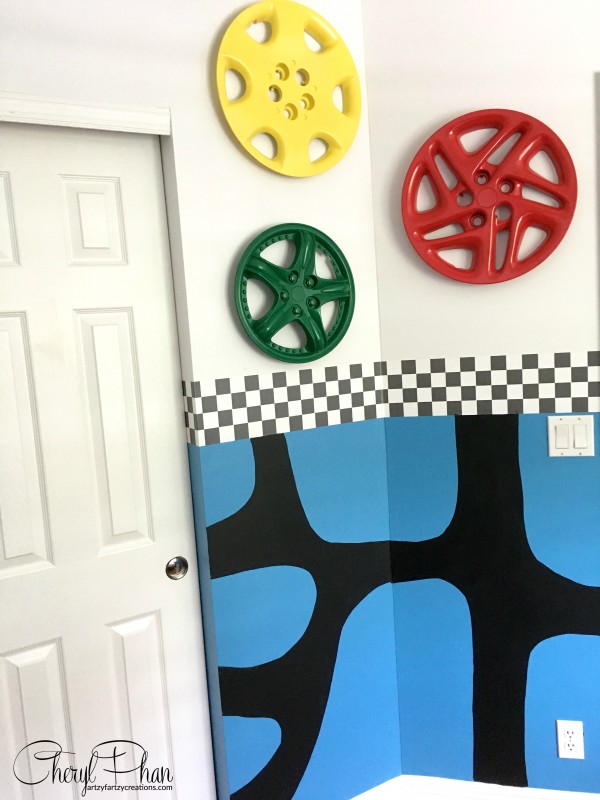
This was another unique design element for my race car room transformation.
Not only is this a fun and affordable DIY project, but you’ll also have one-of-a-kind wall art that no one else can find in a store.
This DIY project will show you how to take old, discarded hubcaps and turn them into a Wall art Masterpiece.
Whether you found them at a junkyard or have a few lying around from an old car, I’m going to show you how to turn these dirty, forgotten items into eye-catching decor.
Step 1: Cleaning Hubcaps
Before you start painting or decorating, the first and most important step is to clean the hubcaps.
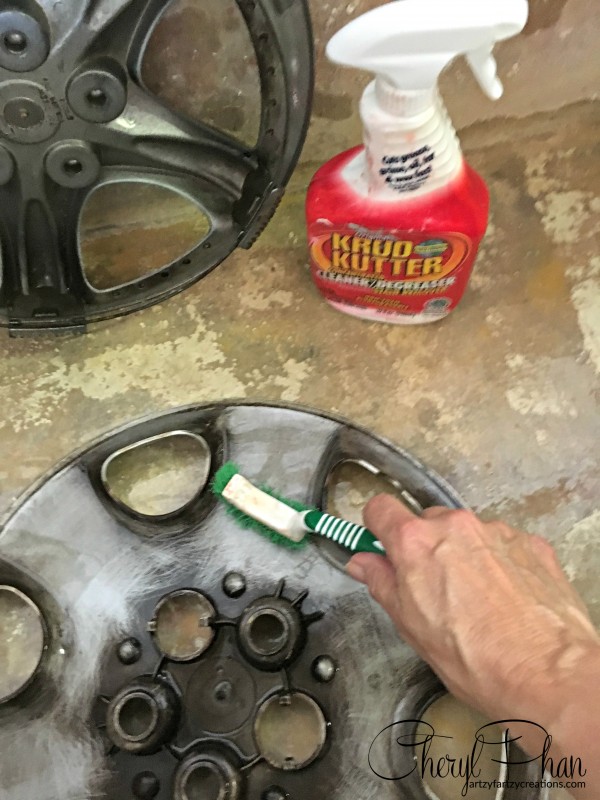
Since they’ve been sitting in a junkyard, they’re likely covered in dirt, grime, and rust. But don’t worry, this is where Krud Kutter comes to the rescue.
I use this product for just about everything, and it works wonders on tough-to-clean items like hubcaps.
Here’s how I tackled the dirt and grime:
- Spray Krud Kutter generously over the entire hubcap surface.
- Let it sit for a few minutes to break down the grime.
- Use a scrub brush to clean all the crevices thoroughly.
- Rinse with water and dry completely before moving on to the next step.
Step 2: Prepping the Hubcaps for Painting
Now that your hubcaps are squeaky clean, it’s time to prep them for painting. This is an important step to ensure the paint sticks and lasts, so don’t skip it!
First, you’ll need to apply a good-quality spray primer. I prefer spray primer because it gives even coverage and dries quickly.
Here’s the process:
- Lay out newspaper or a drop cloth to protect your workspace from paint splatters.
- Spray an even coat of primer on the front and back of the hubcap.
- Let it dry for about 30 minutes before moving on to painting.
Using primer ensures your hubcaps will have a smooth surface for the paint to adhere to, which helps prevent chipping and peeling over time. Rust-Oleum spray paint works wonderfully for this project, as it’s durable and offers a variety of finishes.
Step 3: Choosing the Right Paint and Finish
Once the primer has dried, it’s time for the fun part—painting! Whether you want a sleek metallic finish or a pop of color, Rust-Oleum has you covered. For this project, I went with bold primary colors to give the hubcaps a fun playful look.
Here’s how I painted my hubcaps:
- Shake the spray paint can for at least a minute to ensure even application.
- Spray the hubcap from about 8-10 inches away, using smooth, even strokes.
- Allow the first coat to dry, then apply a second coat for full coverage.
- Let the paint dry completely (at least 24 hours) before handling the hubcap.
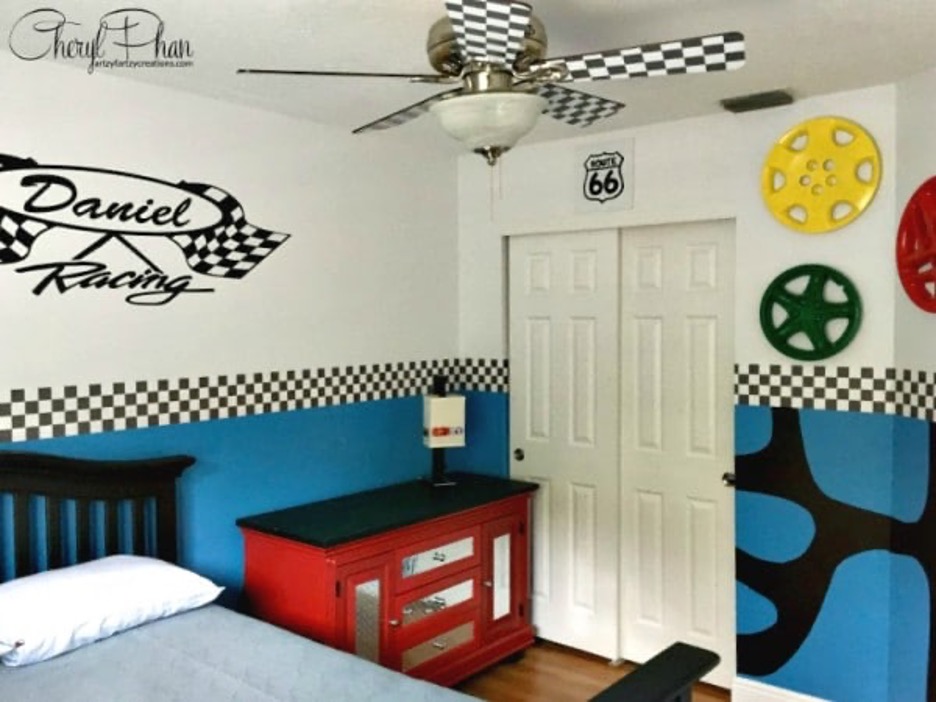
Who would have thought that old hubcap could be used as a vibrant wall display made from junkyard hubcaps? With a little paint and imagination, you can easily turn just about anything into unique DIY home decor.
Hubcap Wall Decor
Group several hubcaps together on a feature wall for a bold statement. This DIY hubcap project is proof that you can turn just about anything into beautiful home decor with a little creativity and effort.
The possibilities are endless!
I hope this guide inspired you to dive into your next creative project and gave you the confidence to try something new!
Have you been following the 6-part Race Car Blog series?
Just in case you missed it, here are the first 4 transformations…
P.S. Don’t forget to sign up for my blog for more home decor tips, DIY projects, and creative inspiration!
P.S.S. Do you need help building and monetizing your online business? Join Empowering Women. Get started today!
Let’s get creative,
Cheryl
Artzy Fartzy Creations. Oh Yes you can DIY!
How to Make Money With Videos
Did you know that 85% of people watch videos online? [...]
Turn Your Passion Into A Paycheck
If you’ve been following me for any length of time, [...]
Learn How to Take Your Own Professional Pictures with These 4 Tools and Save Hundreds of Dollars
You don’t need to spend a ton of money on [...]
How to pick the PERFECT PAINT COLORS for Your Walls
Need help picking paint colors? I have the thing you’re [...]
5 Must-Have Apps You Need for Instagram
If you want your Instagram account to stand out and [...]
How to Write Your Instagram Bio in One Sentence
Do you have an Instagram Bio that tells people what [...]
Contents
Recent Reads
Mirror Makeover: Transforming Outdated Wall-Hanging Mirrors
From Outdated to Outstanding: Mirror Makeover You know how we're [...]
Hand-Painted Valance Transforms Bedroom Elegance
Unveiling the Master Bedroom Magic with Hand-Painted Valence Oh, you [...]
5 Steps to Transform Your Faux Granite Fireplace
Do you have an electric fireplace that needs some TLC? [...]

