DIY Small Dog Bed Tutorial -How to Make a Puppy Bed Out of an Old Nightstand Step-by-Step
When I got my new puppy, Bella, I knew my little princess deserved a stylish bed fit for her royal status. The challenge was…
I didn’t have much space, and the only spot for it was in my living room. That’s when I got creative and decided to design something that was not only adorable but also served a dual purpose!
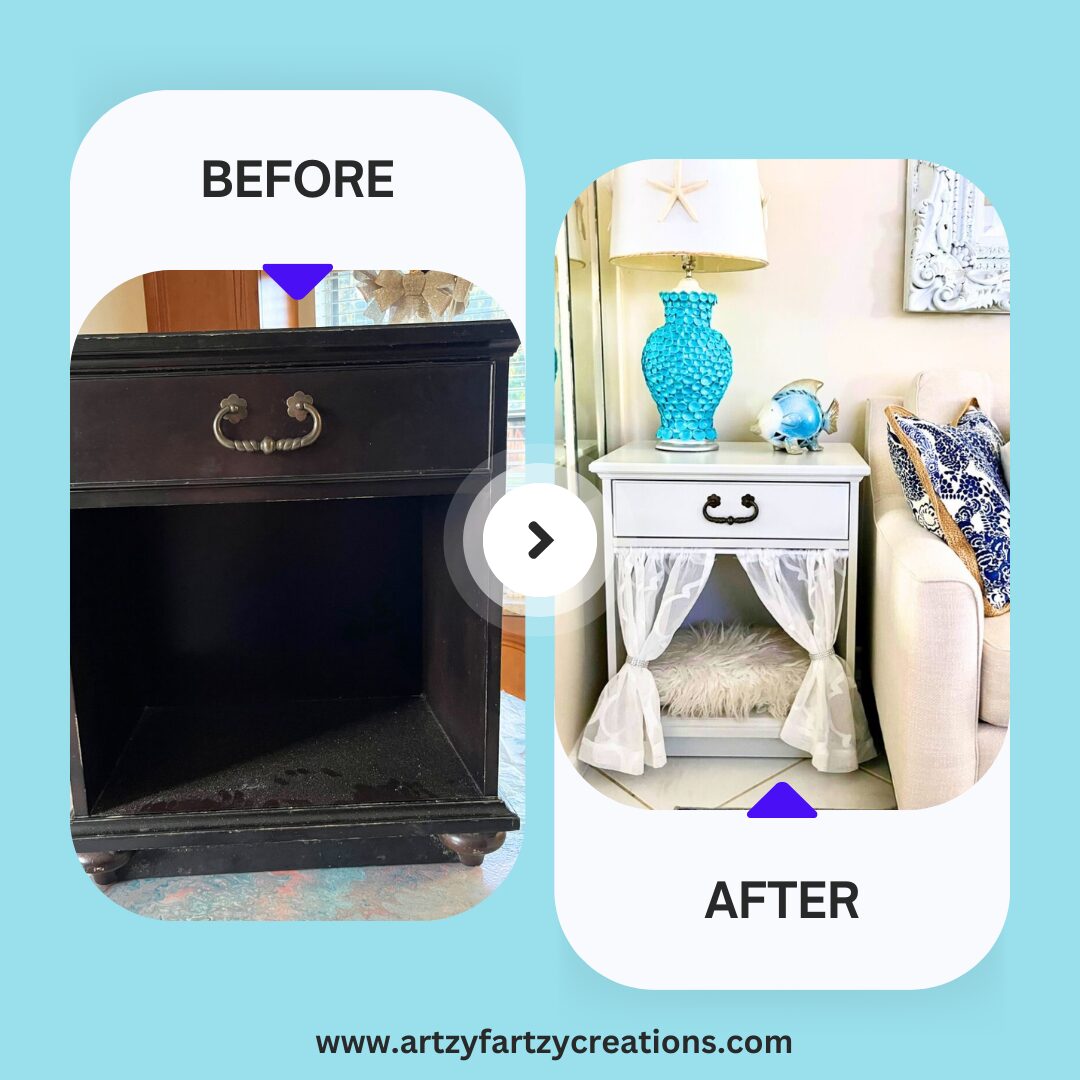
If you’re looking for a creative way to repurpose old furniture and give your furry friend a cozy spot to snooze? This step-by-step guide will show you how to turn an old nightstand into an adorable and functional puppy bed.
Whether you’re a DIY enthusiast or just love pampering your pup, this project is easy, budget-friendly, and a great way to upcycle something you may already have.
Why Make a Puppy Bed Out of a Nightstand?
If you’re searching “DIY puppy bed ideas” or “how to make a dog bed from furniture,” you’re likely looking for something unique and practical.
Buying pet furniture can get expensive, and let’s be honest, it’s hard to find something that matches your style. Creating a custom puppy bed solves that problem—it’s cost-effective and eco-friendly, and you can personalize it to fit your home decor.
Step 1: Choose the Right Nightstand
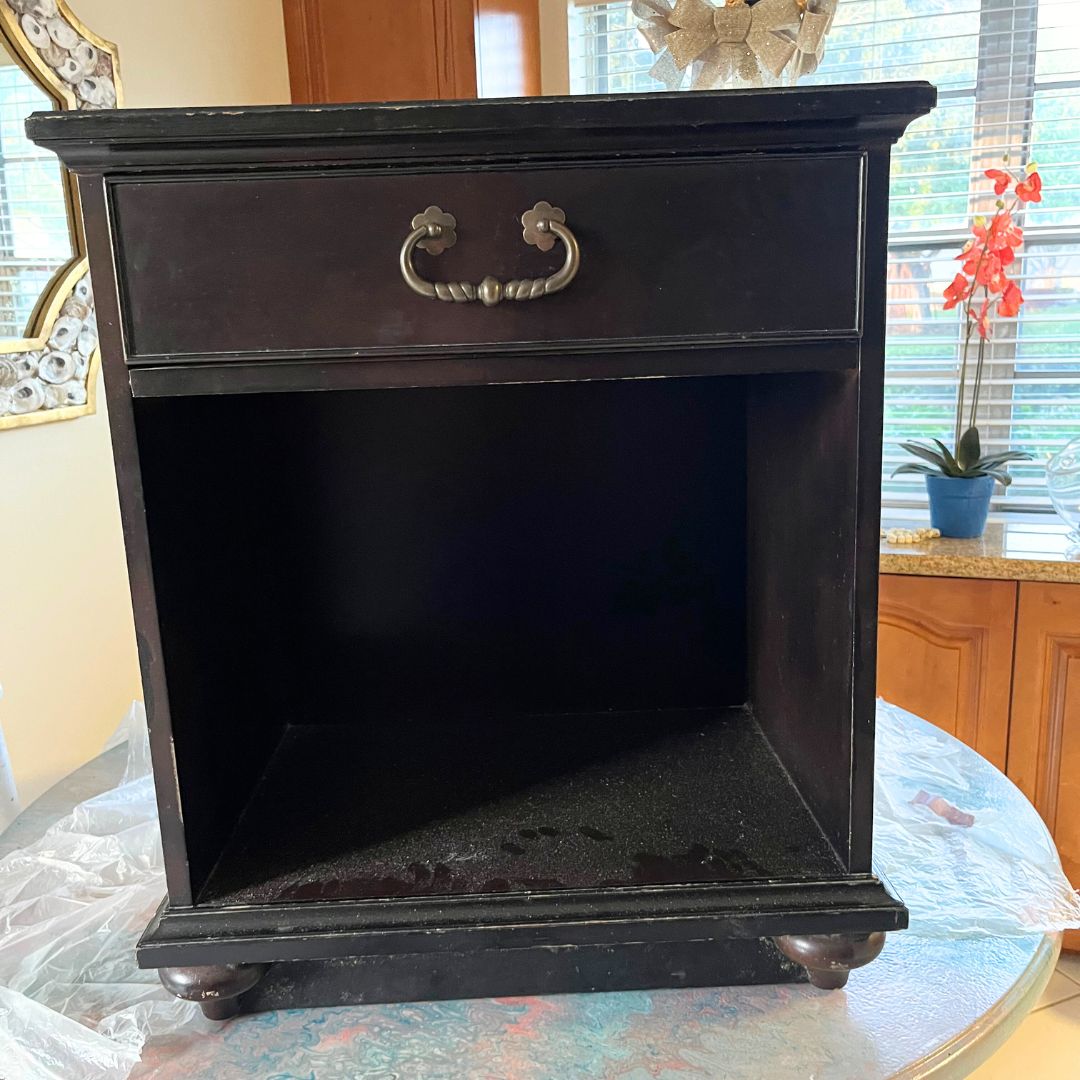
The first step is finding the perfect piece of furniture. Look for a sturdy nightstand with enough space inside to comfortably fit your puppy. Ideally, the nightstand should have an open front or removable doors that can be converted into a cozy sleeping area.
Tip: Check thrift stores or garage sales if you don’t already have one.
What You’ll Need to Get Started for the DIY small dog bed tutorial
Before diving into the step-by-step instructions, make sure you have these materials and tools ready:
Materials:
- An old wooden nightstand: Thrift Store
- A small dog bed or cushion (to fit inside)
- Fabric to make curtains: (Look in Goodwill)
- Spring rod for the curtain
- Tiebacks for curtain: (you can use just about anything)
- Primer
- Paintbrush
- Non-toxic Paint
- Sponge roller and tray
- Gloves
- Sandpaper (medium grit
- Rags: (old rags for cleaning up)
- Screwdriver:
- Plastic or drop cloth
- Puppy stencil
Got everything? Let’s get started!
Step 2: Prep the Nightstand
Once you’ve picked your nightstand, it’s time to prepare it. Remove any drawers, hardware, or extra pieces that won’t be part of the final bed. Sand the entire surface with medium grit sandpaper to give it some tooth before priming.
Pro Tip: Wipe it down with a damp cloth after sanding to remove dust. This ensures a smooth paint job later.
Step 3: Paint
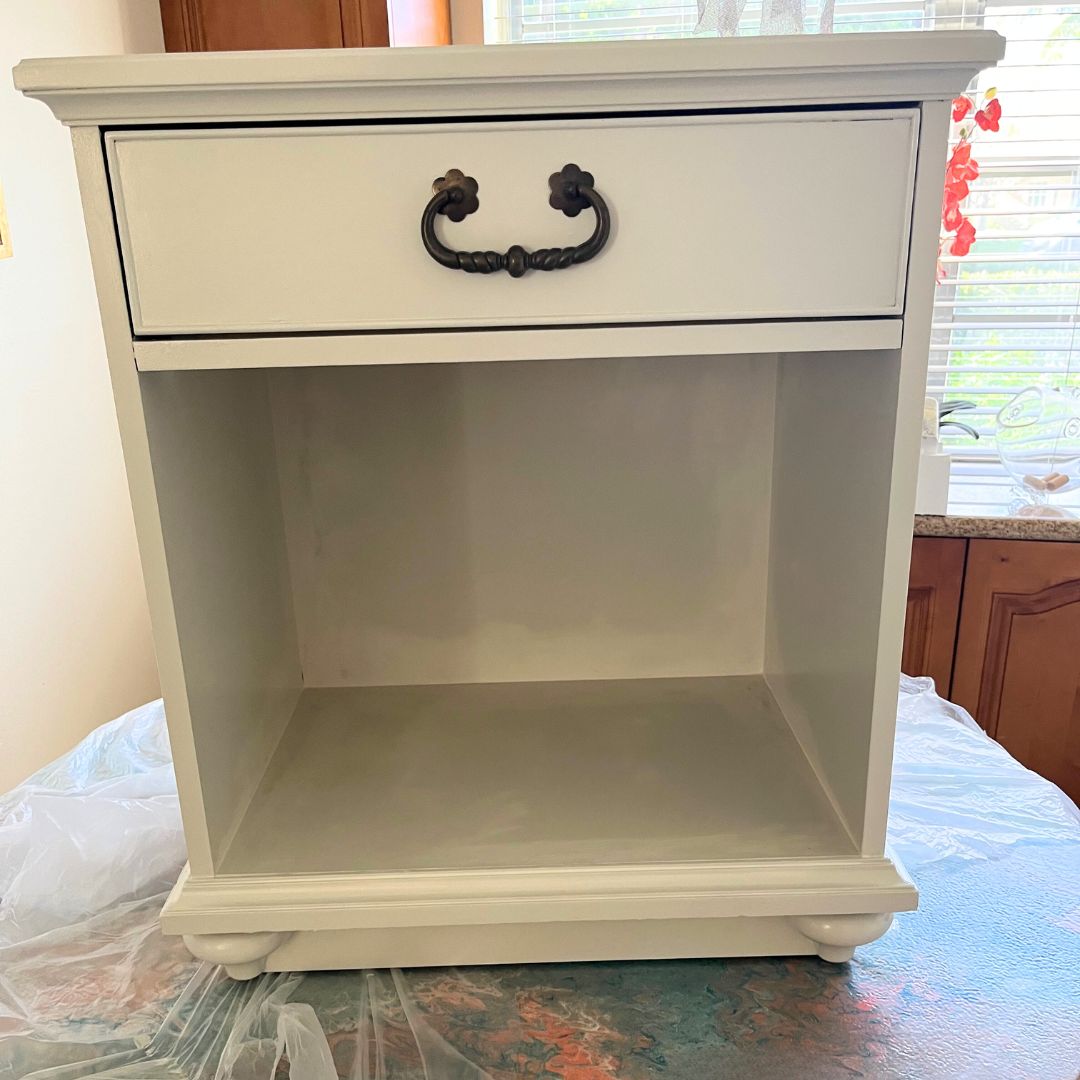
Before you start painting, don’t forget to apply one coat of primer. This step is essential for ensuring durability and creating a smooth base for your paint.
Now for the exciting part of the DIY small dog bed tutorial is picking your color or finish! Opt for a non-toxic paint; for this project, I went with a soft light gray. Bright colors can add a pop of personality, while neutral tones offer a timeless and elegant look. Be sure to let the paint dry completely before applying the second coat of paint.
Make it extra special:
Add your puppy’s name using stencils or decals for a personalized touch!
Step 4: Add the Cushion or Dog Bed
Measure the interior dimensions of your nightstand and find a cushion or small dog bed that fits snugly inside. If you can’t find the perfect size, consider making your own cushion using foam and fabric.
Bonus Hack: Use washable materials for easy cleaning, because accidents happen!
Step 6: Add Finishing Touches
Your DIY puppy bed is almost ready to shine! For an extra special touch, consider adding curtains to give it a cozy, polished look—and a bit of privacy for your pup.
For my project, I used an old sheer curtain and draped it over a spring rod.It’s simple, stylish, and adds the perfect finishing detail to make the bed truly unique!
By following these steps, you’ll not only solve the problem of finding a stylish dog bed but also create something meaningful for your home.
P.S. Ready to tackle more DIY projects? Sign up for my blog, filled to the brim with home decorating and DIY tips!
P.S.S. Would you like to learn how to turn your DIY projects into a business? Join Empowering Women. Get started today!
Have Fun!
Cheryl
Artzy Fartzy Creations. Oh Yes you can DIY!
Classy Zebra Chair
Trash-To-Treasure Transformation This Old Chair Gets A Makeover You Won’t [...]
Curb Appeal That Matters!
Today, there are new ways to make a [...]
Make Chalkboard Paint In Any Color
Easy Peasy DIY Projects! Make your own chalk [...]
How to choose the right paint color
This is one of the biggest problems I see when [...]
5 Reasons Why You Should Hire an Professional Faux Finisher to Paint Your Cabinets
Kitchen cabinets have become a key selling point [...]
8 Things You Don’t Need in Your Kitchen
If you have a small kitchen, every square [...]
Contents
Recent Reads
Whose Dream Are You Building?
I want to give a few words of [...]
Social Media Image Size Cheat Sheet
Struggling to get your social media images just, [...]
Furniture Rescue
Blending Technique Furniture Rescue Some people rescue pets [...]

