How to apply the perfect caulk line
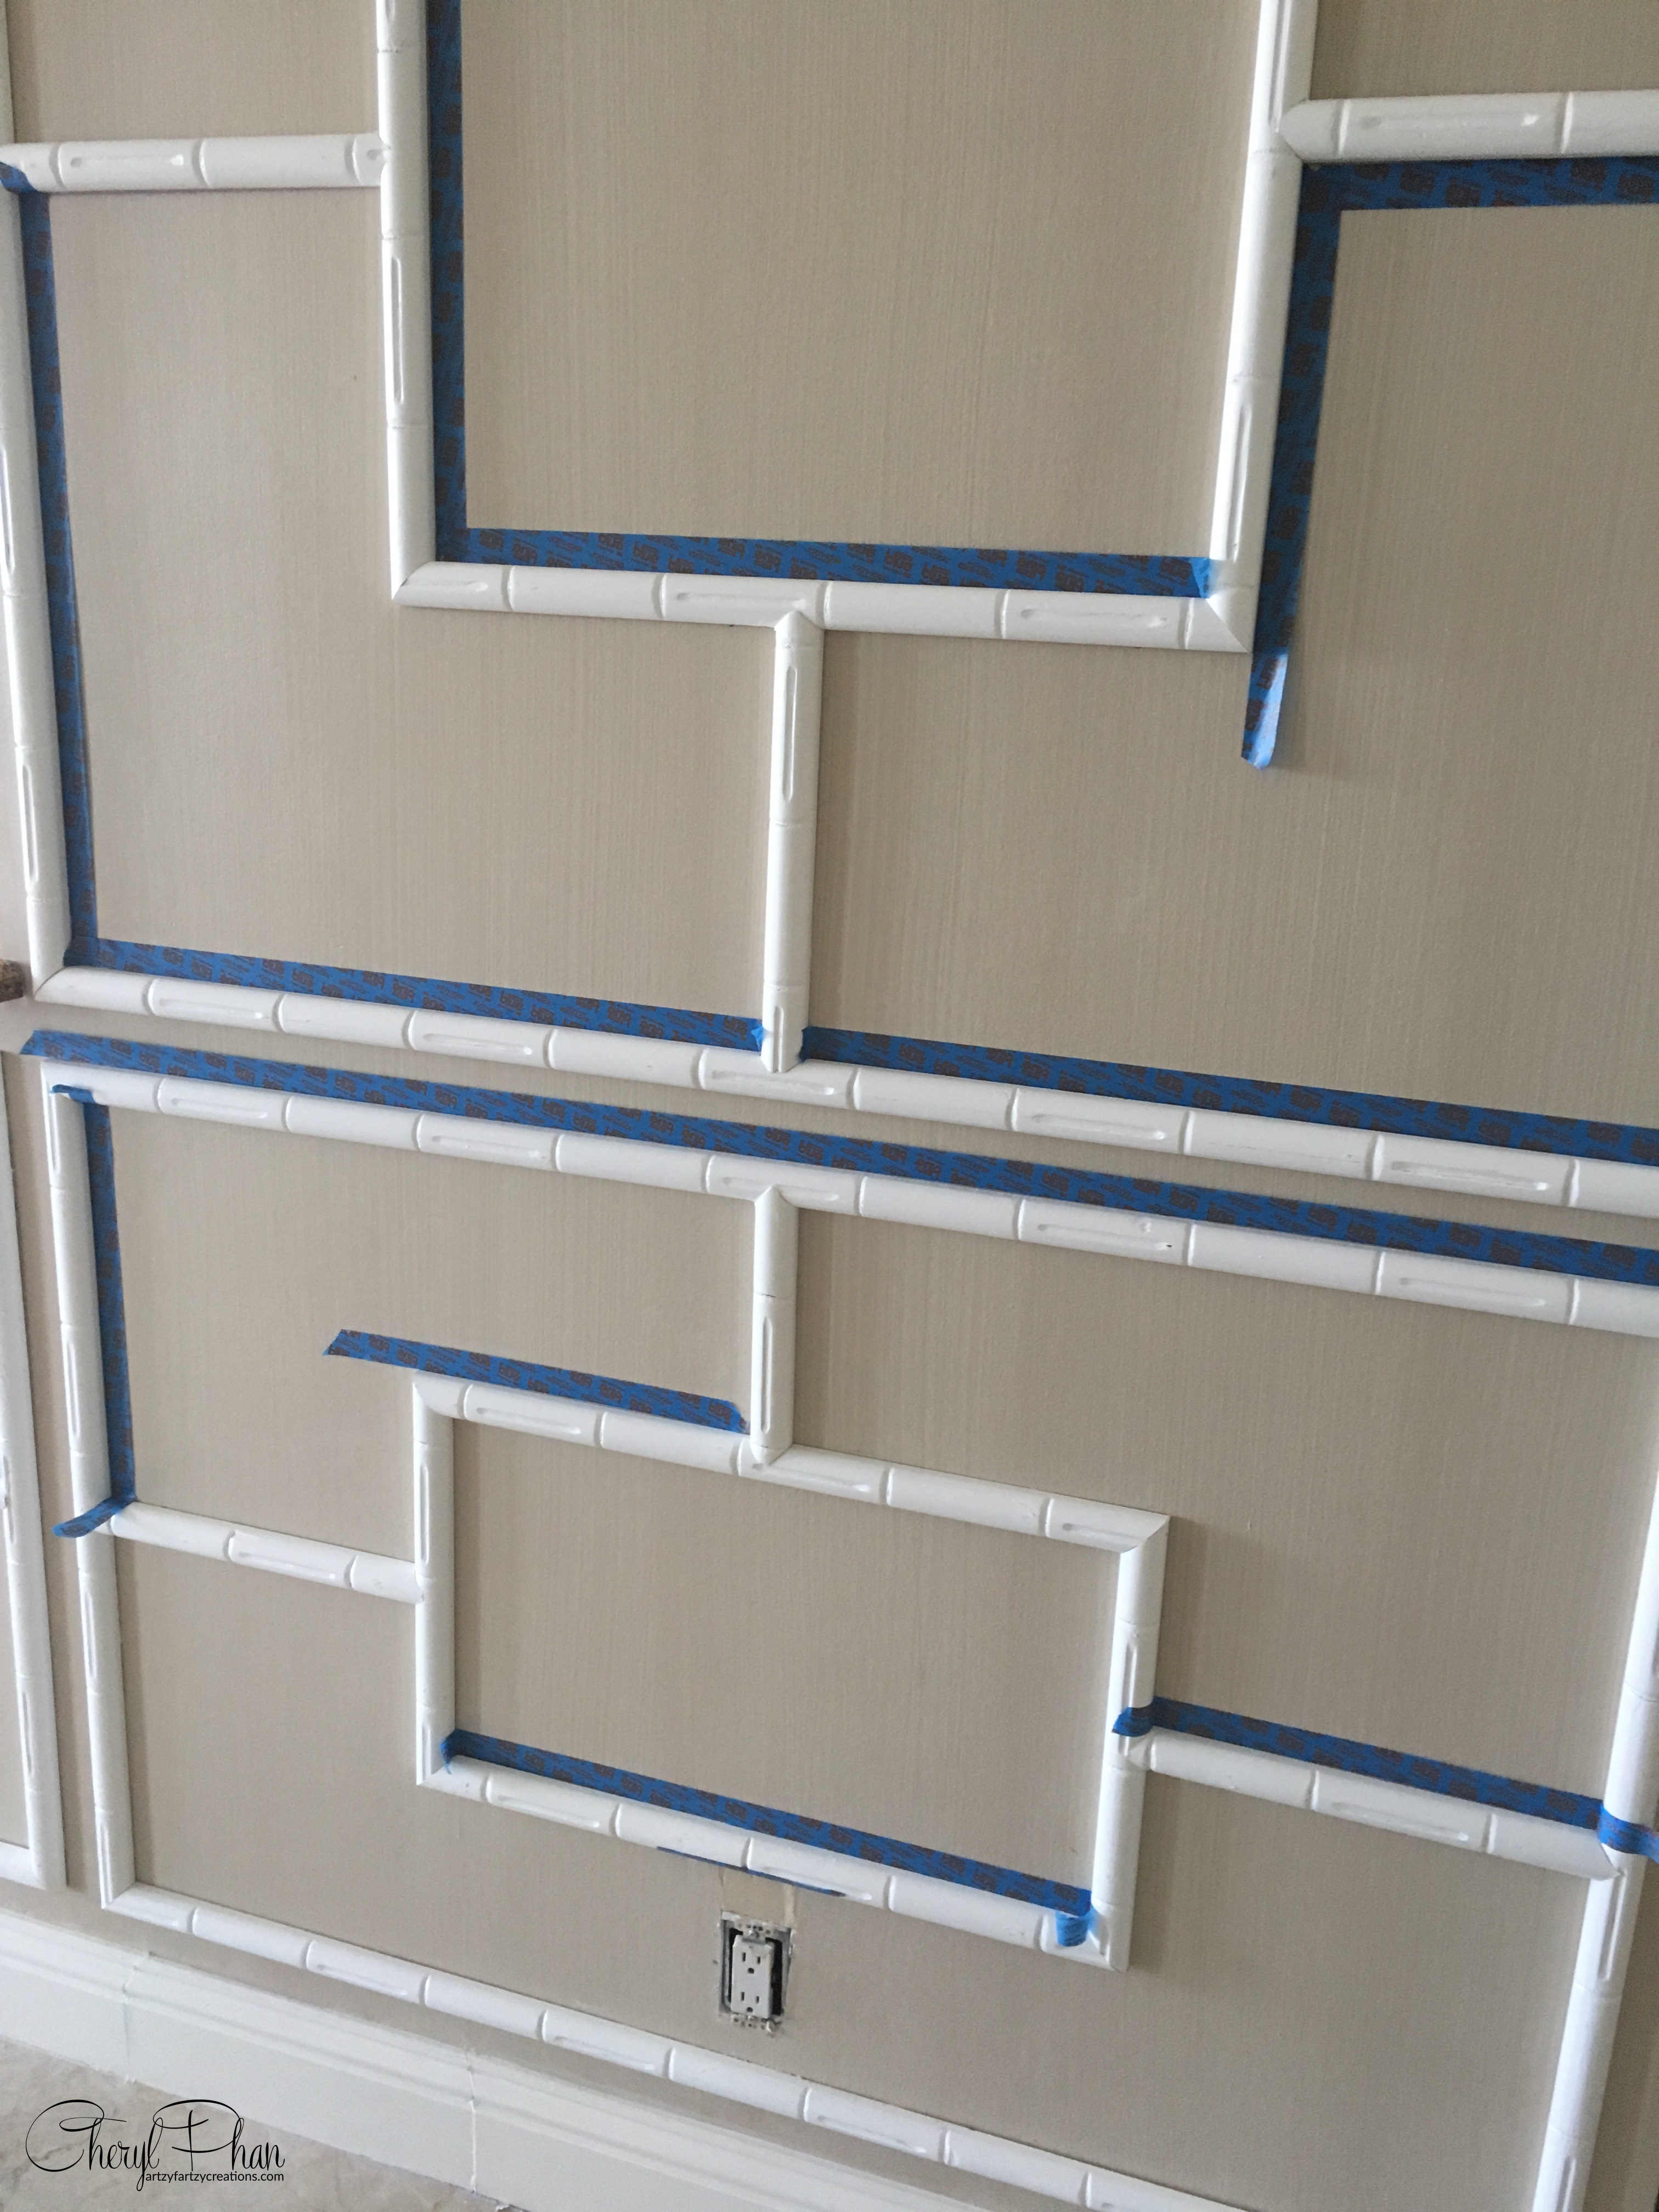
Inevitably, when you apply molding of any kind to a wall you will end up with gaps. This is because the wall isn’t completely flat. The best way to give it that finished look is to apply a caulk line. The problem is, when you add the caulking it may come out thick and when you use your finger to smooth it out it will smudge on the wall and make a mess.
But I have the perfect solution.
Here’s a great hack I learned a long time ago. Run a piece of tape along the edge of the molding. It may be an extra step, but it is well worth the extra time.
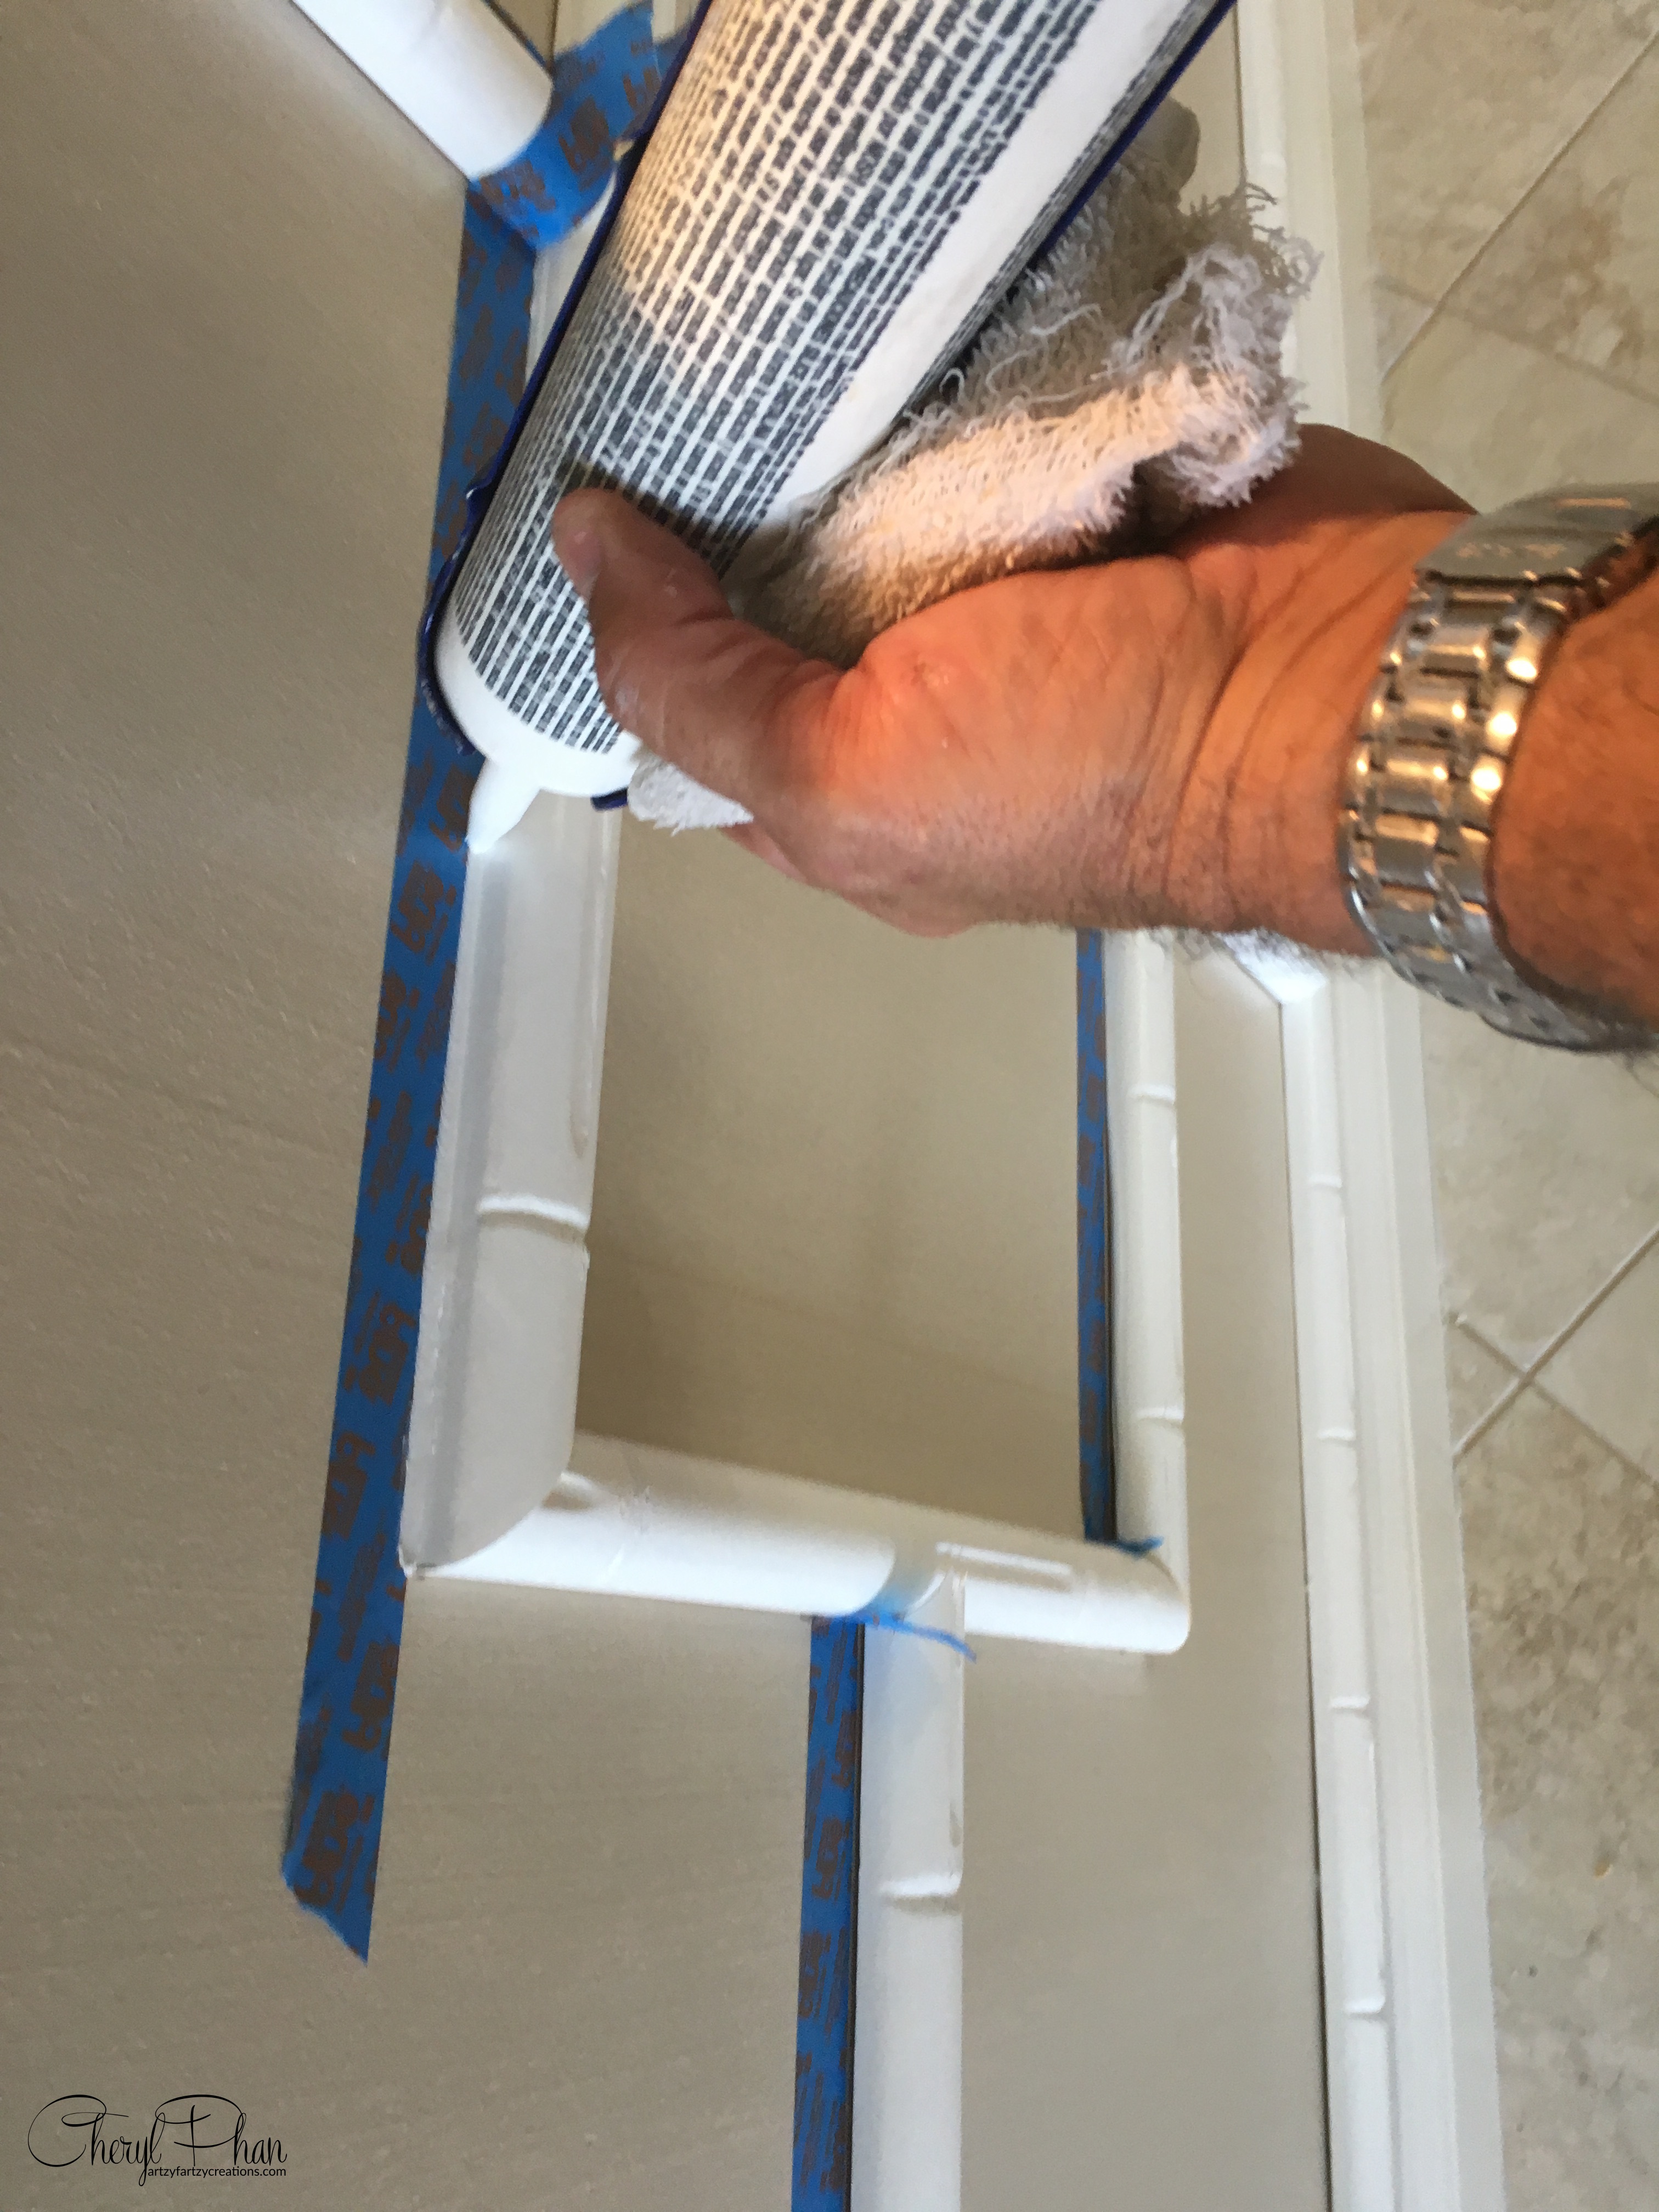
Then apply a small amount of caulking along the edge. Use a damp rag or your finger to smooth it out.
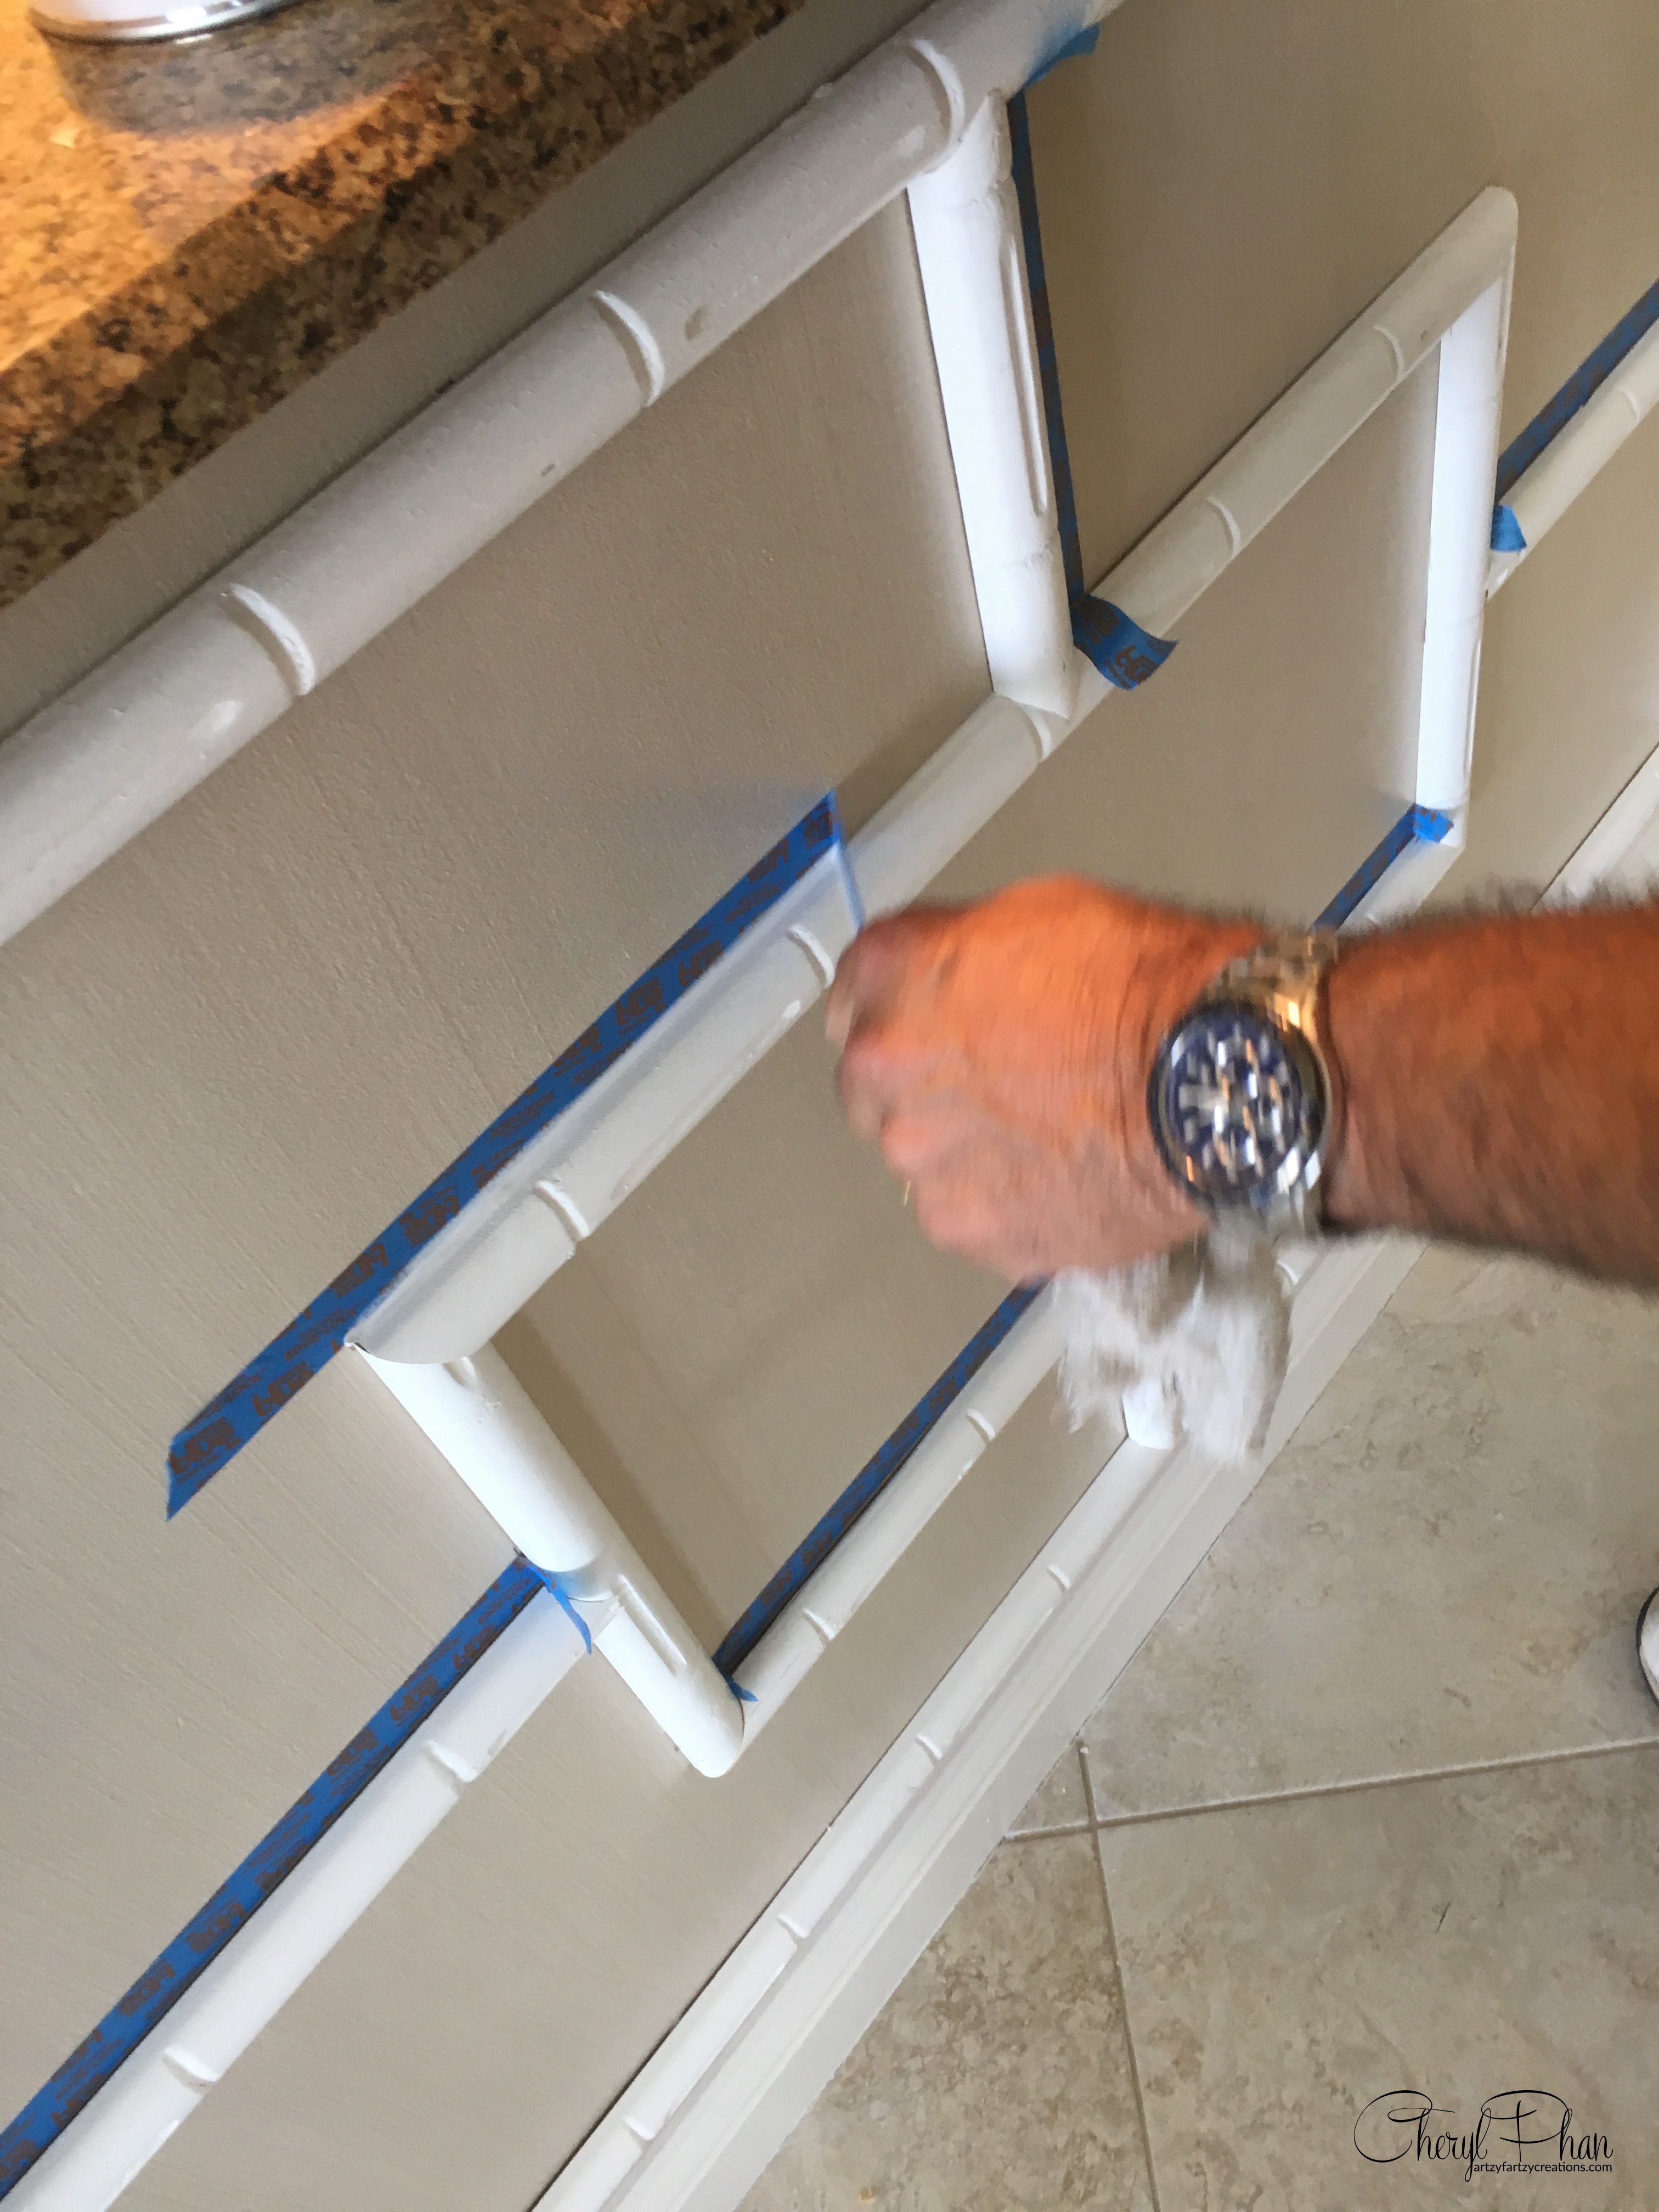
Remove the tape immediately.
There you have it, a perfect line without the smudgy mess. This works well on bathtubs and sinks as well.

Perfect caulk line. No smudging, no mess.
If you want to learn how to start making money with your hobby get the details HERE
If you want to learn DIY Tricks and Tips get my weekly blog HERE


Artzy Fartzy Creations. Oh Yes you can DIY!

Thrift Store Gem for 3 Dollars
One of my favorite things to do is [...]

Should you REPLACE, REFACE or PAINT your kitchen cabinets?
Not sure what to do? Read this before [...]

Stunning Ceilings for Any Room in Your House!
I’m a huge fan of decorative painted ceilings. [...]

Lilly Pulitzer Themed Bookshelf
When decorating a room we look at many [...]

MY TOP 6 Faux Finishes for 2015
Wow, I can’t believe we’re already through the first month [...]

How to Paint a Strie Wall Faux Finish
A strié wall faux finish is created by dragging a [...]
Contents
Recent Reads

CYA-Cover Your Ass-sets
5 Important Tips to Protect Your Business from [...]

6 Thrift Store Finds You Can Transform To Decorate Your Home
Budget-friendly ways to transform your thrift store finds [...]

Learn how to paint Glitter office accessories in less than 3 minutes for as little as $12
Making your own glitter office accessories After searching [...]