One of my FAVORITE things to do is creating bright and whimsical bedrooms for children with special needs. This entire room was transformed for Maya, a beautiful 15-year-old girl who suffers from Autism. Volunteers from my nonprofit organization, “Paint For Children” share their time and talent to give back to children with disabilities. Come see how we created this beautiful room in just two days.
My goal is to repurpose as much as I can. If you have old furniture and accessories that are in good condition, I would suggest painting them instead of buying new.
This cute little shelf was painted with chalk paint and the three knobs were replaced with new decorative hardware. A quick and simple fix.
I’m sure you will agree that this little nightstand really needed some TLC. Most people would have ditched it and bought a new one, but I can see the beauty behind all the dings and scratches.
The hardware was painted with spray primer and then lacquer spray paint. I try to salvage everything I can. The nightstand was painted with chalk paint. I like to make my own chalk paint with this Magic Powder because it saves a ton of money and I can custom make my own colors.
This dresser was in perfect condition, it just needed a color change. All the furniture in this room was painted with white chalk paint. I love using chalk type paint because it dries fast and covers in two coats. I changed out the hardware because I happen to have these in my studio, but you can use lacquer spray paint if you want to keep the ones you have.
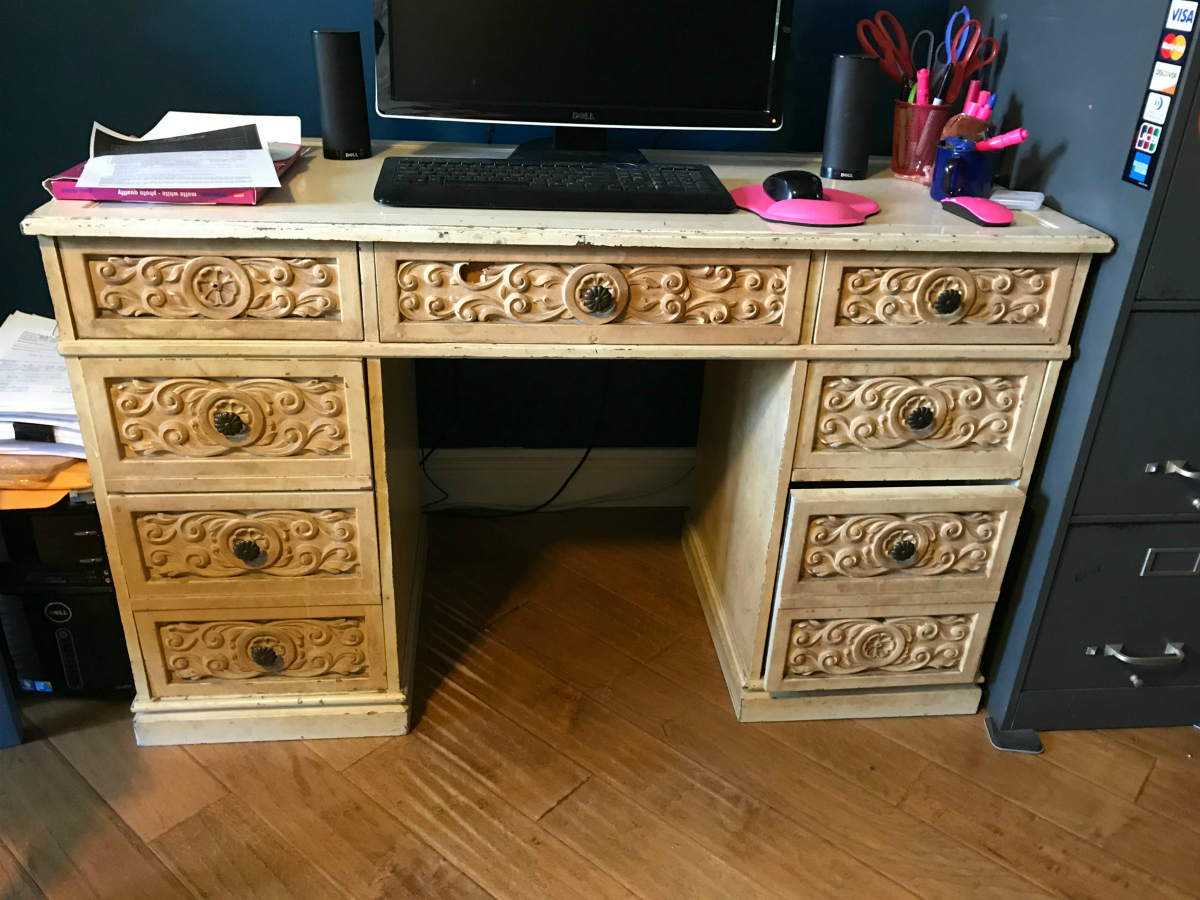
This piece was donated but it needed a little extra work. There was a hole in the center drawer that needed to be cast. Here is a blog on how to make your own applique and repair broken furniture.
Look at how beautiful this came out. I bought the chair at Goodwill for $7 and painted it with chalk type paint to match the desk.
Here is the before picture of the room. We had to paint two coats of primer on the walls to cover up the tree before we could paint it.
After the primer dried we added two coats of pink paint on all the walls.
See the letters in the frame, here a great hack on how to hang letter in one easy step.
Here is where I bought the canopy.
Another before picture. As you can see the doors also needed to be primed & painted.
The closet doors and the door to the bedroom was painted in a white satin paint finish.
As you can see, a little paint can go a long way. We painted this entire room with only two gallons of primer, two gallons of pink paint and less than ½ gallon of chalk type paint for all the furniture.
The Big Reveal
I want to give a shout out to all our volunteers. It takes a team of people that come together to do God’s work and to make a child smile.
Thank you
Dennis Ramella & Shaman Wood from On A Roll Elite painting services for all you do from painting the walls, hanging the chandelier, and everything else that needs to be done.
Lester Mendoza, from Artist with Master Skilled Corp hand-painted this amazing Cherry Blossom tree on the wall. It doesn’t have to be elaborate, it just needs to pop.
My creative friend Romi Ortega and her daughter Christie who turned the old furniture into fresh new pieces that light up the room.
Scott Hennessey: Our amazing and talented videographer who spends the entire day videotaping, editing, and capturing all the details and excitement for big reveal reveals.
You ALL ROCK!
Donors
Home Depot: For providing all the paint and supplies
Dunkin Donuts: for providing breakfast to all the volunteers
HAPPY PAINTING!
Want more painting tips???? Please subscribe to my weekly blog here! I’ve got a free tutorial on how to paint a silver leaf or gold leaf finish HERE. Also, check out my favorite paintbrushes in my online shop.
If you want to learn how to start making money with your hobby get the details HERE
If you want to learn DIY Tricks and Tips get my weekly blog HERE
Artzy Fartzy Creations. Oh Yes you can DIY!
Popular 2026 Paint Colors
Popular 2026 paint colors are shaping up to [...]
Best DIY Painting Tools and Must-Have Products + Exactly Where I Buy Them!
Best DIY Painting Tools I Use for Professional-Quality Results Ever [...]
How to Create a Stunning Faux Woodgrain Finish That Looks Realistic (Step-by-Step Tutorial)
How to make faux woodgrain joints is one of the [...]
How to Repair Cracked Paint on Garage Door (and Make It Look Brand New Again!)
How to Fix Cracked Garage Door Paint (and Make It [...]
Easy DIY Cabinet Makeover with Gel Stain
The one-step gel stain process gave these cabinets a [...]
Polycrylic vs Polyurethane: Clear Coat Comparison
Polycrylic vs polyurethane clear coat — choosing between these two [...]
Contents
Recent Reads
Best DIY Painting Tools and Must-Have Products + Exactly Where I Buy Them!
Best DIY Painting Tools I Use for Professional-Quality Results Ever [...]
How to Create a Stunning Faux Woodgrain Finish That Looks Realistic (Step-by-Step Tutorial)
How to make faux woodgrain joints is one of the [...]
How to Repair Cracked Paint on Garage Door (and Make It Look Brand New Again!)
How to Fix Cracked Garage Door Paint (and Make It [...]


