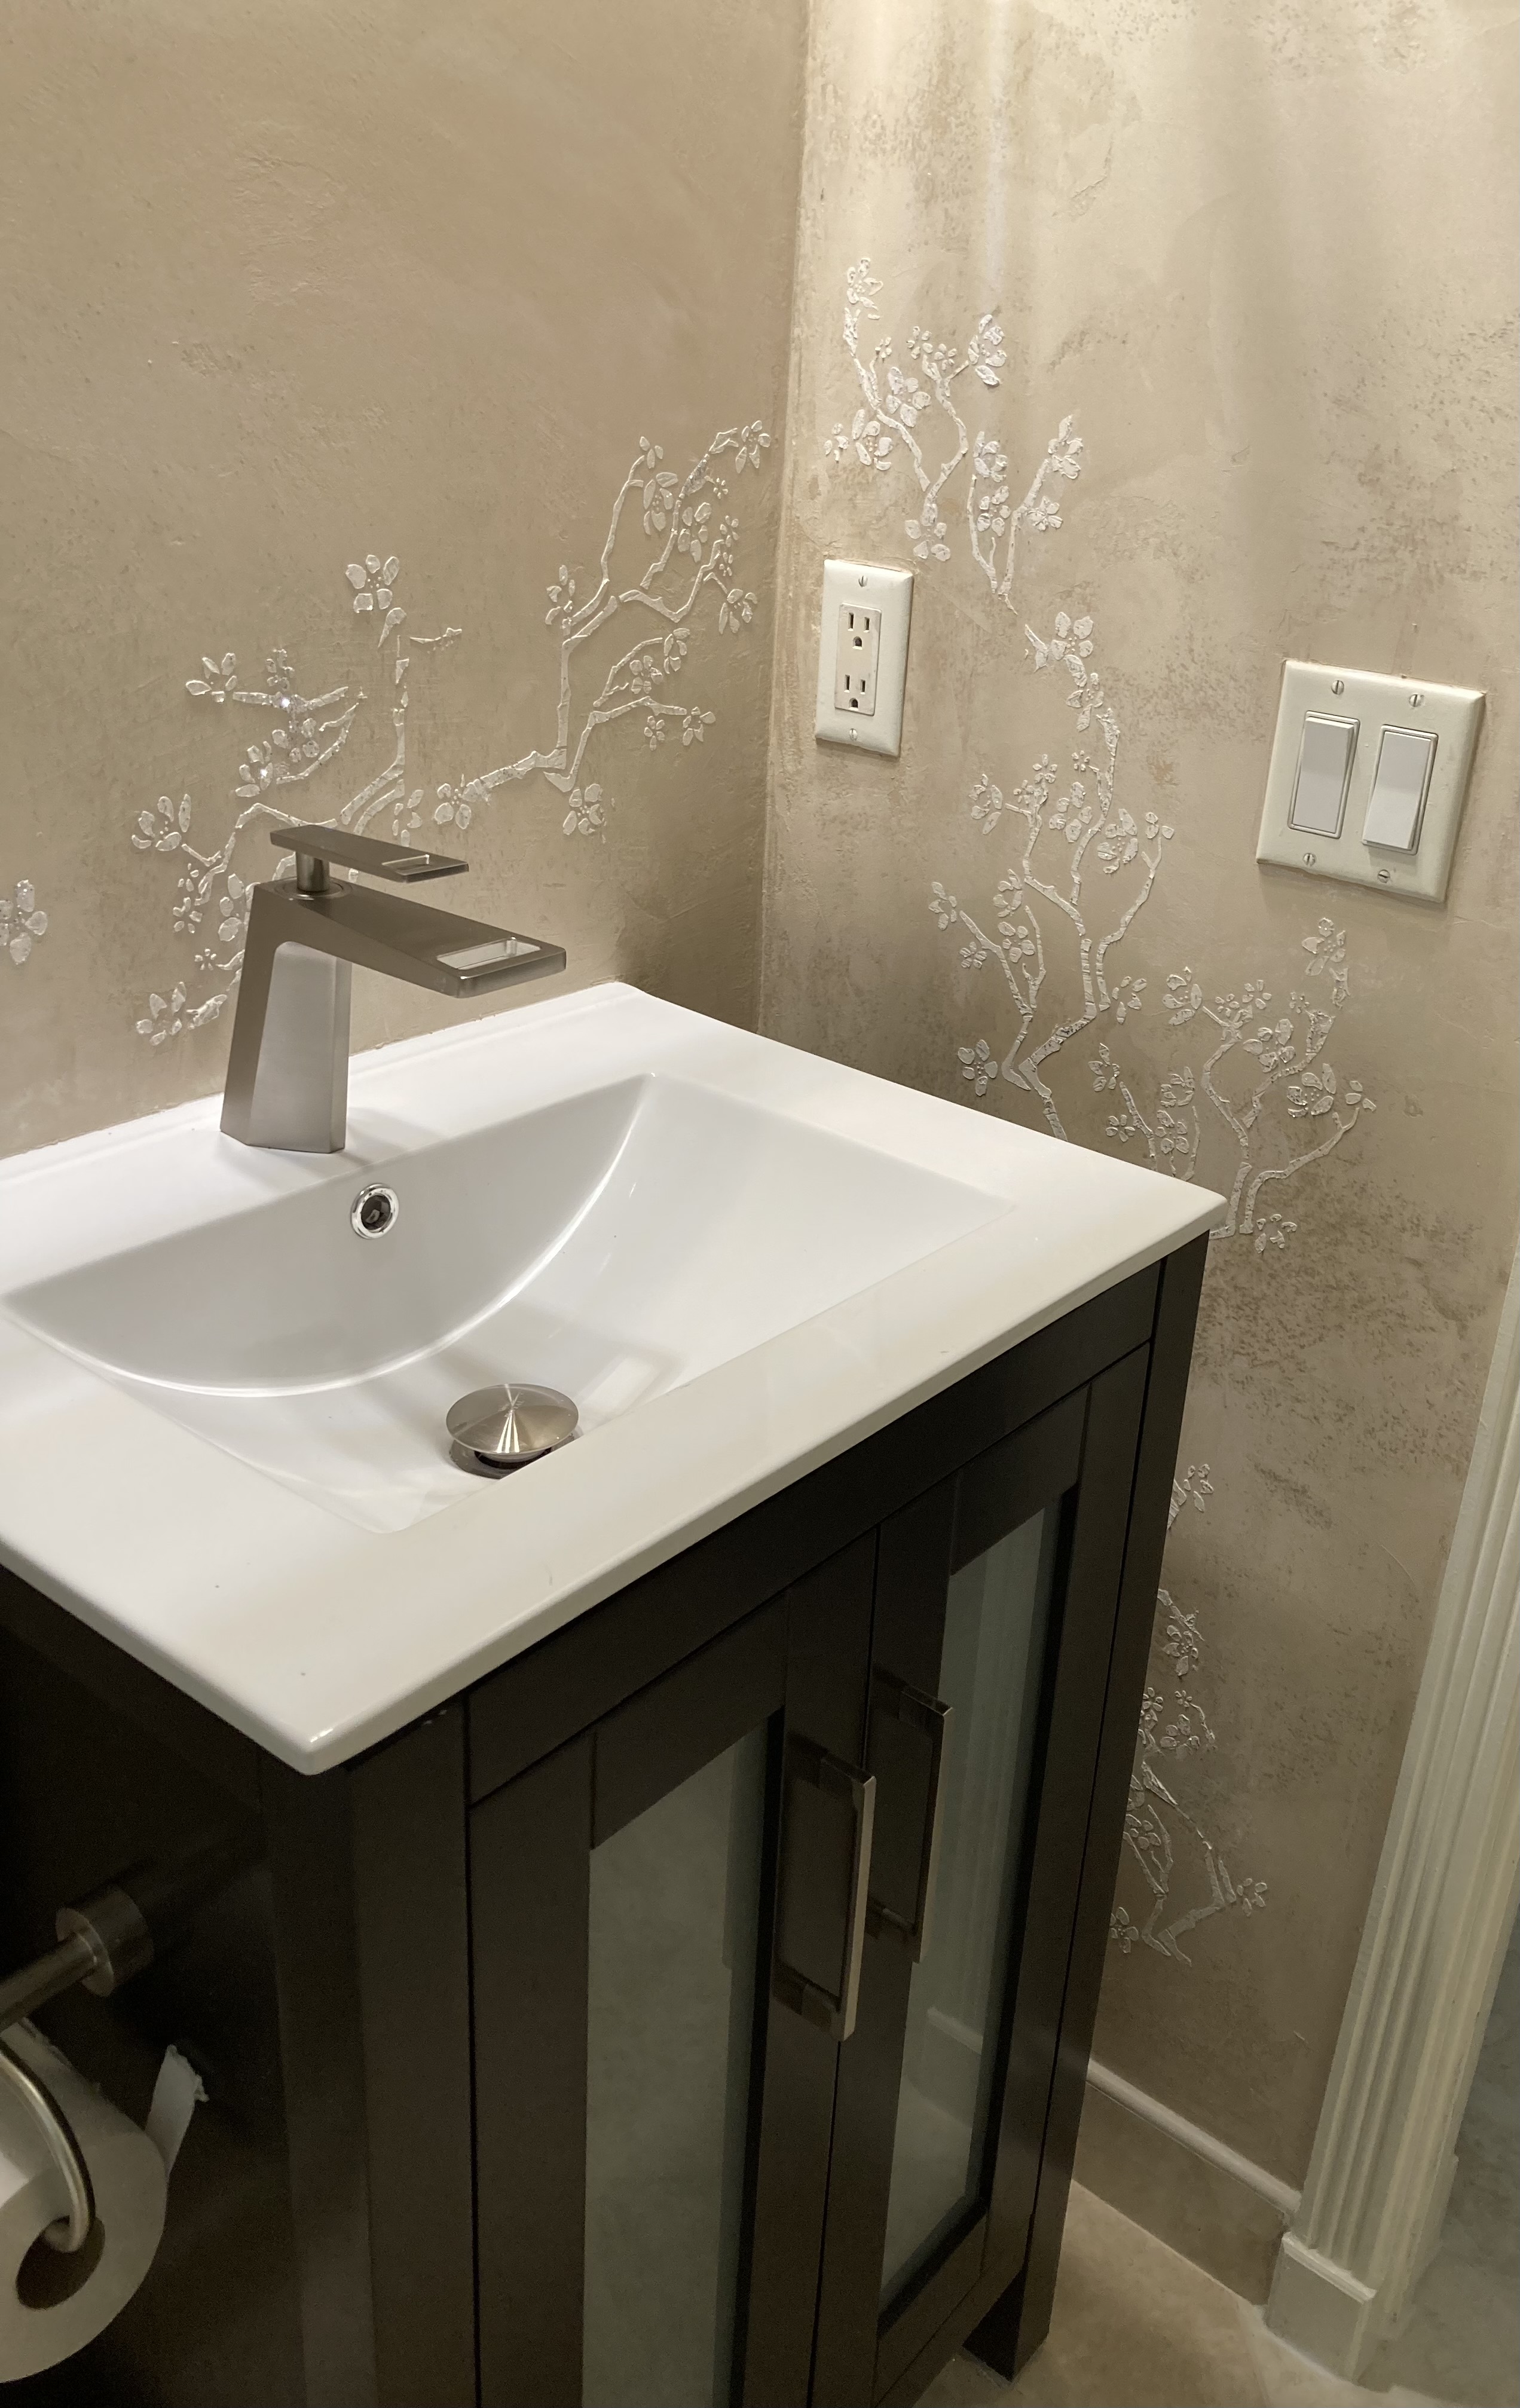
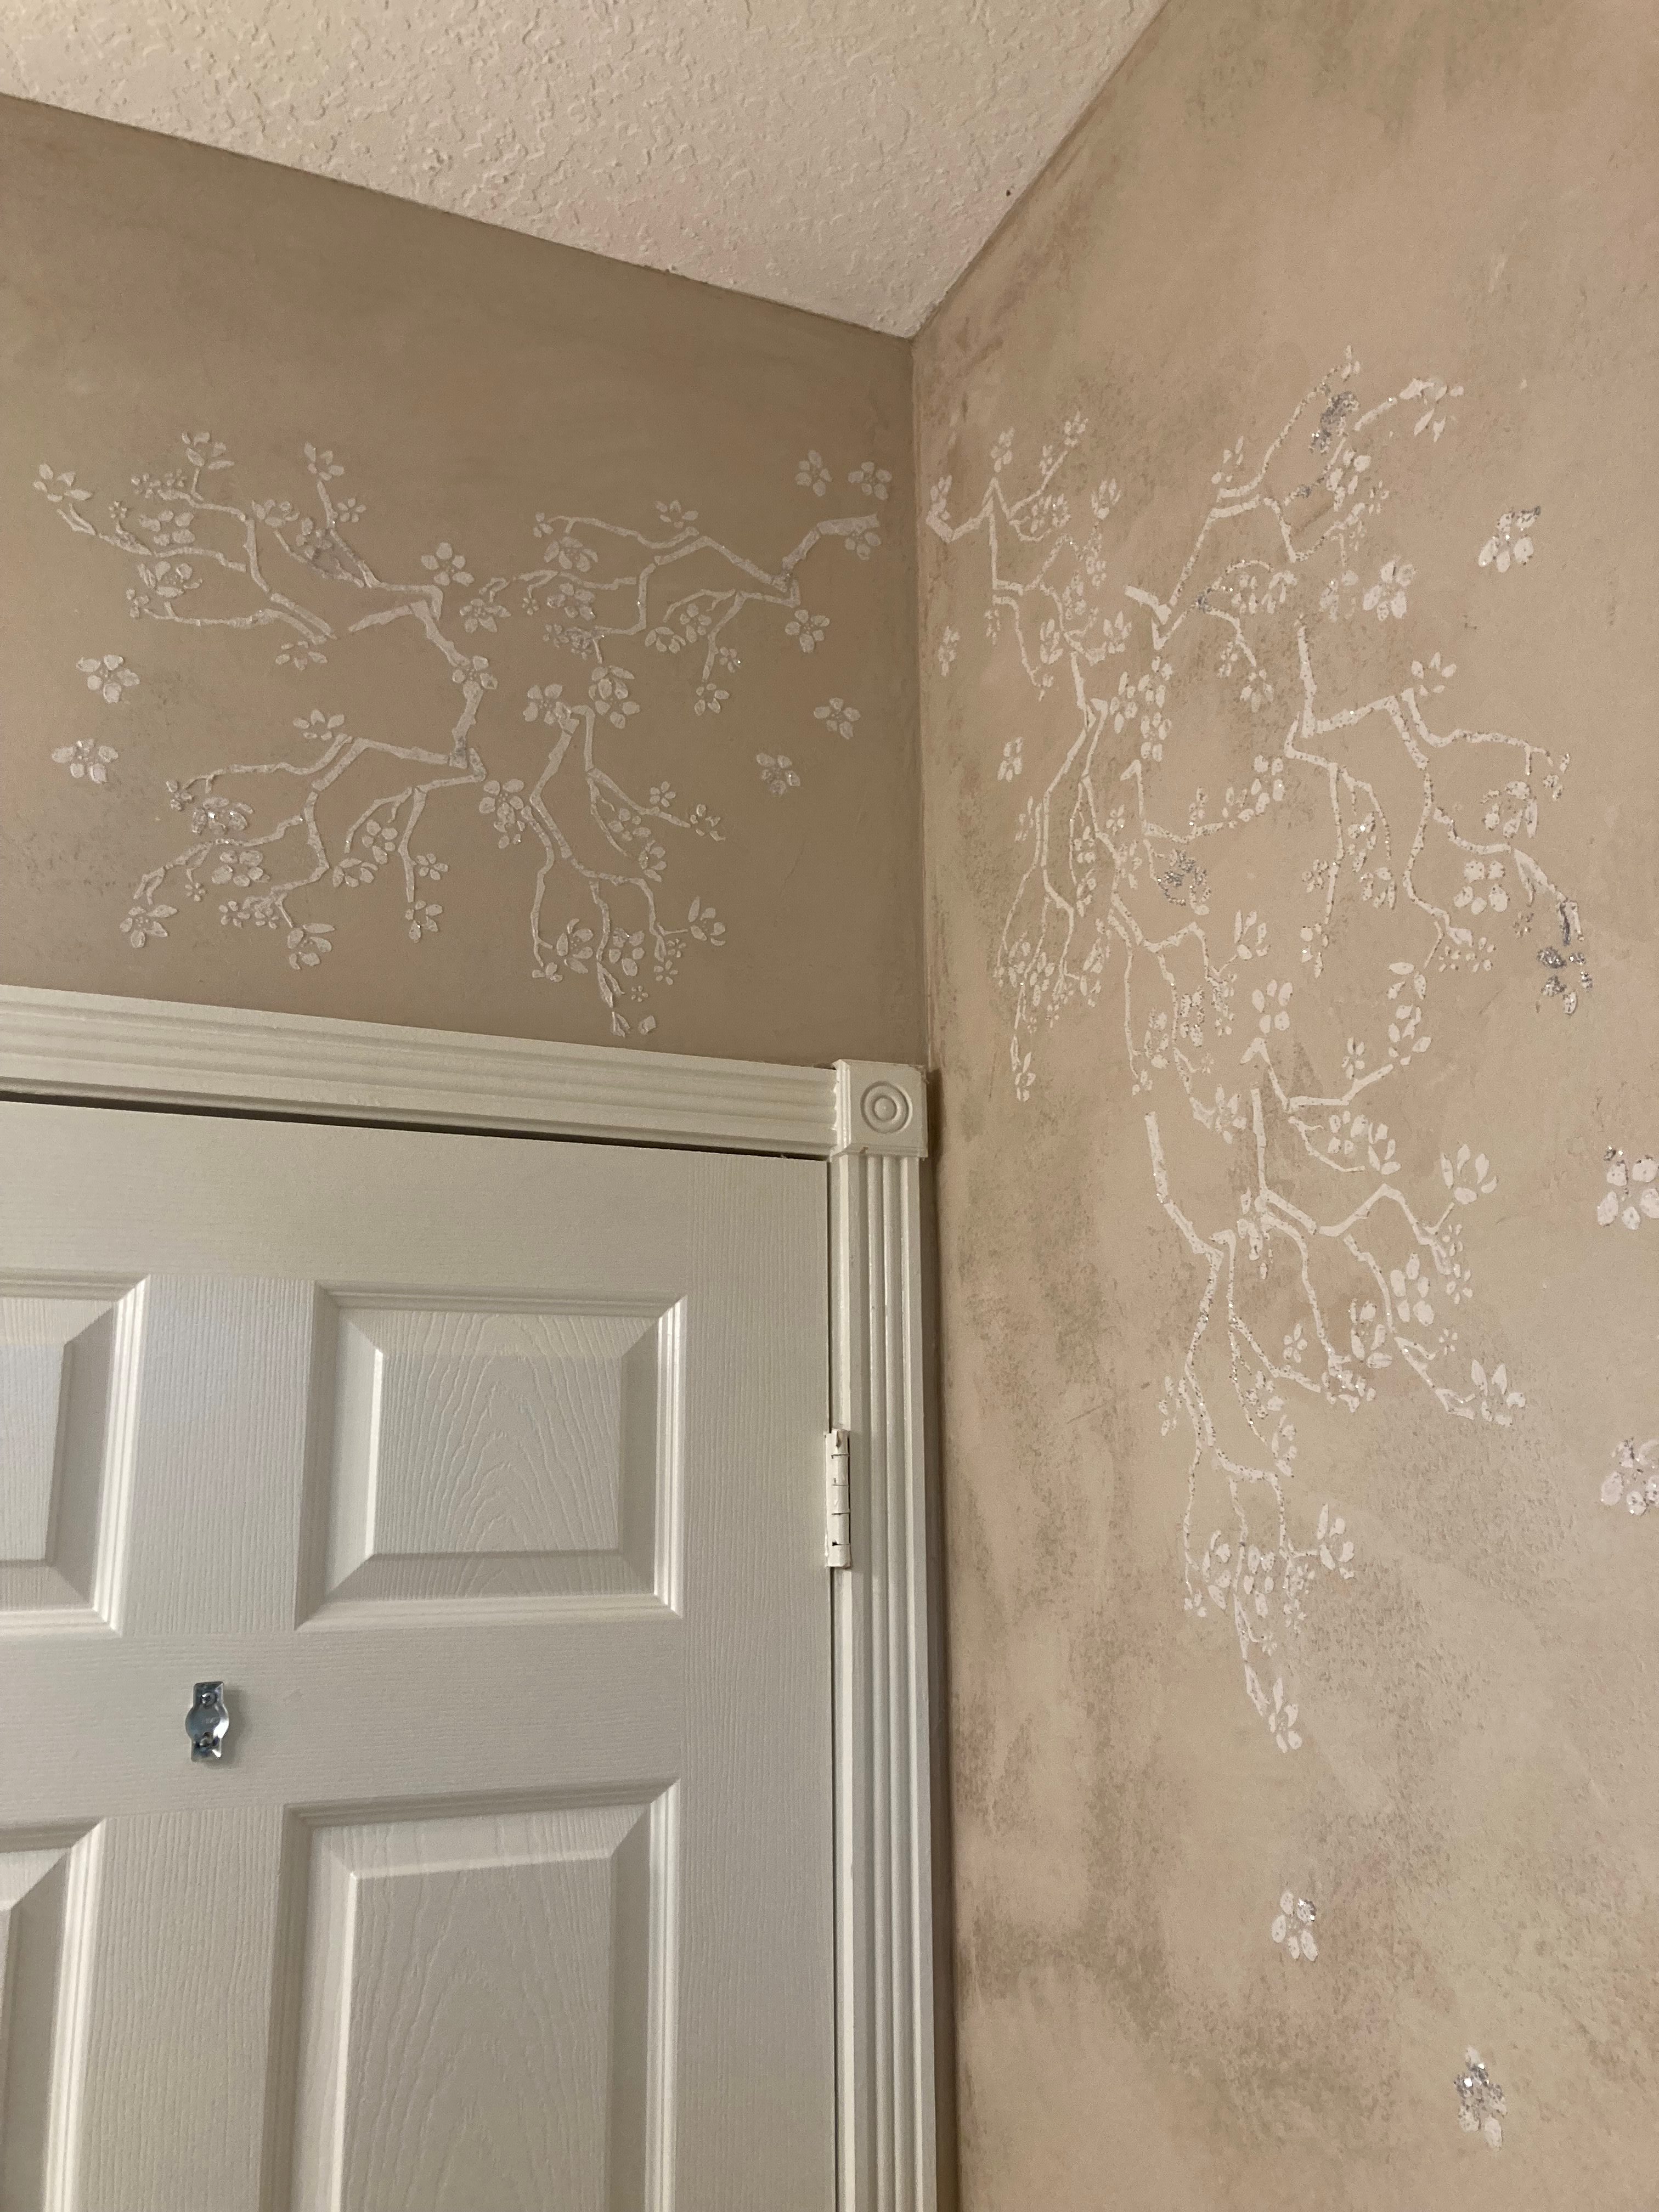
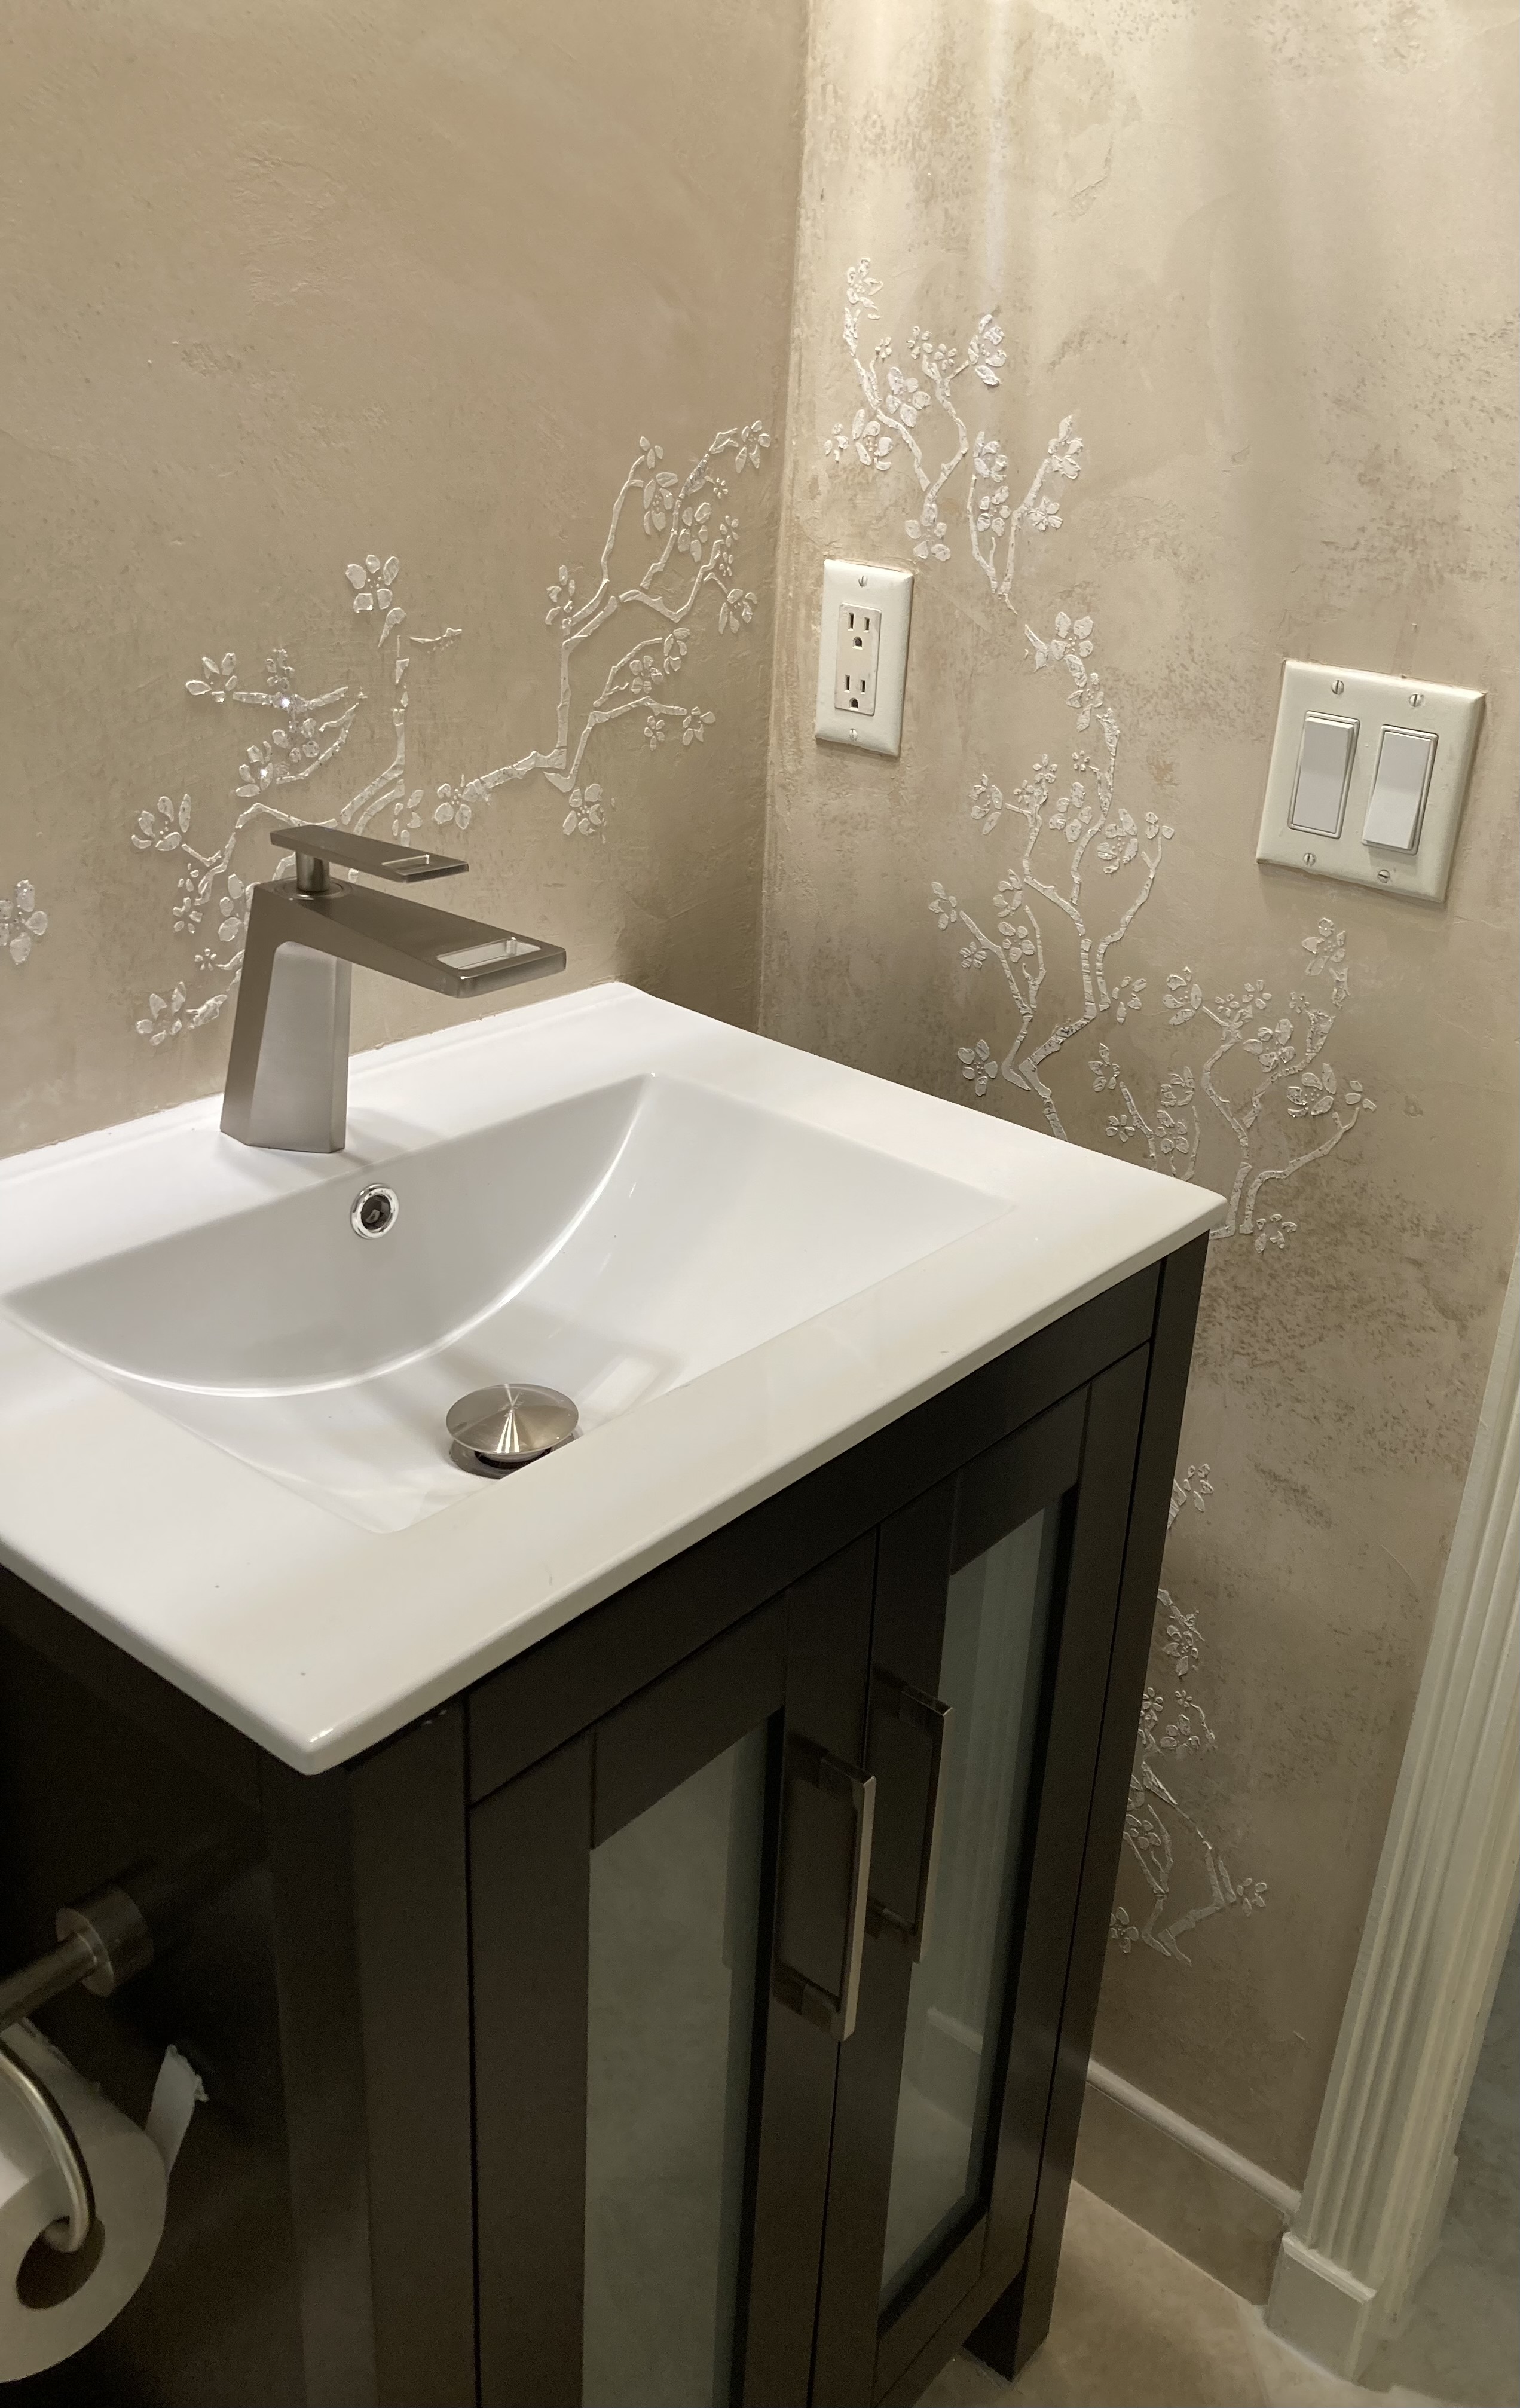
Adding a cherry blossom wall stencil to your walls is one of the easiest ways to bring beauty and elegance to your DIY projects. Whether you’re jazzing up a tired dresser, giving a wall a fresh look, or creating boutique-worthy home décor, this raised stencil technique with a dash of glitter will instantly give your project that designer edge. In this step-by-step guide, I’ll show you how to use a cherry blossom stencil to create dimensional art with a subtle shimmer — perfect for homeowners looking for a designer wall finish on a budget!
Why Cherry Blossoms Are So Cool
Cherry blossoms are just awesome! They’re part of Japanese flower designs and are also called sakura. These little flowers are soft, pretty, and never go out of style. People love them because they stand for new beginnings, beauty, and how fast life can change. They also make any space feel calm and peaceful, like a relaxing spa.
The best part? You can use cherry blossoms in so many ways! You can paint them on your walls, add them to furniture, or even make designs on bags and crafts. They work with all kinds of styles — modern, farmhouse, rustic, you name it. Plus, people always love the story behind them, which makes your projects feel extra special.
What You’ll Need to Get Started
Before we get our hands dirty (in a fun way), here’s your DIY checklist:
- Reusable cherry blossom stencil for wall art or furniture
- Drywall mud for that raised, textured look
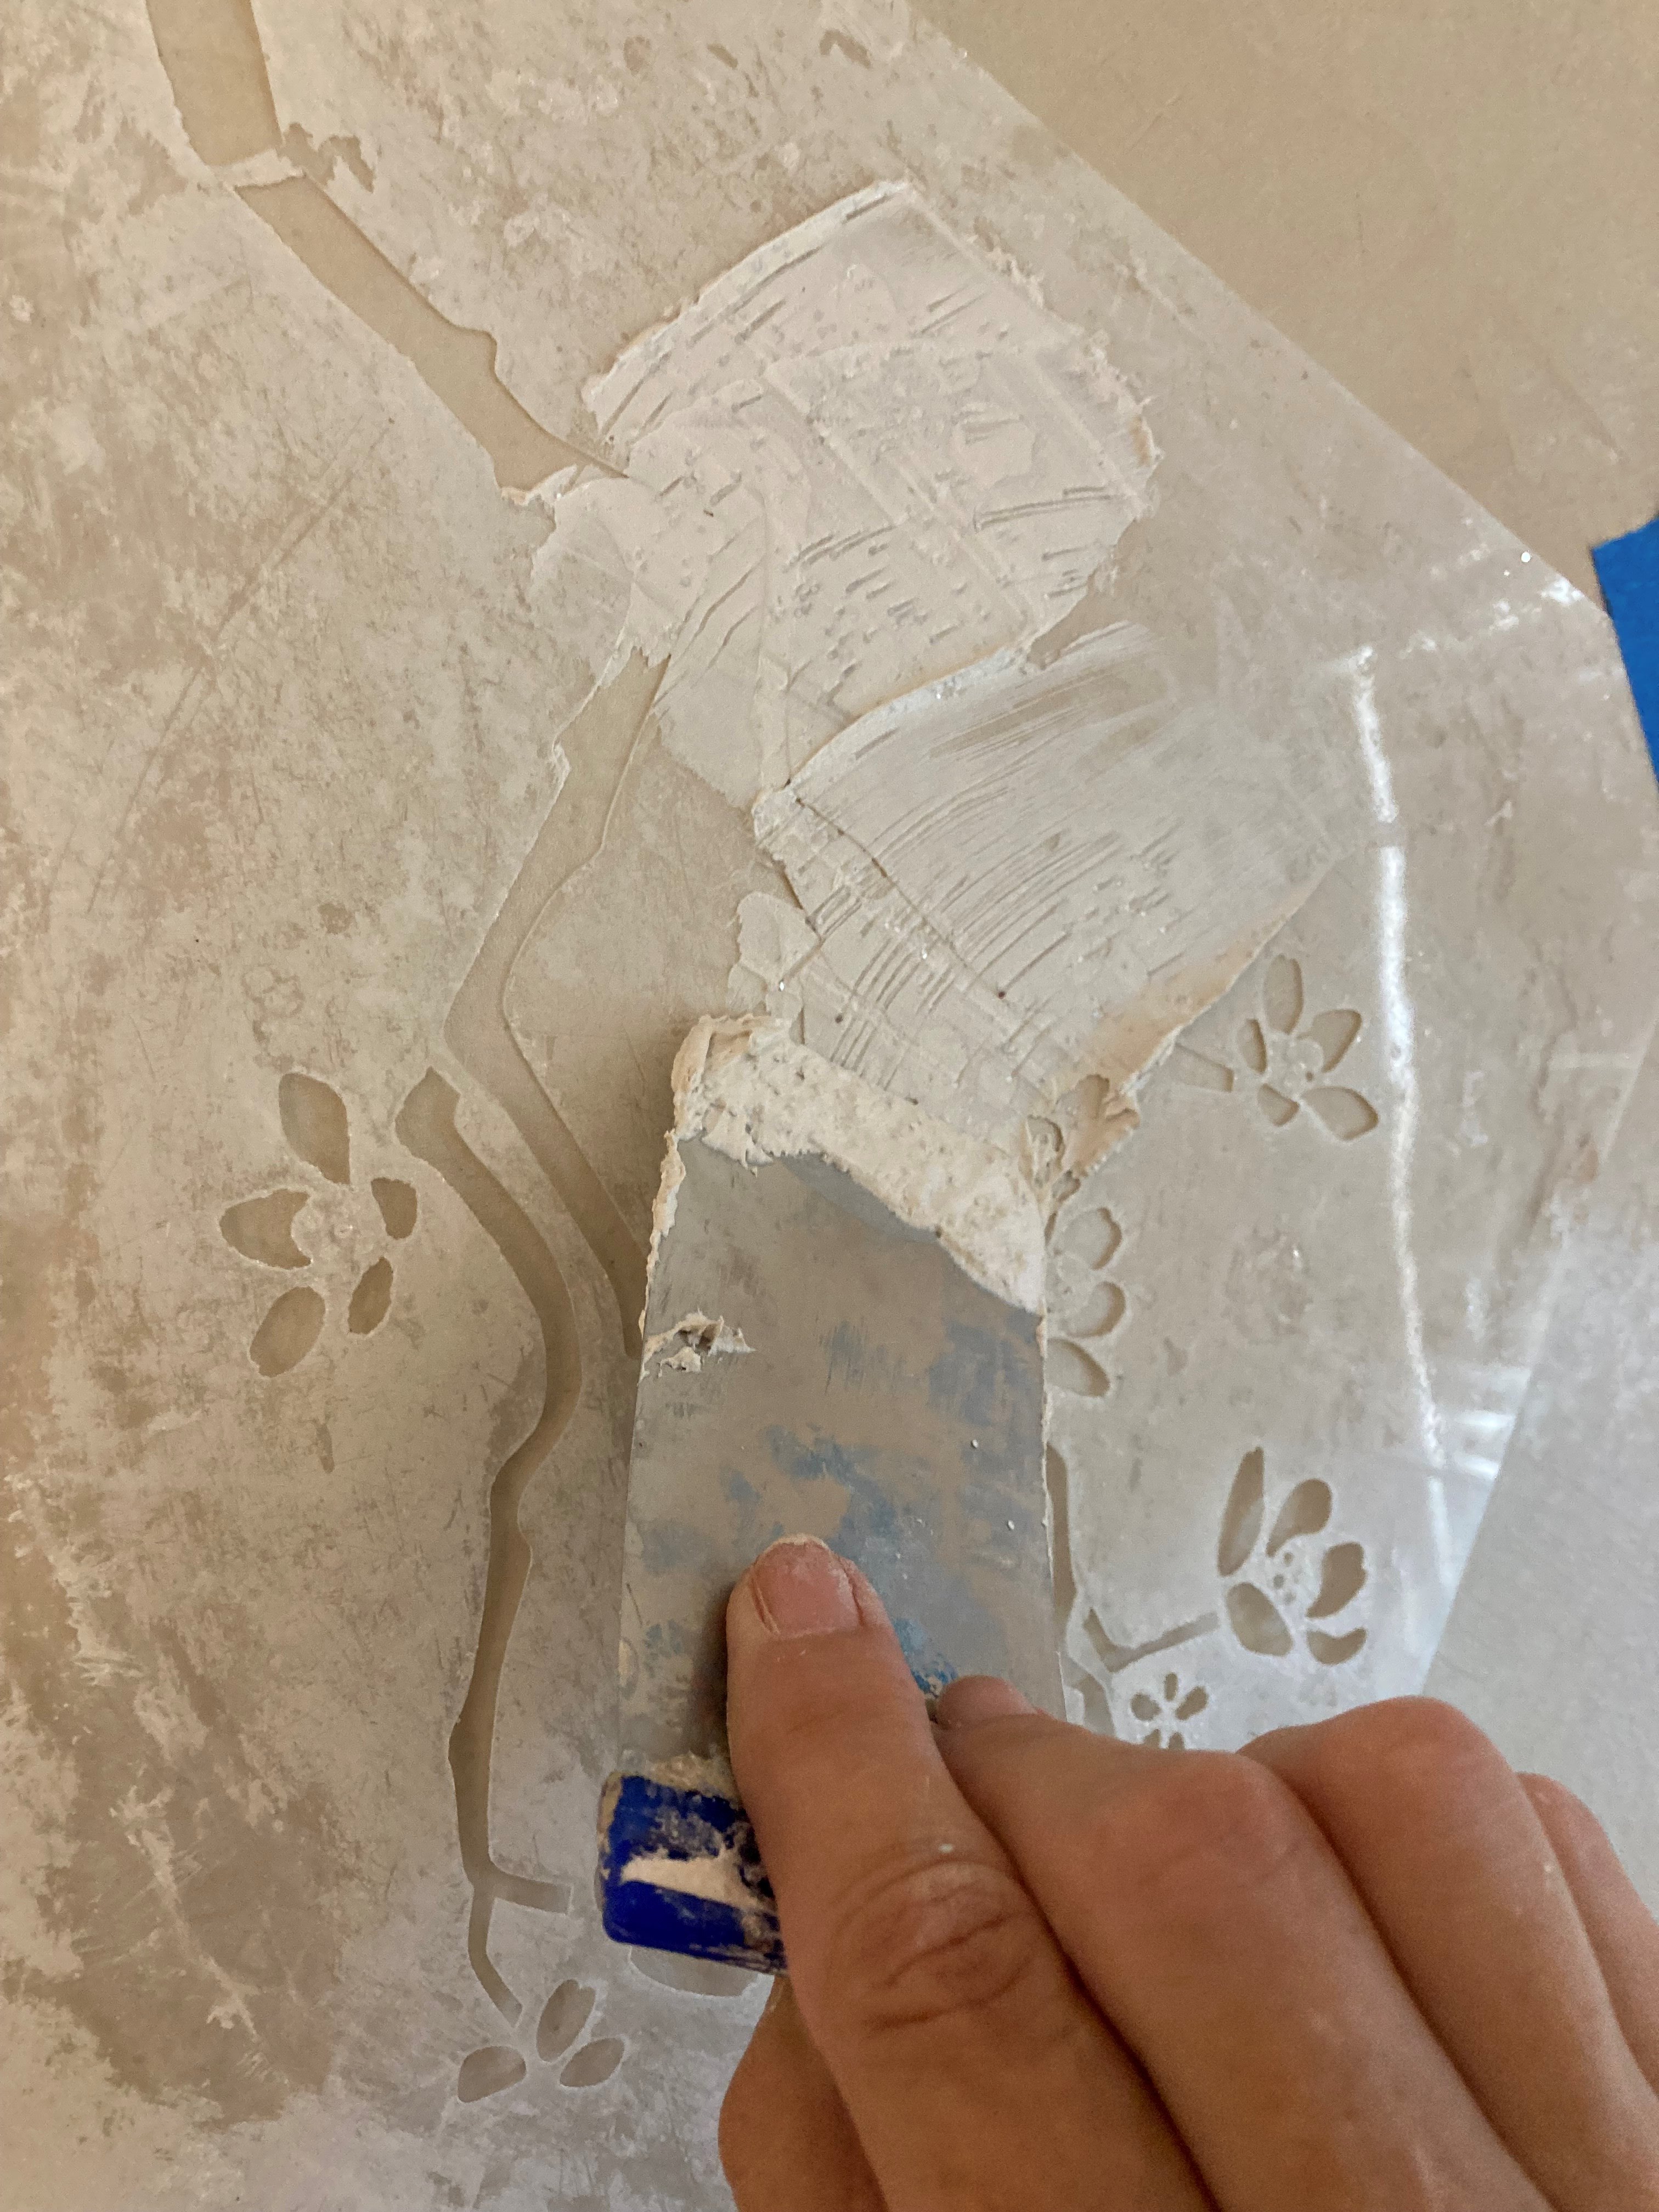
- Spatula: To spread drywall mud
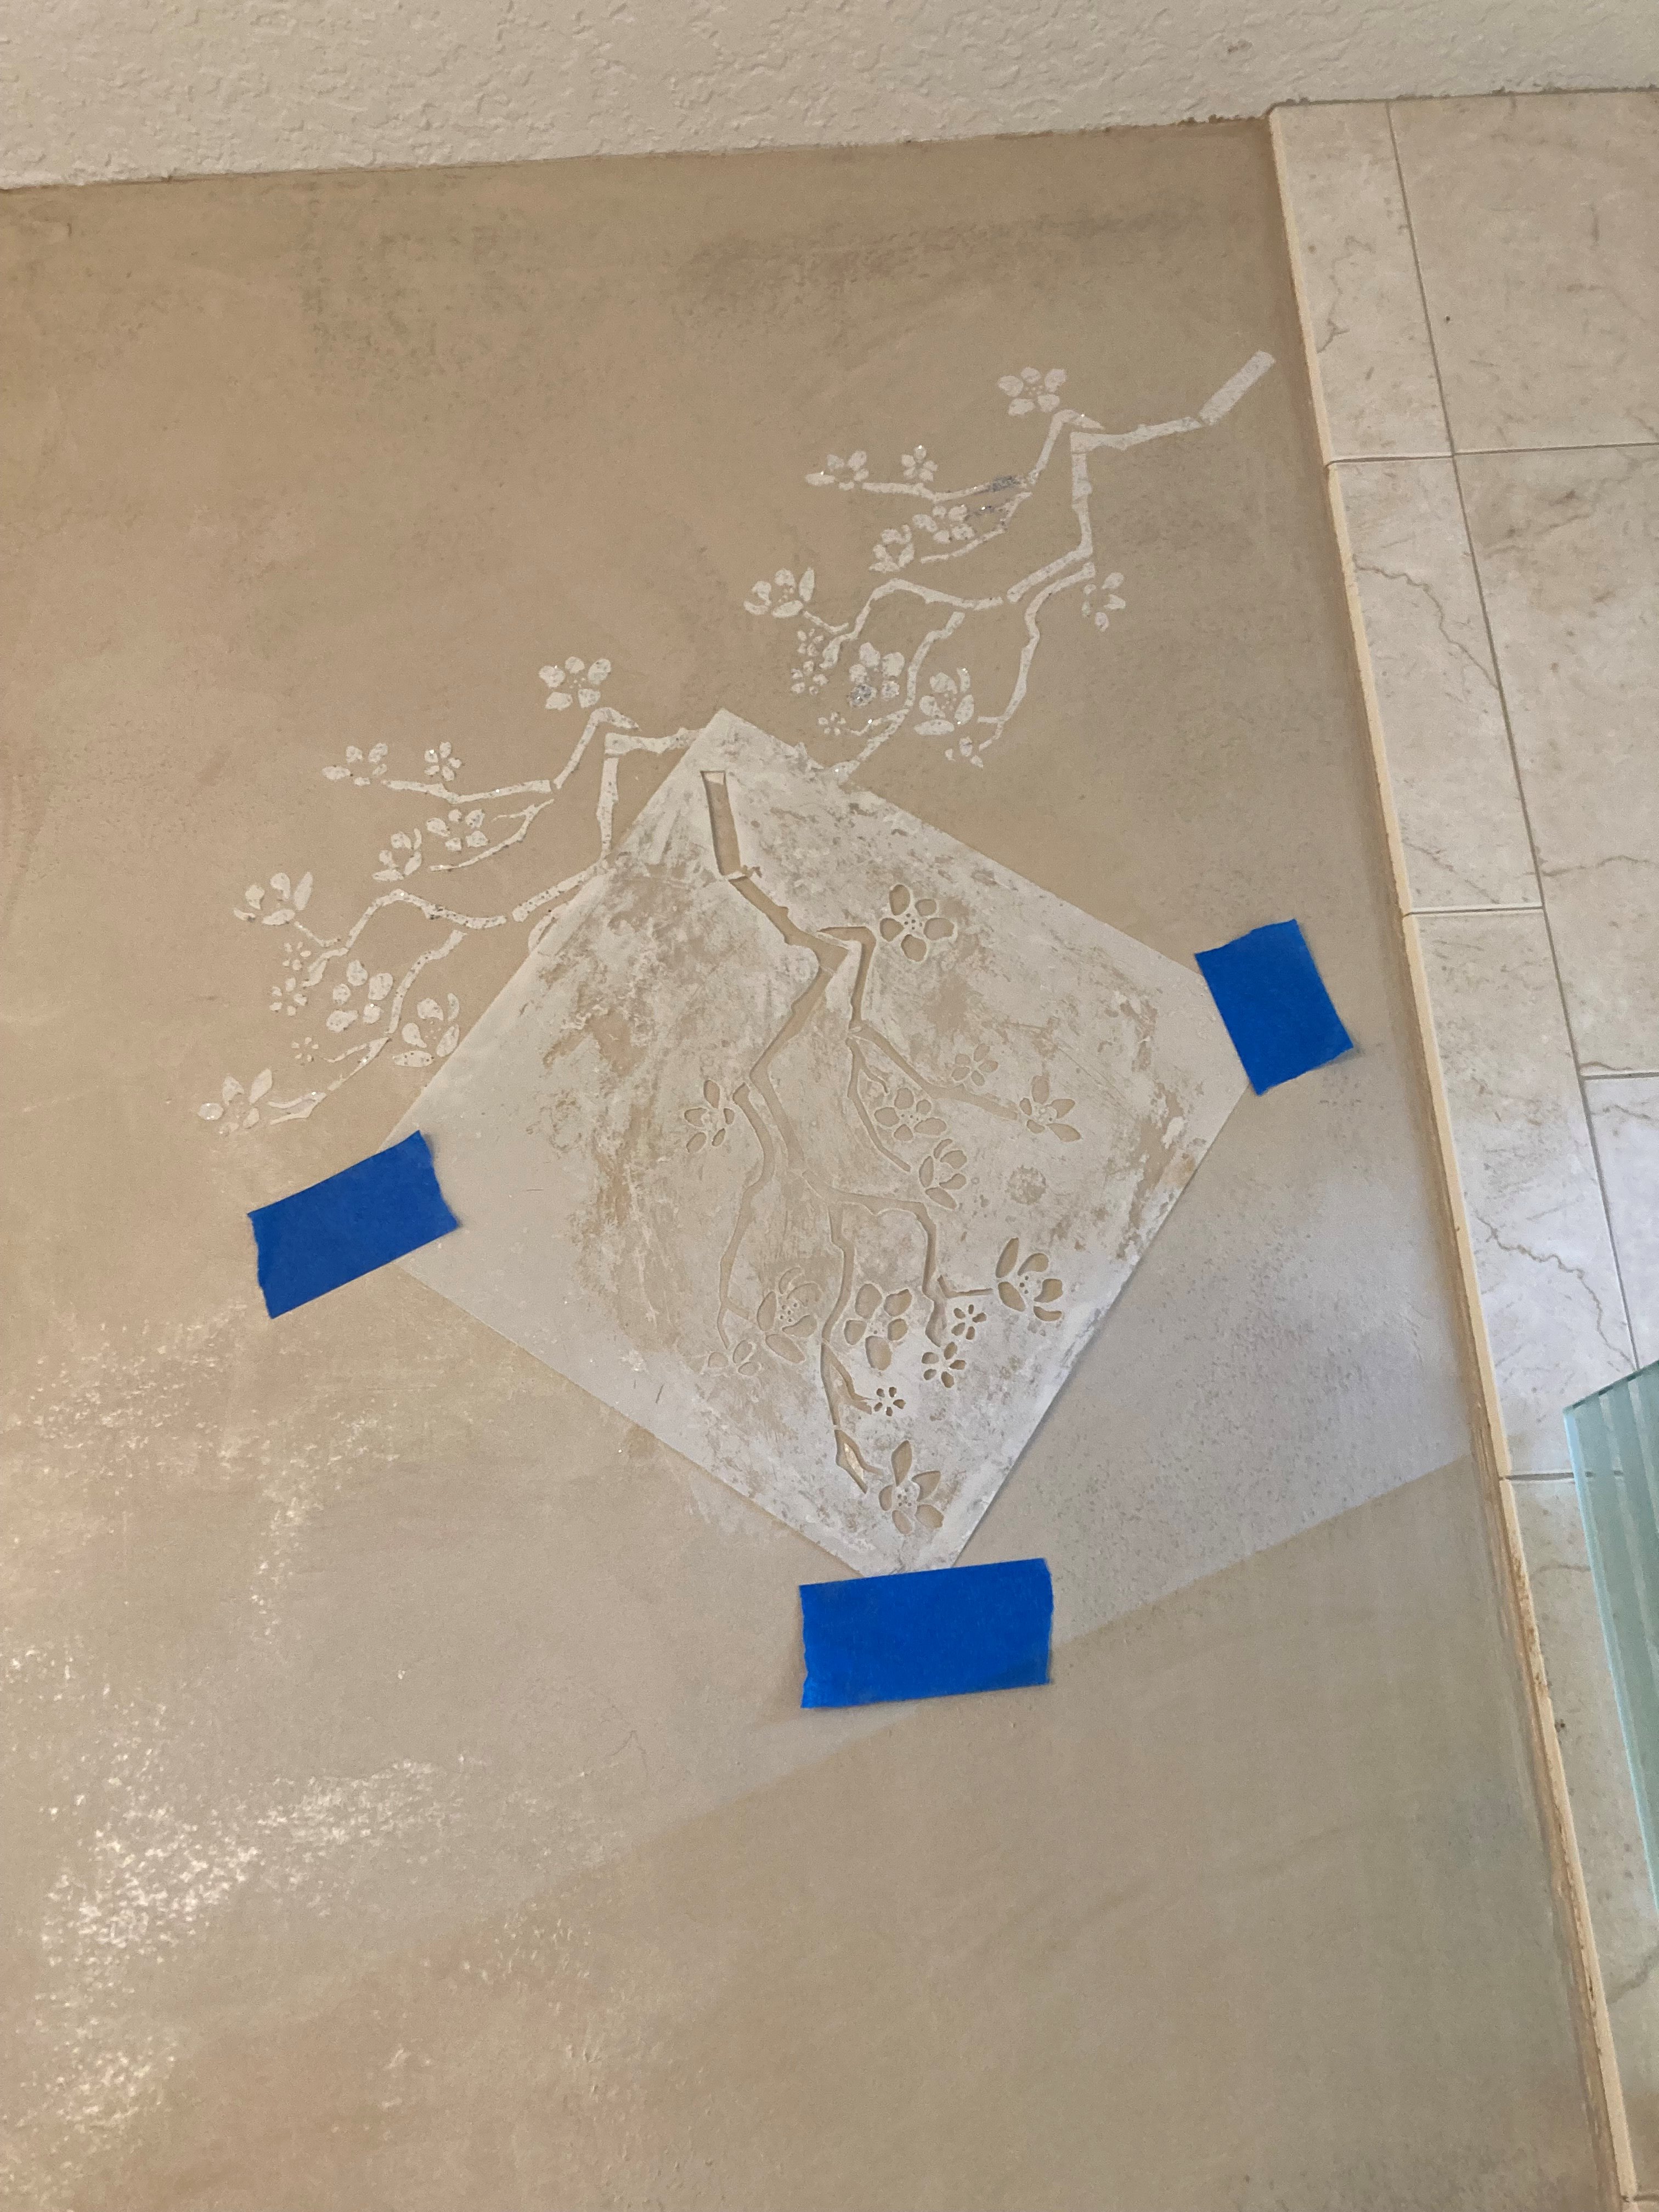
- Painter’s tape: to hold the stencil in place
- Fine glitter (gold, silver, or even iridescent for extra wow-factor)
Step 1: Prep Like a Pro
Clean your surface and make sure it’s smooth and ready to go! Whether you’re stenciling on a wall, a wooden tray, or furniture, you want a nice base. If you love color, go ahead and paint your background first and let it dry fully before moving on.
Step 2: Secure That Stencil
Grab your DIY cherry blossom stencil and tape it down tight. The more secure it is, the cleaner your design will turn out.
Step 3: Let’s Get That Raised Effect
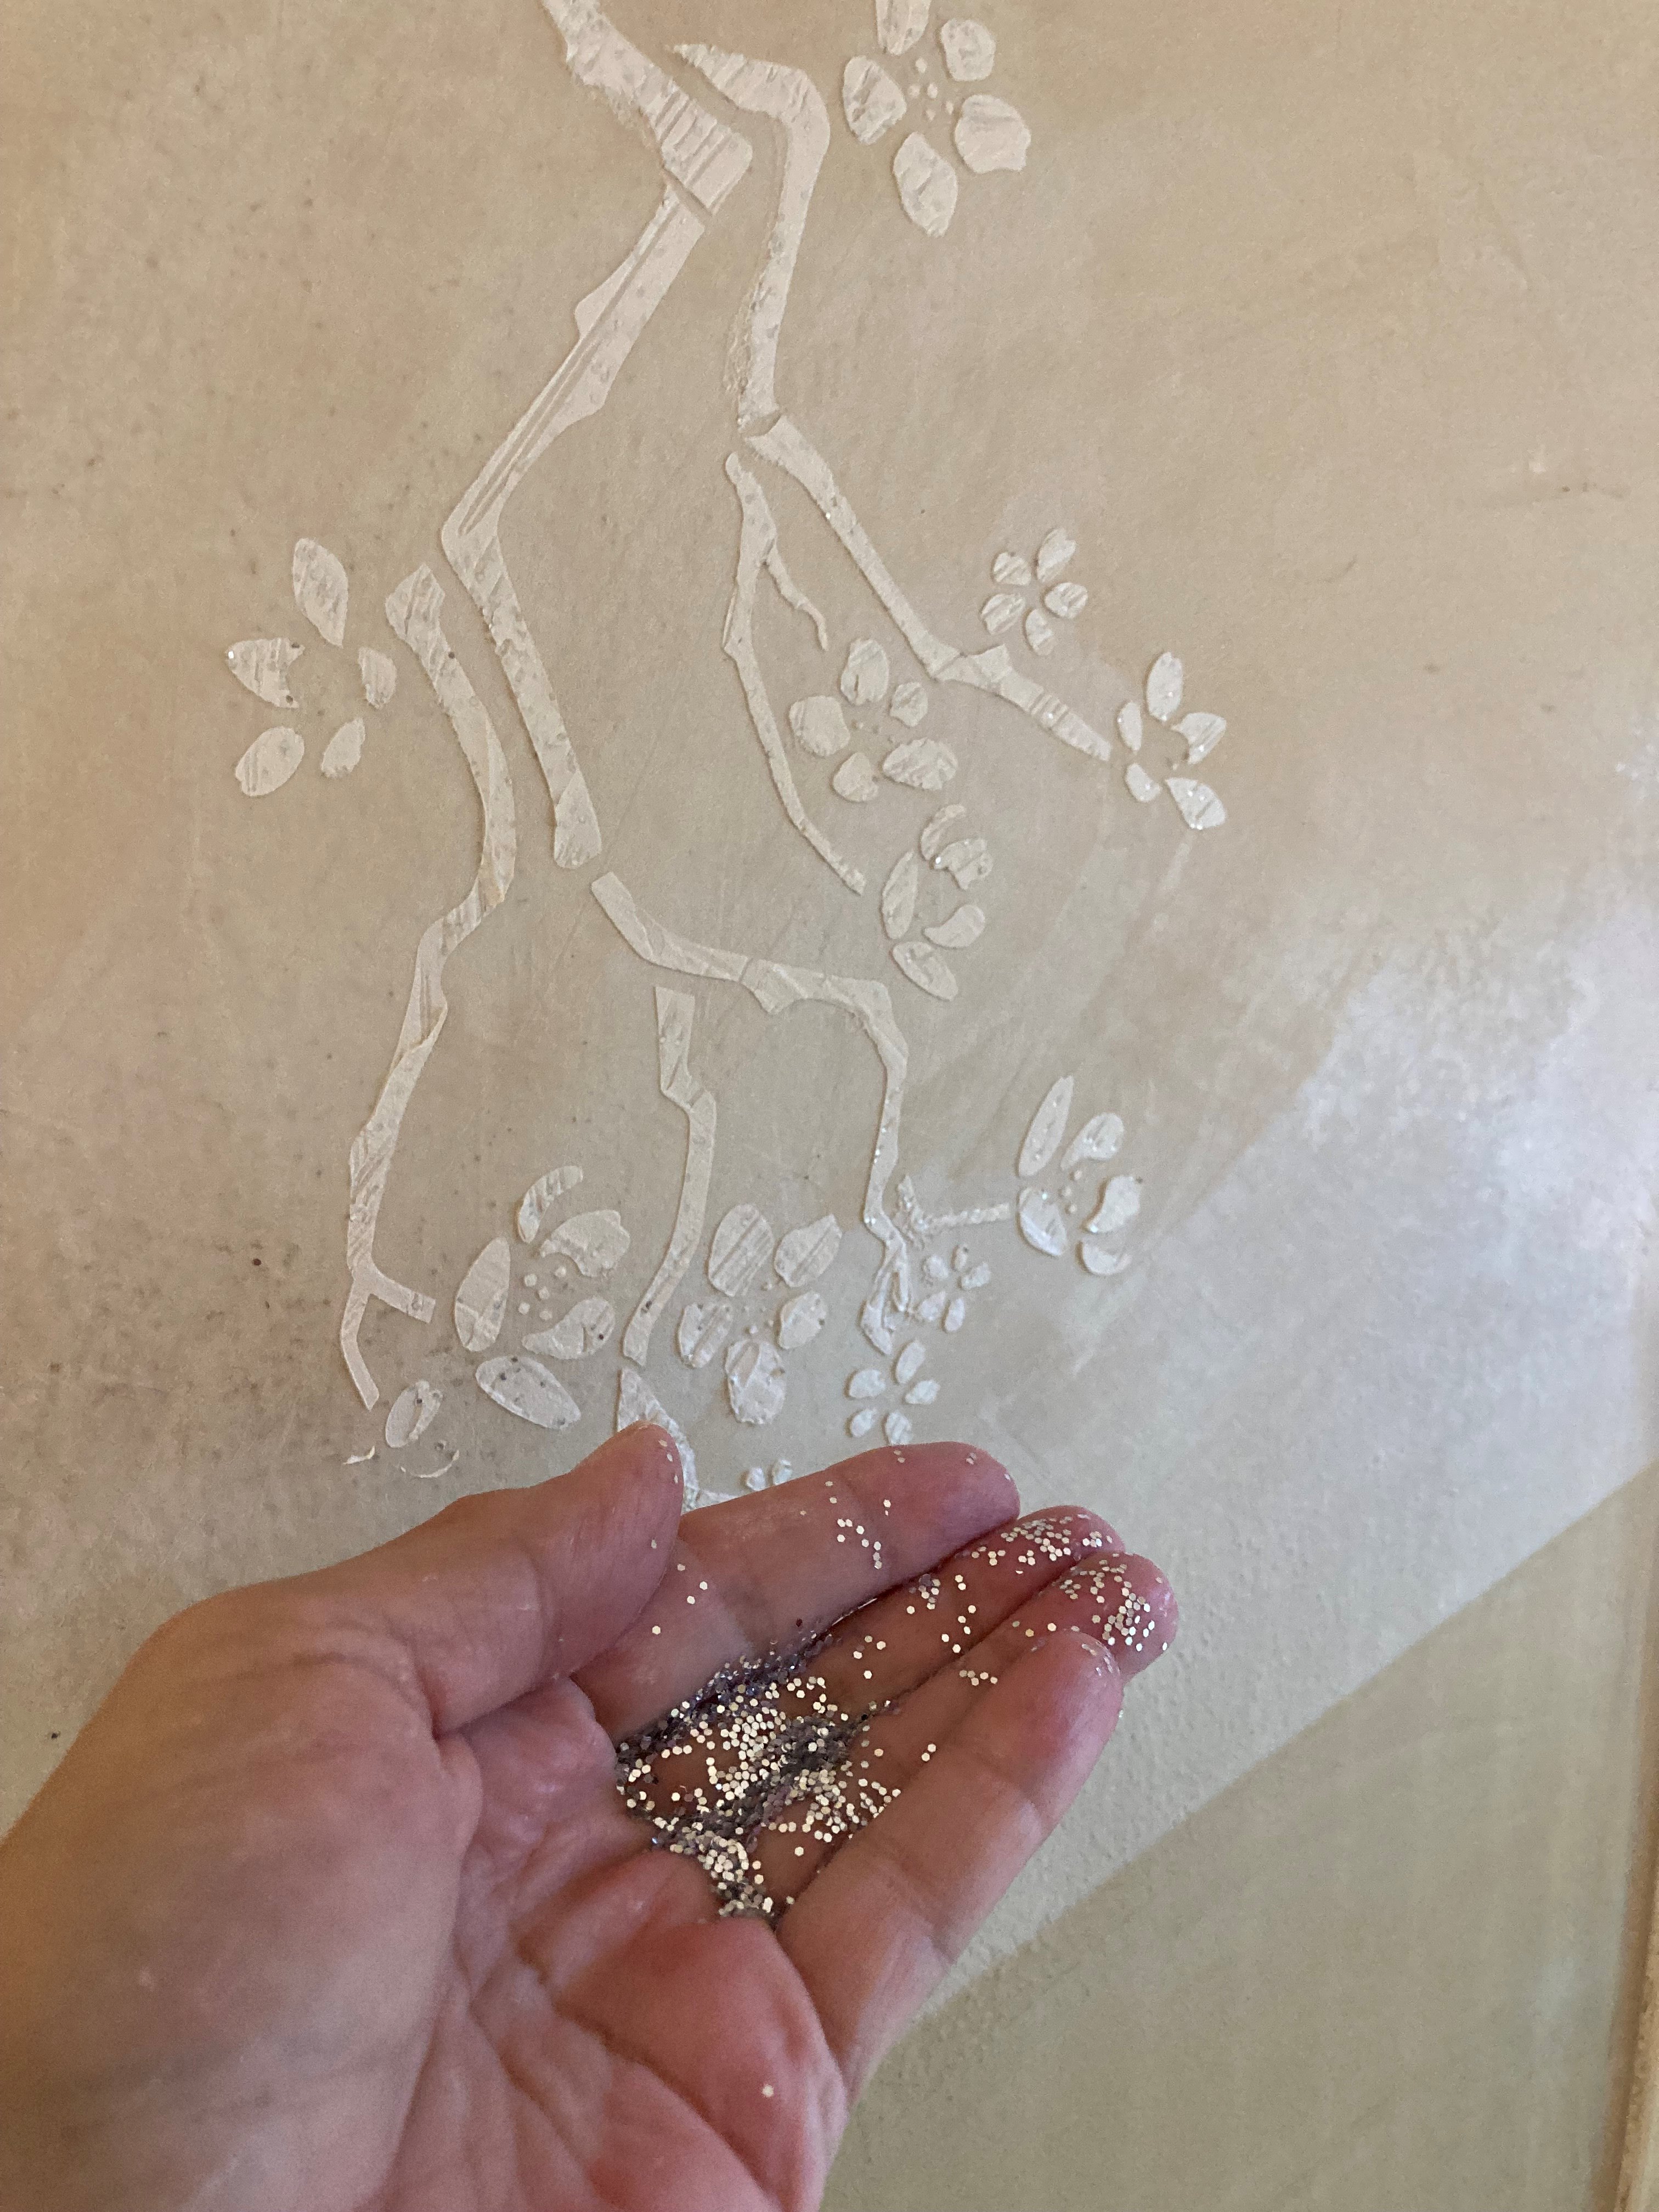
Scoop up your drywall mud with a palette knife and spread it over the stencil like frosting a cake (so satisfying!). Don’t worry about making it perfectly smooth — that texture adds character. Gently peel up the stencil to reveal the raised cherry blossom petals and branches.
Step 4: Sprinkle Some Sparkle
Now for the fun part! While the paste is still wet, sprinkle a touch of fine glitter right onto the raised areas. A little goes a long way to give your cherry blossom stencil for furniture makeover or wall art that subtle, designer shimmer.
Step 5: Dry
Let your creation dry fully. There is no need to add a clear coat. Just let it dry and enjoy.
Pro Tips for Next-Level Design
- Want a luxe, antique vibe? Try gold or copper glitter to complement the oriental flower stencil art style.
- Love soft, dreamy finishes? Once your raised design is dry, try a light watercolor wash over the petals.
Why This Technique Is a Crafter’s Dream
This project is a total win for DIYers, furniture painters, and creative entrepreneurs looking to create custom, eye-catching pieces. It’s simple, affordable, and adds a boutique feel to your walls.
Now’s the time to break out your cherry blossom stencil and try this raised, glittered look for yourself! It’s a game-changer for everything from home décor to client commissions.
Got questions? Drop them below — I’d love to chat about your latest DIY adventures!
P.S. Make sure you don’t miss out on signing up for my blog, it’s filled to the brim with home decorating and DIY tips!
P.S.S. Do you need help building and monetizing your online business? Join Empowering Women. Get started today!
Have Fun!
Cheryl
Artzy Fartzy Creations. Oh Yes you can DIY!
Budget Friendly Bathroom Makeover
Bathrooms don’t have to cost a small fortune [...]
What sheen should I paint my interior?
Choosing the right paint finish depends on the [...]
Bathroom Makeover under $100
It always amazes me how you can take JUST PAINT [...]
Best Earring Display Ever!
I had so many earrings I never wore [...]
Repurposed Filing Cabinet
I can think of so many things you could do [...]
6 Tips to Painting PERFECT STRIPES Every Time!
I’m going to share my 6 tips on how to [...]
Contents
Recent Reads
Don’t Discard Your Old Picture Frames
Transform your old picture frames … I literally [...]
Subject Lines That Get Your Emails Opened
The Subject Line … Have you ever received [...]
How to Paint Old Outdated Tile to Look Fresh and New
YES! This is paint…. Can you believe it? If [...]

