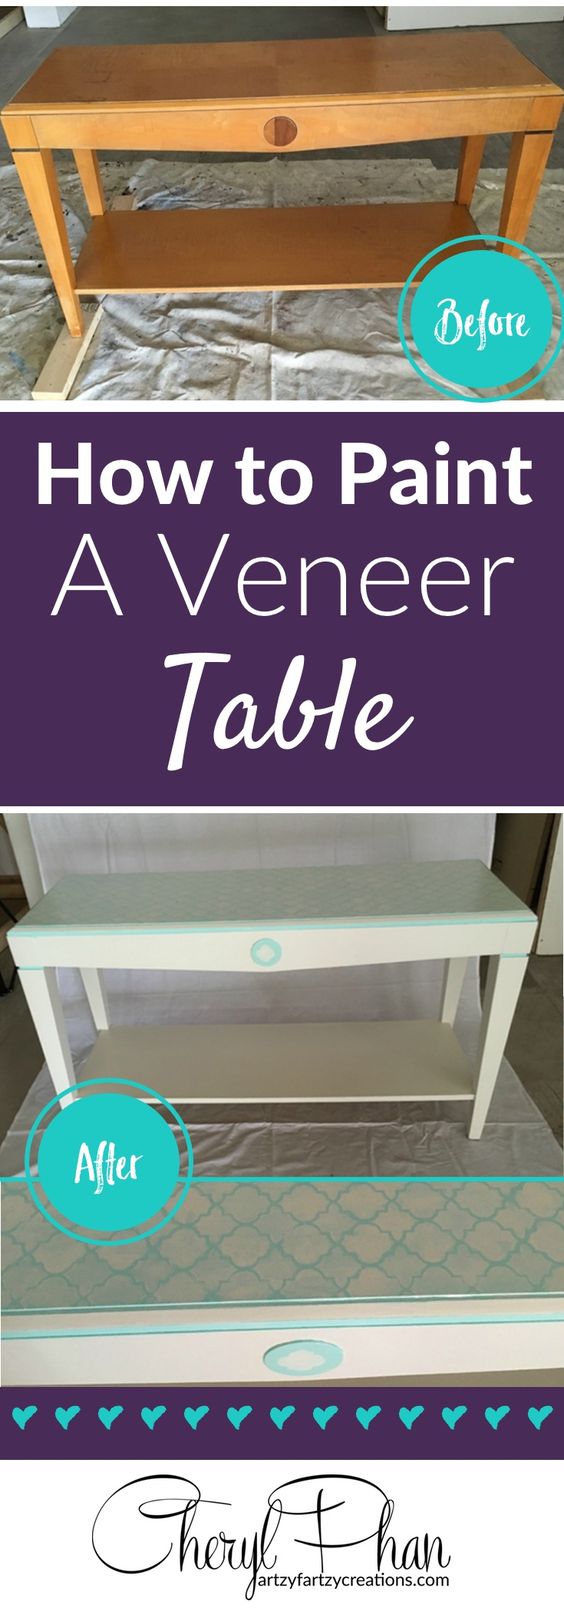
Painting veneer may be a little work, but well worth the time. This table was given to a client of mine from a friend of hers. She liked the style of it but wasn’t crazy about the oak finish. Her goal was to lighten it up and pop some color on it and turn this into a fun side table.

Before and After
Other than a few areas where the veneer was peeling back, it was in pretty good shape. Unlike a solid wood table, the veneer has a tendency to crack and peel. But with that say, it can be repaired. I’ll walk you through the steps from start to finish.
STEP 1
The first and most important step is the prep. DON’T skip this step. Sand the veneer table with 120 grit sandpaper. This gives it “Tooth” which means something for the paint to stick to. Just sand it enough to take the sheen off.

Sand table
Step 2
Wipe the veneer down with some TSP and let dry. Then prime it with a durable primer. I like using Stix. I use Stix on just about everything. You can buy it at Benjamin Moore. Apply the primer with a sponge roller. The sponge roller gives it a smooth finish. Use a brush to get it the corners and trim.

Prime table

Prime table
Step 3
Repair any areas where the veneer is lifting. I used wood glue (wood glue) and used blue tape to hold it together until it dried.

Glue damage
Once the glue dries, use a piece of extra fine sandpaper and very lightly sand the table to remove any burs or imperfects.
Step 4
If you’re painting two different colors as I did. You want to tape off the area where you’re going to apply the first color. I started with the accent color because the top is going to be stenciled with the second color. When the first coat dries use a piece of extra fine sandpaper and very lightly sand the table to remove any burs or imperfects. Clean with a damp rag and paint the second coat. Remove the tape.

Tape off accent color
Step 5
Paint the rest of the table the second color the same way you did the first color. Paint two coats allowing the first coat to dry before applying the second coat, I use Benjamin Moore Advanced paint (White)
You will notice I taped off the circle in the front of the table. I was going to leave that in the original teak wood but decided to paint it to match the top of the table.

Paint table white
Step 6
The top of the table was stenciled in this Retro pattern. I bought the stencil at Michaels. I used the same white paint on the stencil as I did on the table. I used an artist brush and painted one coat with a lightly distressed look. You can make it a solid white if you want, there are no rules.
You can also use a sponge roller or stencil brush to apply the stencil design, just be careful of bleed through.
Once it dries add a clear coat to seal on top to finish it off. I used Modern Masters Saturn clear coat. You can buy it at Benjamin Moore.
Tip: clean the stencil after using it twice, it will start to build up underneath, so you want to keep it clean.
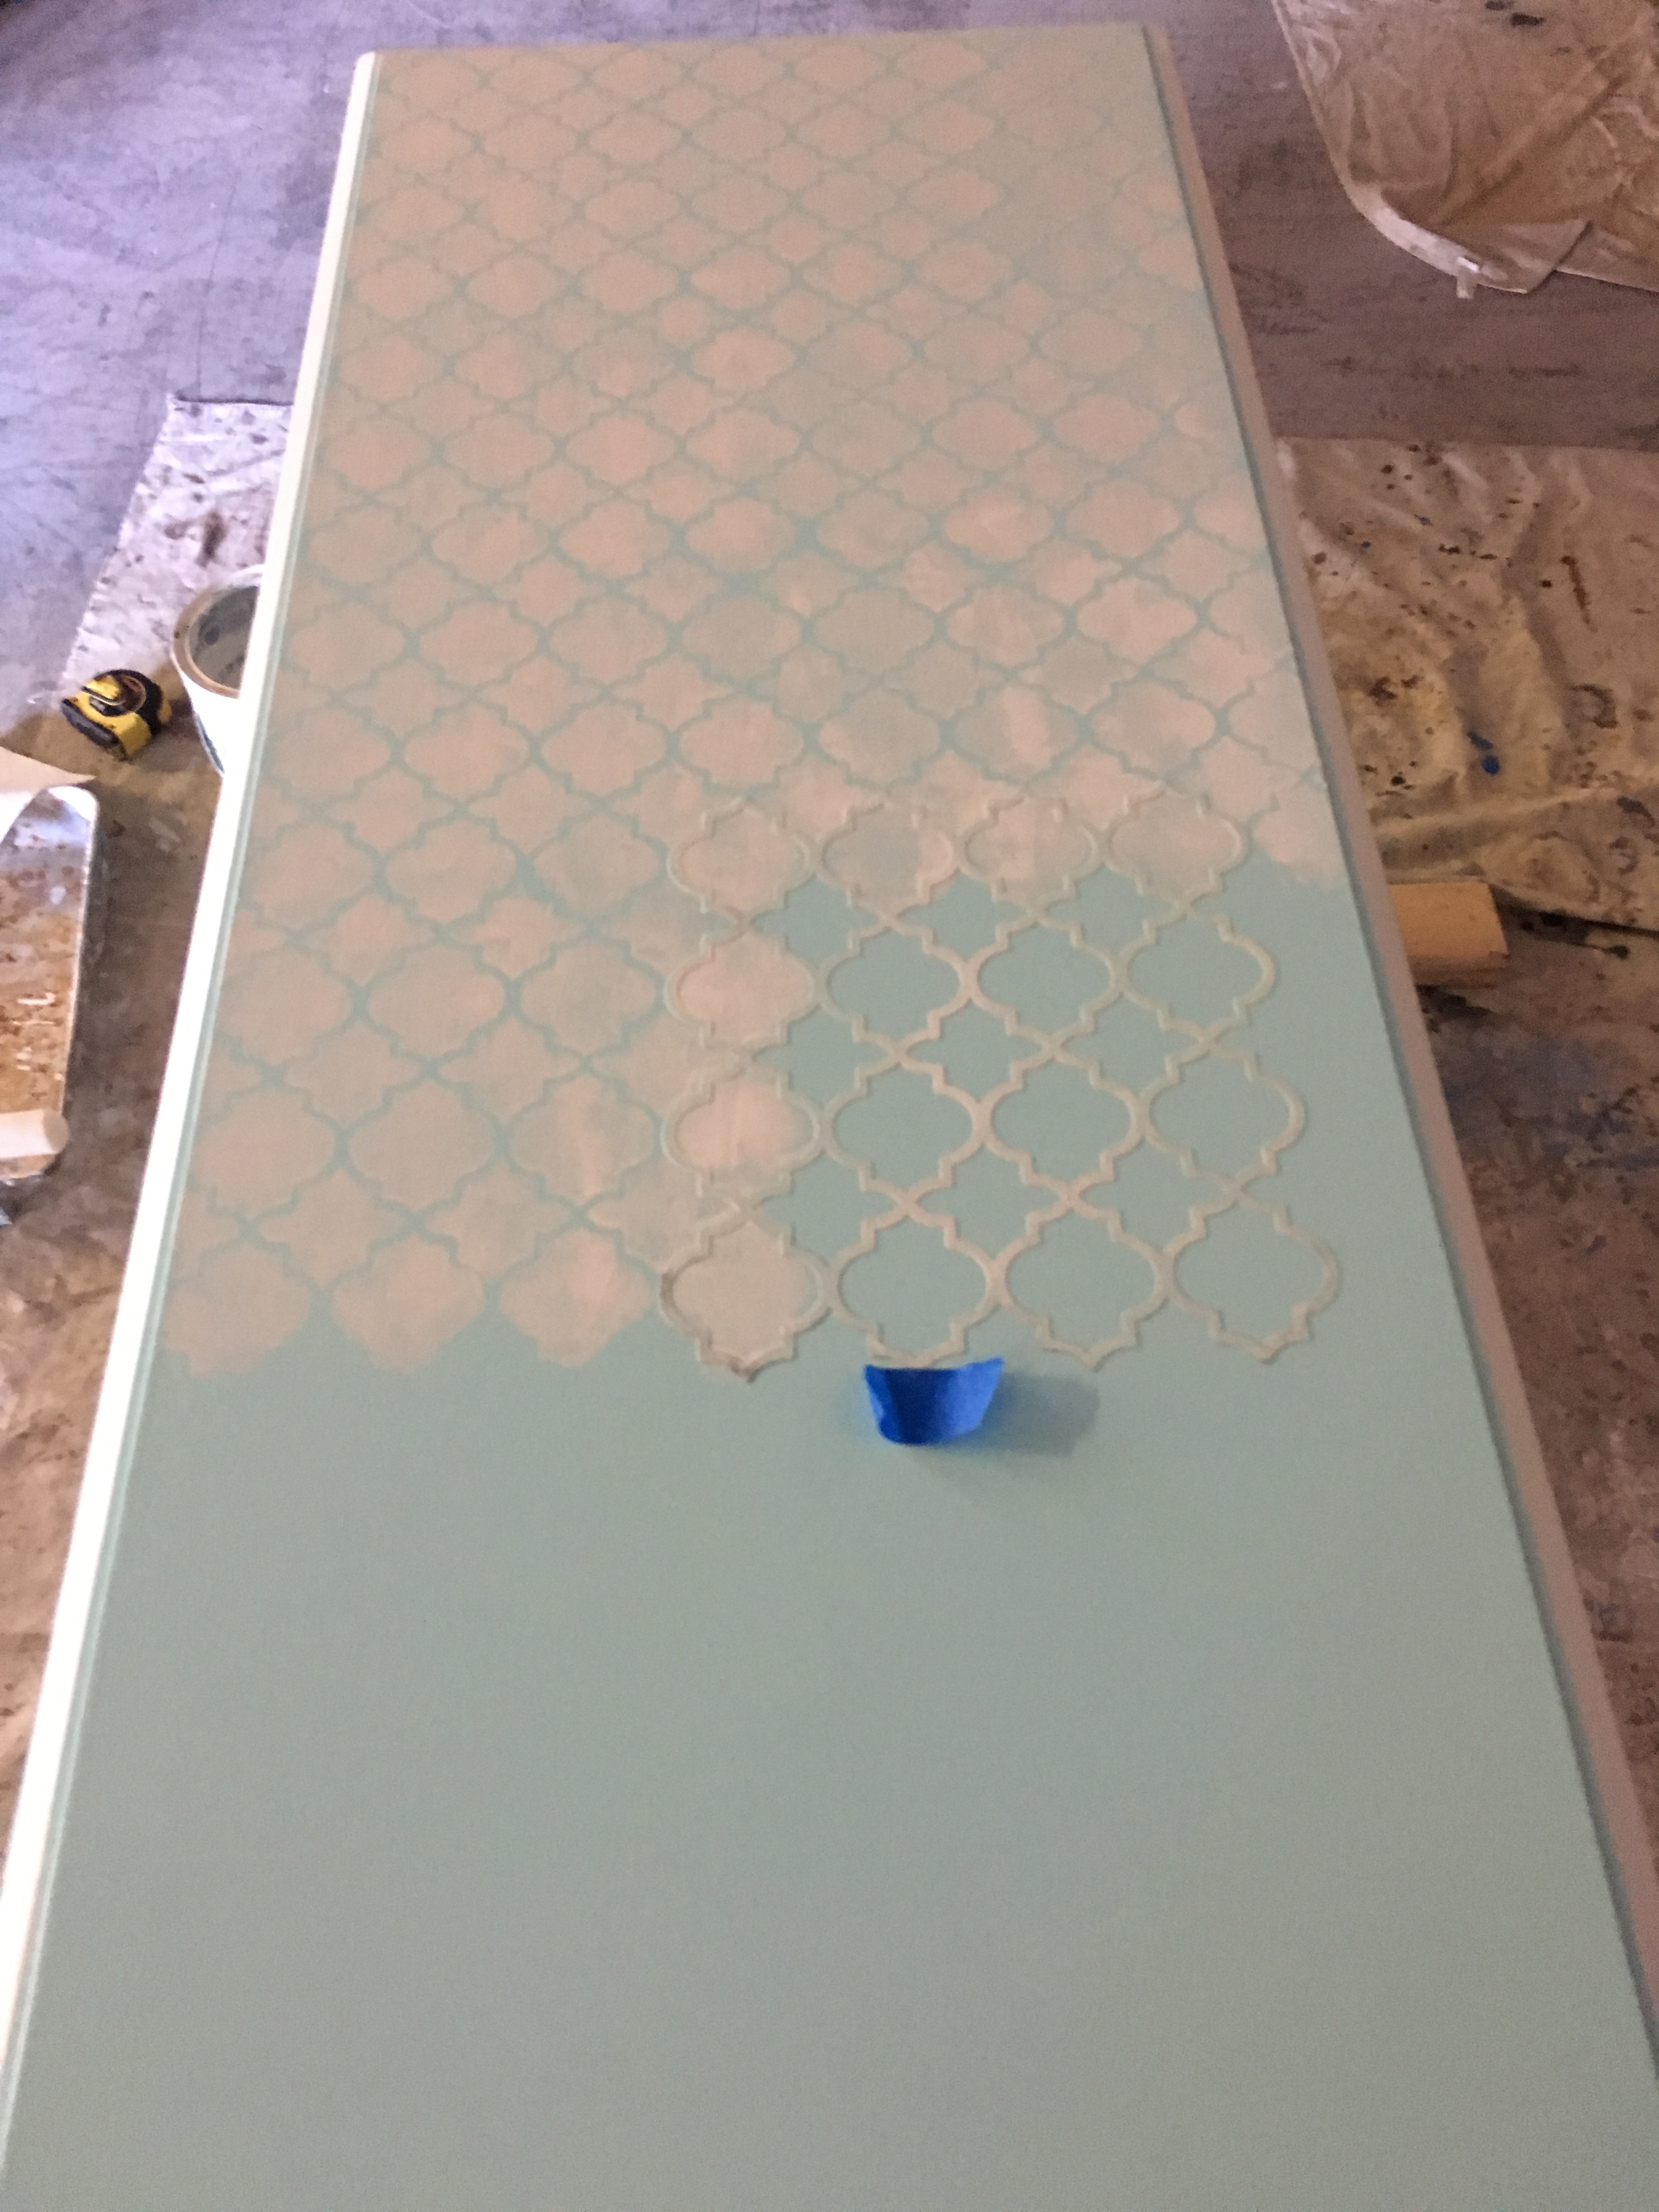
Apply stencil

Stencil
Here’s the finished project. These are the colors my client selected. You can get as creative as you want. Have fun!

After
Looking to paint your cabinets next? Get my 7 Cabinet Painting Tips for FREE!
If you want to learn how to start making money with your hobby get the details HERE
If you want to learn DIY Tricks and Tips get my weekly blog HERE


Artzy Fartzy Creations. Oh Yes you can DIY!

Subject Lines That Get Your Emails Opened
The Subject Line … Have you ever received [...]

How to Paint Old Outdated Tile to Look Fresh and New
YES! This is paint…. Can you believe it? If [...]

Thrift Store Chandelier Makeover for $15
How to get this thrift store chandelier makeover for $15 [...]

Open Your Own Virtual Store in less than 30 Minutes Selling Your Crafts
and Make Money While You Sleep Do you [...]

Whose Dream Are You Building?
I want to give a few words of [...]

Social Media Image Size Cheat Sheet
Struggling to get your social media images just, [...]
Contents
Recent Reads

Hand Painted Furniture Legs
If you’ve known me for half a minute, [...]

How to Create a Linen Faux Finish
One of the things I love about the linen look [...]

Oops, I messed up my painted floor
Have you ever messed up a painting project and had [...]