Are you tired of your front door looking dull and outdated? Refreshing it doesn’t have to be complicated or expensive.
With gel stain, you can give your door a gorgeous, polished look in just three easy steps—no need to strip the old finish or hire a professional! In this guide, I’ll show you how to prep, stain, and seal your exterior door, leaving it looking brand new and adding instant curb appeal.
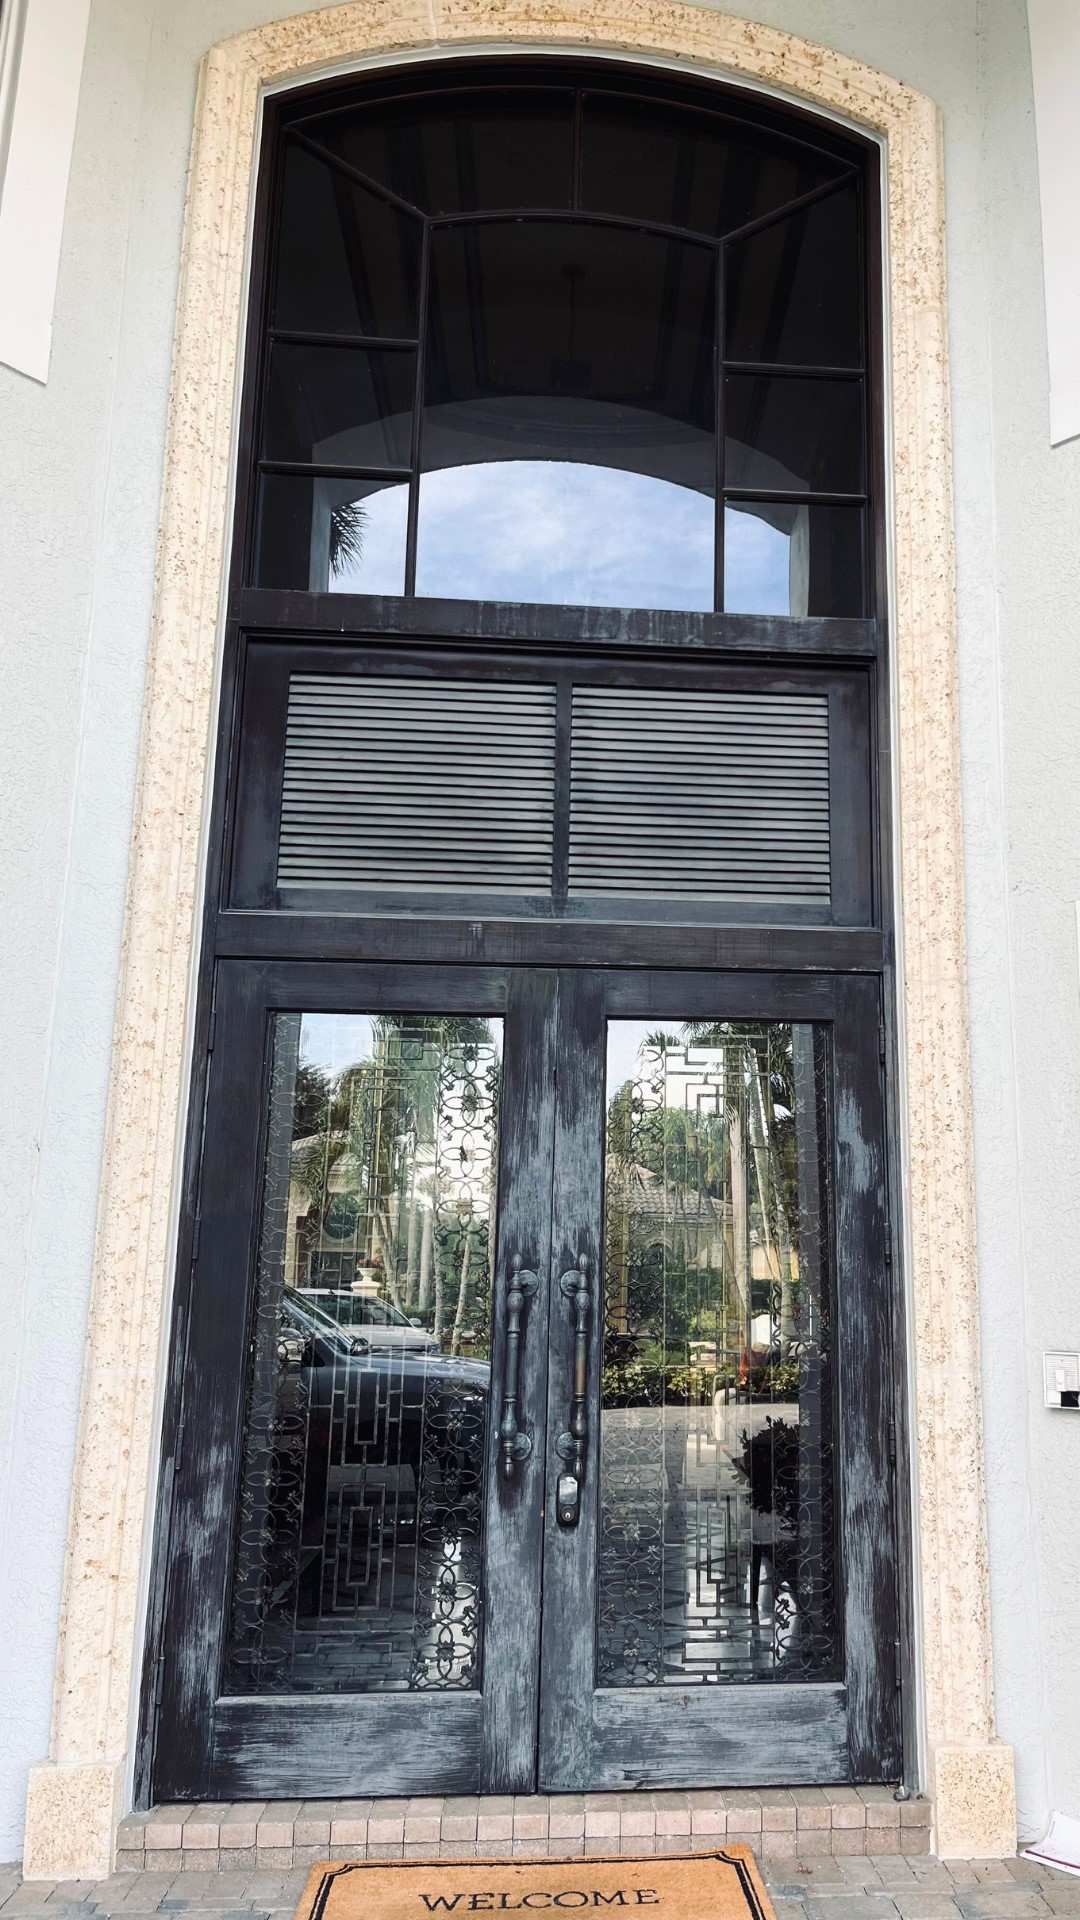
Whether you’re a DIY enthusiast or a total beginner, this process is simple, affordable, and incredibly satisfying.
Step 1: Prep Your Door
Good prep work is the foundation of any successful staining project. Follow these steps to get your door ready:
- Clean the surface: Start by wiping your door down with a damp cloth to remove dirt, grease, or grime.
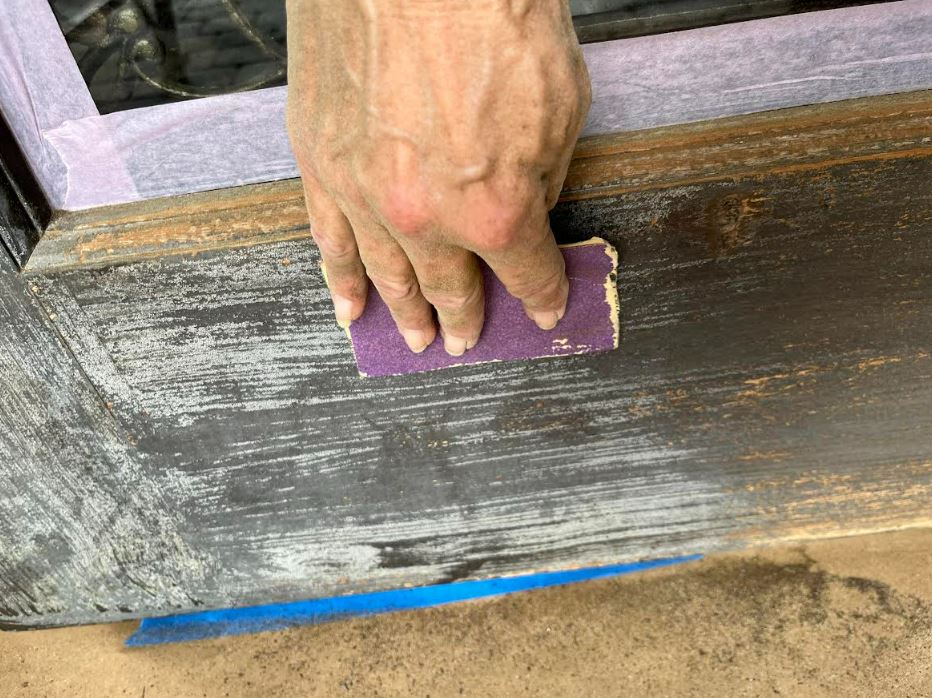
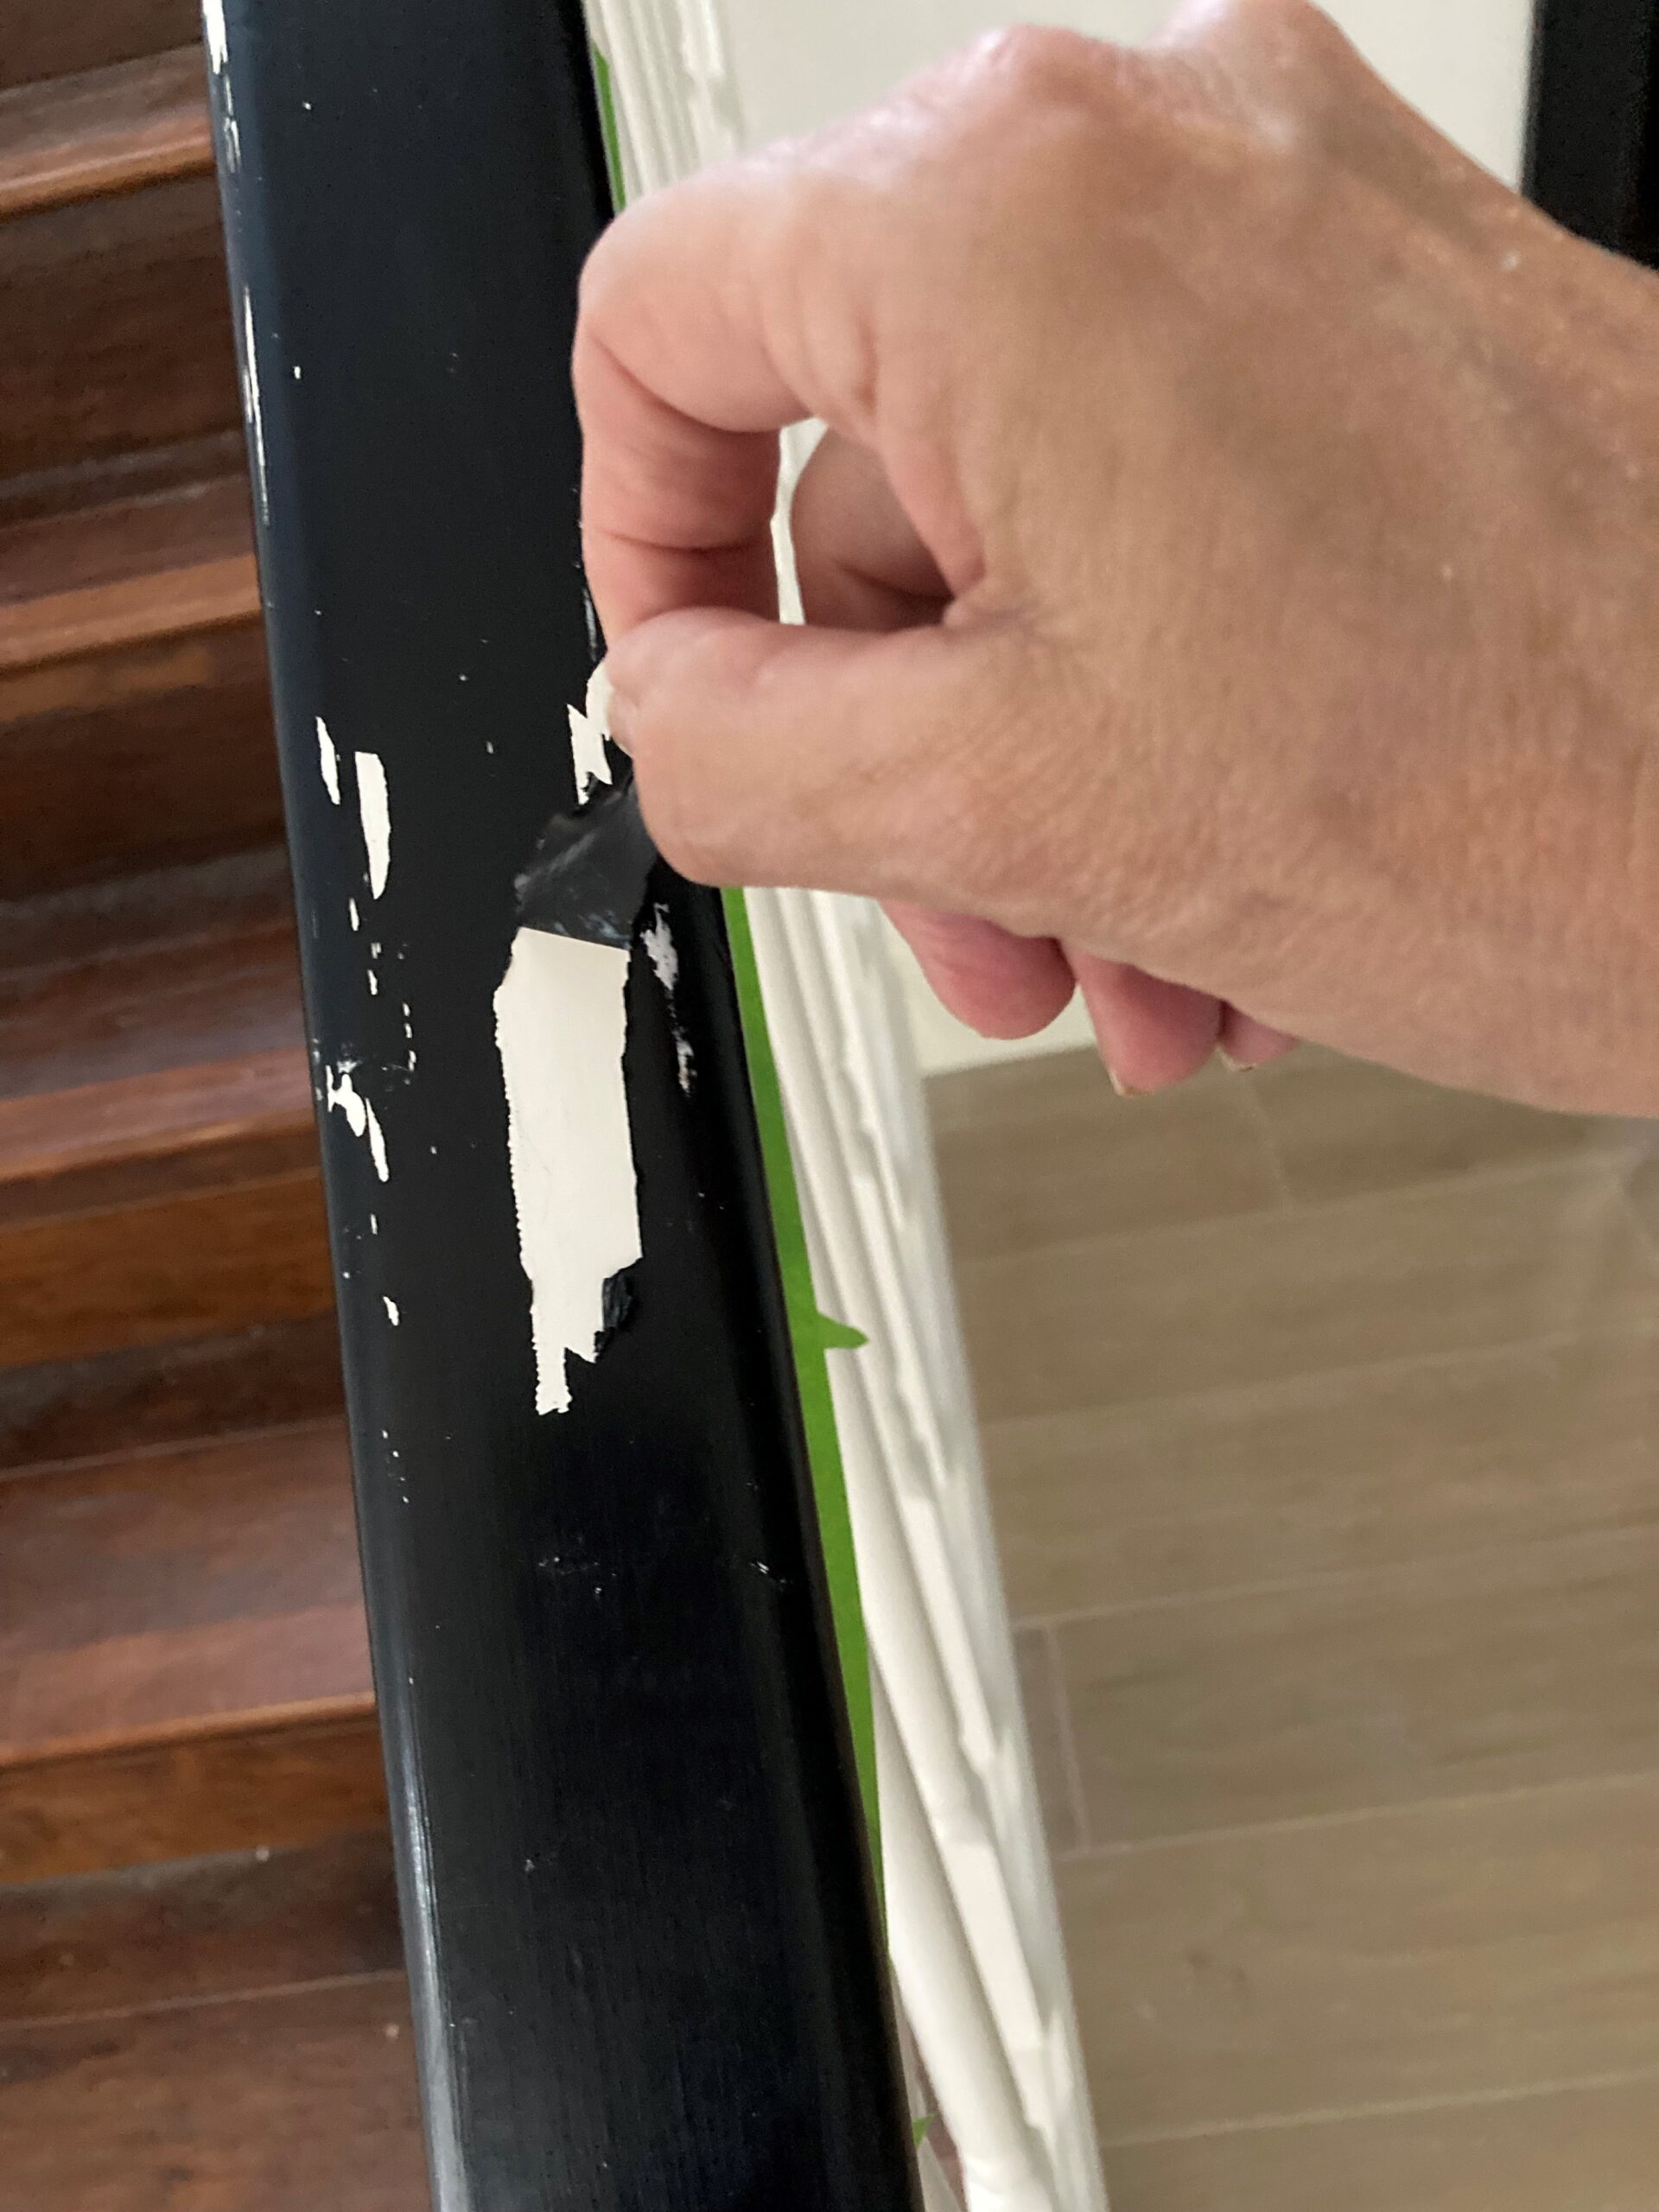
2. Sand lightly: Use a 150 grit sanding Paper to lightly sand the door. This step roughens the surface just enough for the gel stain to adhere better. You’re not stripping the finish—just creating a texture for better grip.
3. Dust thoroughly: After sanding, use a clean cloth or to wipe away all dust particles. Skipping this step can lead to a bumpy finish.
💡 Pro Tip: Pay extra attention to peeling or uneven areas. A quick sanding here can make a huge difference in the final look.

Why Gel Stain Is the Perfect Solution
Gel stain is a dream product for DIYers! Unlike traditional stains, it sits on top of the surface rather than soaking in, which means less prep work and a more forgiving application.
It works beautifully on wood, fiberglass, and even metal doors, making it an ideal choice for almost any home.
Step 2: Stain Like a Pro
Now it’s time to add that rich, polished color to your door. Here’s how:
Put on gloves: Gel stain can be messy, so protect your hands.
Apply stain: Use a Chip brush to apply the gel stain in long, even strokes. Always follow the grain of the wood (if visible).
Let the first coat dry completely (usually 6-8 hours) before deciding if a second coat is needed. If you prefer a deeper color, repeat the staining process.
How long does it take for an old master gel stain to dry?
Approximately 6 to 8 hours depending upon temperature, humidity, air movement, and the amount of stain on the surface.
For additional color depth, a second coat of stain can be applied after 8 hours. Ideal drying conditions recommended are 70° to 75°F and 35% to 50% humidity.

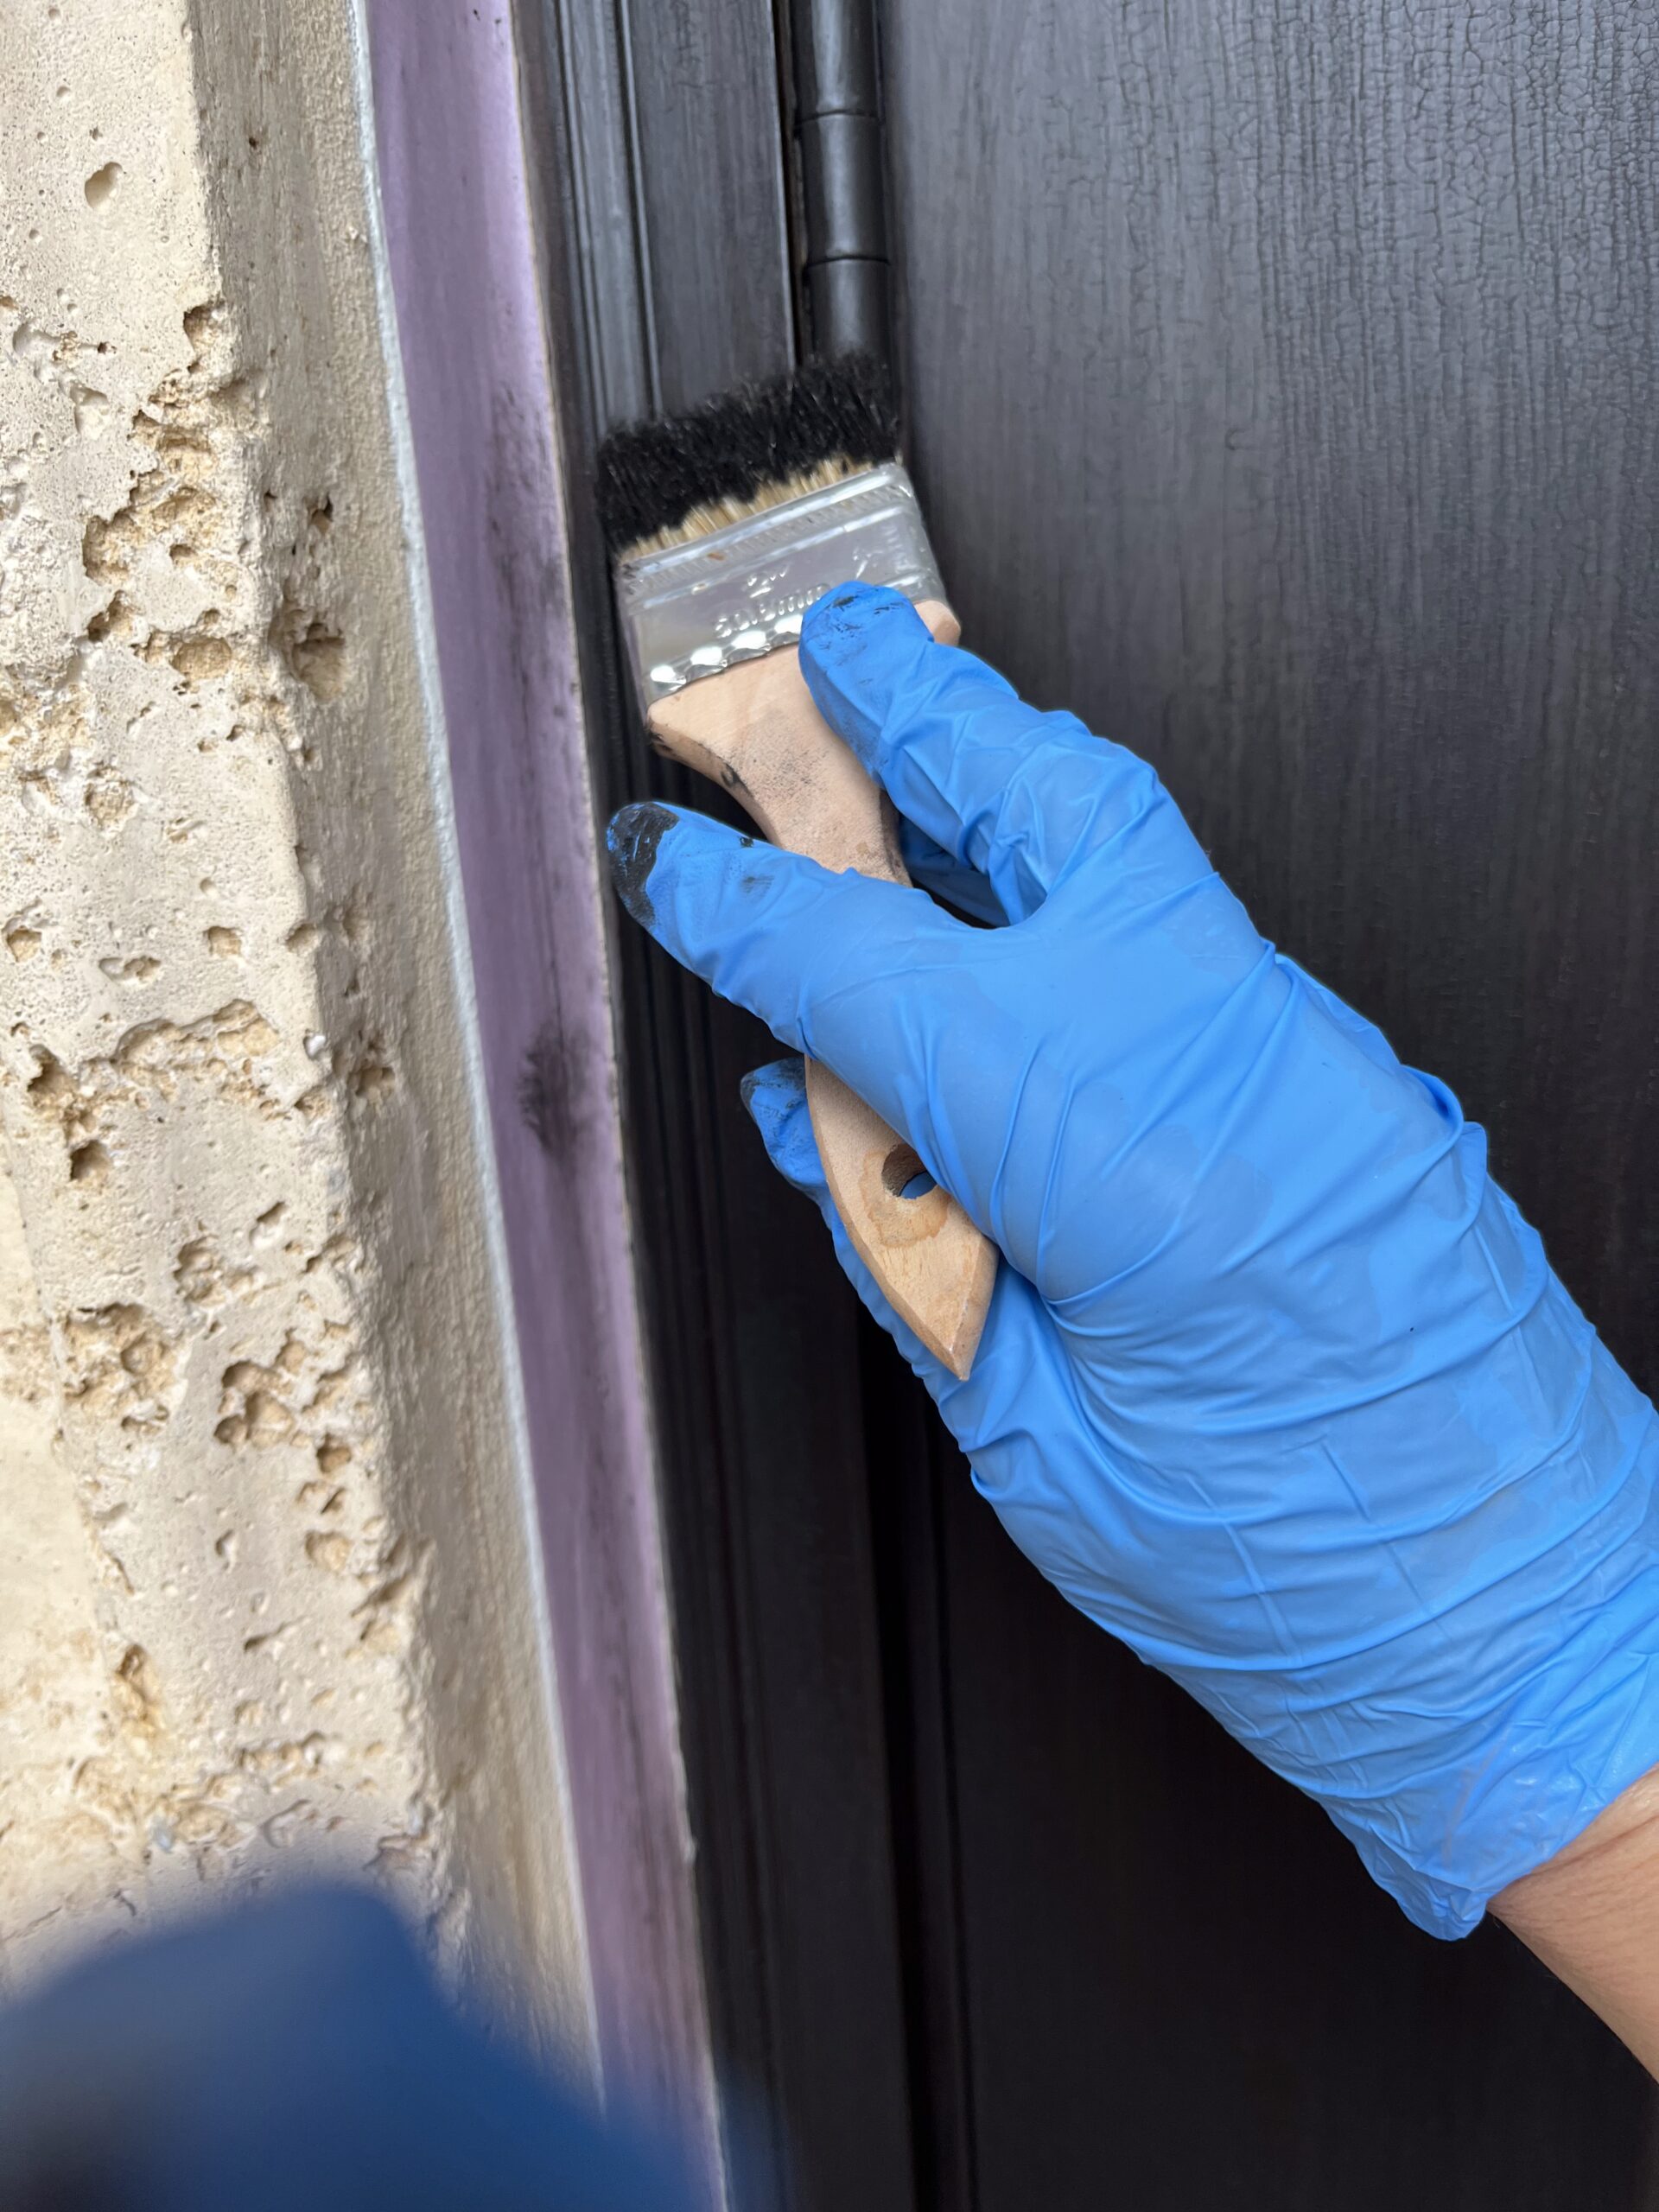
Step 3: Seal for Durability
Sealing your door is the final and most important step to ensure your hard work lasts. Here’s how to do it:
Choose the right sealer: For exterior doors, use a weather-resistant polyurethane. This will protect against moisture, UV rays, and general wear and tear.
Apply the topcoat: Use an oil-based paintbrush to apply a thin, even layer of the sealer. Follow the grain of the wood for the best results.
Allow to dry: Let the sealer dry completely (check the product instructions for drying time) before applying a second coat if needed.
Sealing your door not only enhances its look but also adds a layer of protection that keeps it looking great for years.
FAQs and Troubleshooting
Q: Can gel stain be used on any type of door?
A: Gel stain works best on wood, fiberglass, and metal. If your door is painted, you’ll need to strip the paint before staining.
Q: How long will this project take?
A: The process will take a few hours of hands-on work, plus drying time between coats. Plan for a weekend to complete the project.
Q: Do I need to remove the door to stain it?
A: Not necessarily! You can leave the door on its hinges as long as you tape off the hardware and surrounding areas.
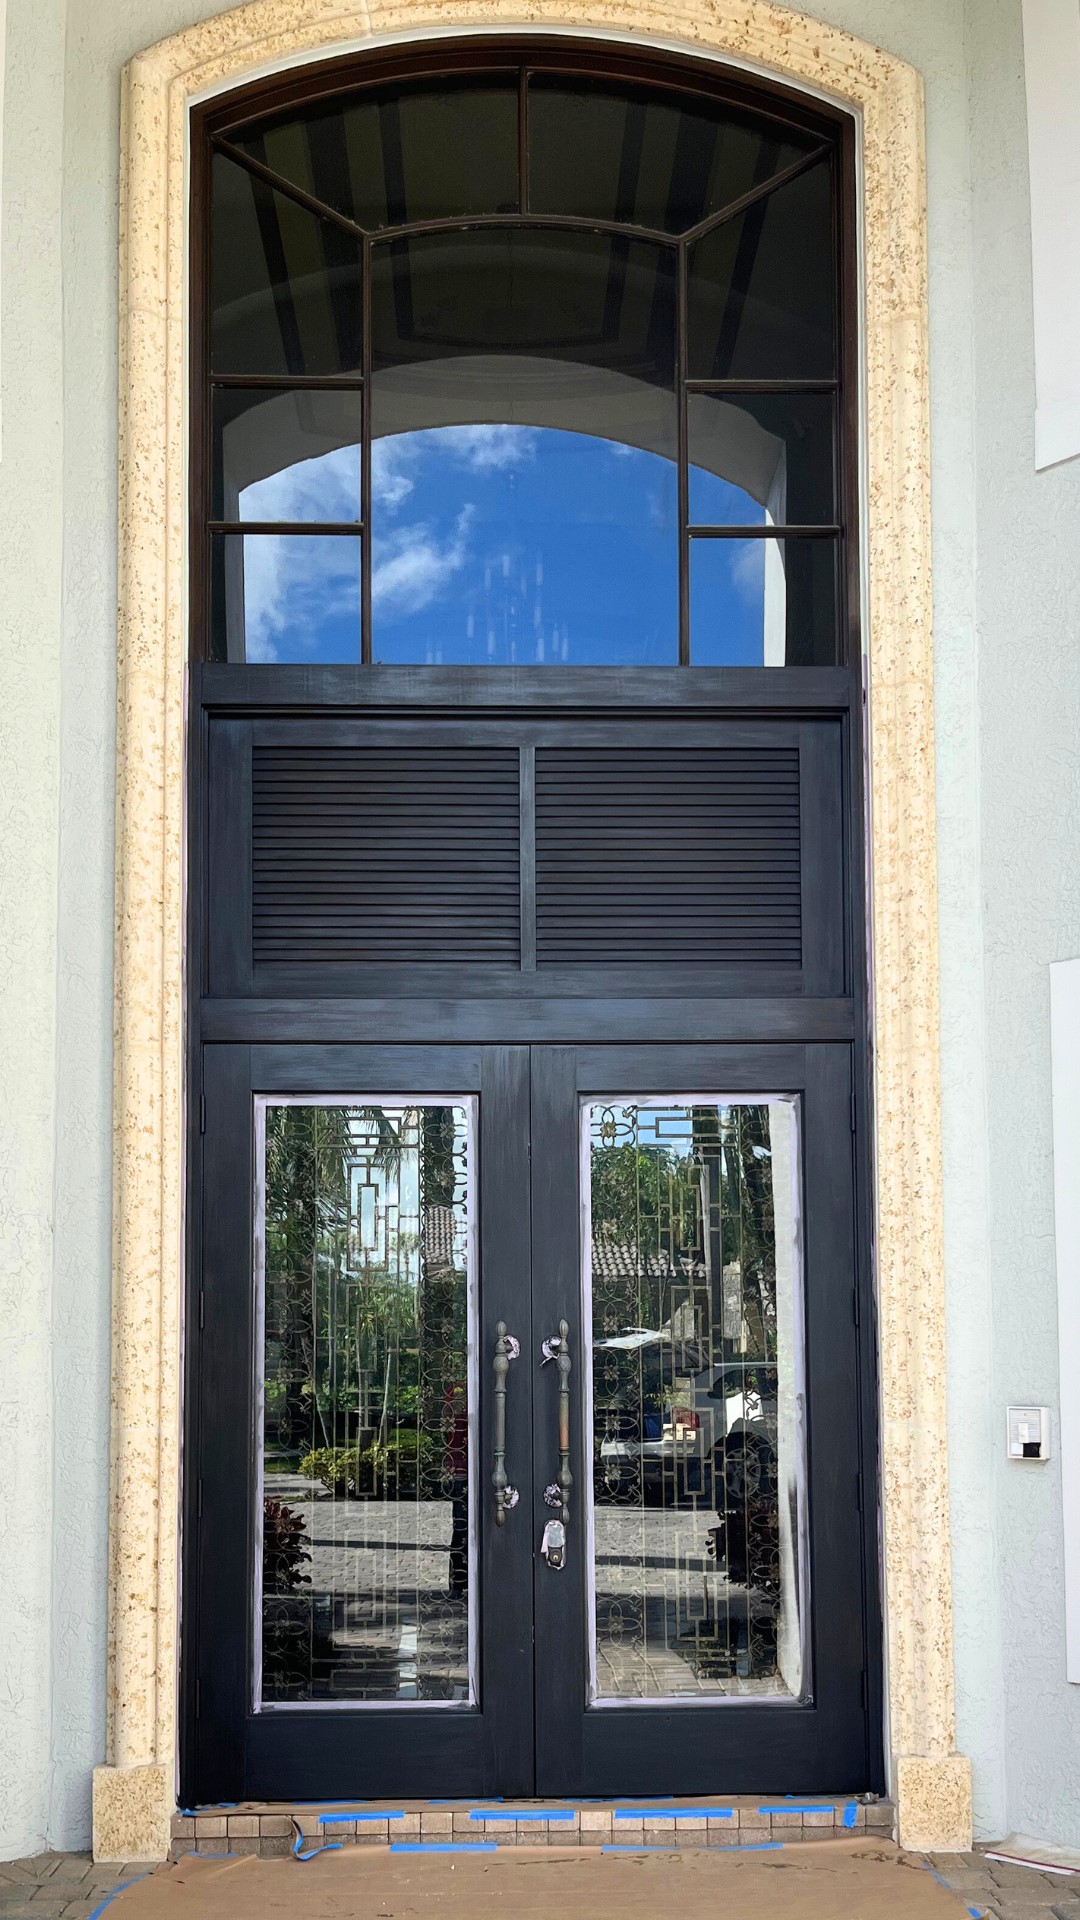
Staining your exterior door with gel stain is a simple, affordable project that makes a big impact. With just three steps—prep, stain, and seal—you can transform your door into a showstopper that adds charm and value to your home.
If you have any questions please feel free to reach out to me.
Happy DIYing! 🎨
Cheryl
P.S. Make sure you don’t miss out on signing up for my blog, filled to the brim with home decorating and DIY tips!
P.S.S. Do you need help building and monetizing your online business? Join Empowering Women. Get started today!

Artzy Fartzy Creations. Oh Yes you can DIY!
Drawer Wallpaper Transformation: A Stylish DIY Home Decor Upgrade
Drawer Wallpaper Transformation: A Creative DIY Hack Are you a [...]

The #1 Secret to Success After Age 50
Have you ever wondered how some people are successful [...]
Mirror Makeover: Transforming Outdated Wall-Hanging Mirrors
From Outdated to Outstanding: Mirror Makeover You know how we're [...]
Hand-Painted Valance Transforms Bedroom Elegance
Unveiling the Master Bedroom Magic with Hand-Painted Valence Oh, you [...]

5 Steps to Transform Your Faux Granite Fireplace
Do you have an electric fireplace that needs some TLC? [...]
Limewash Brick: 1-Easy-Step for a Beautiful Home
DIY Limewash Finish for Exterior Brick Ready to learn how [...]
Contents
Recent Reads
How To Pickle Wood: 1 Easy Step
Have you ever how to pickle wood that seems to [...]

Budget-Friendly Way to Lime Wash Pecky Cypress
Ready to transform your ceiling using our budget-friendly [...]
Latex Paint Not Sticking Over Oil-Based Paint: How To Fix It
Is the latex paint not sticking to your [...]