Bathrooms don’t have to cost a small fortune to make a huge change. If your bathroom is structurally in good condition you can update it with a minimal cost. Take this bathroom built in 1988, some would look at this and immediately want to rip it out and start from scratch. The problem is, it can cost 5,000+ and sometimes it’s just not in the budget. So, What’s the solution?
In the late 80’s this was a popular color. I know this because the house I bought in 1980 had a pink bathroom and I think I even liked it. Check it out, even the countertop and sink is pink. The good news is this is a quick fix. You wont believe the transformation.

Did you know you can paint the countertop and sink?

In this case, the sink is part of the countertop. Now I must admit this is the first time I’ve painted the inside of a sink. But if you think about it the sink is made of the same materials as the countertop, so why wouldn’t it hold up? It’s all in the prep. Here are the step-by-step instructions. If you want to change the faucet do it before you paint.
#1: Sand the countertop and sink with 320 grit sandpaper. It gives it a “tooth” and takes the sheen off. Then clean them with TSP. This is the most important step to make the paint stick.
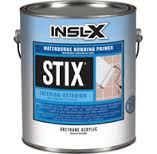
#2: Paint the countertop with 2 coats of primer, I like to use Stix. Use a 6 ” sponge roller to apply the primer. Let the primer dry 2-3 hours between coats
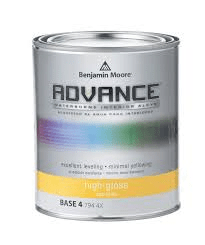
#3: Paint the countertop and sink with 2 coats of Advance paint from Benjamin Moore. Again use a 6″ sponge roller. allow the paint to dry 8 hours between coats. You can use any color you want.
#4: Apply 3-4 coats of Polycrylic semi-gloss clear

Here are the results. Looks like a brand new sink and counter.

Now here’s how you paint the cabinets!
Follow steps 1-3 the same steps as you did on the countertops. Tint the paint to the desired color. There is no need to use a sealer on the cabinets. The transformation is amazing! Not to mention it will save you thousands of dollars. Get my 7 Cabinet Painting Tips for FREE here!


If you want to learn how to start making money with your hobby get the details HERE
If you want to learn DIY Tricks and Tips get my weekly blog HERE
Blessings, Cheryl




Artzy Fartzy Creations. Oh Yes you can DIY!


Turn Your Favorite Photos Into a Stunning Custom Decoupage Purse
How to Make a Custom Decoupage Purse That [...]


25 DIY Drawer Pulls That Will Instantly Transform Ordinary Furniture Into Designer Pieces
If you love repurposing furniture, thrift store flipping, or giving [...]

6 Different Types of Mod Podge: How to Choose the Right Formula for Every Project
Different Types of Mod Podge: Which One Should You Use [...]
Contents
Recent Reads


Turn Your Favorite Photos Into a Stunning Custom Decoupage Purse
How to Make a Custom Decoupage Purse That [...]