 Let me let you in on a little industry secret… the real magic of a beautiful faux finish doesn’t start with the glaze, the metallics, or the fancy tools. It starts with faux finish surface prep. Proper faux finish surface prep is essential for the best results.
Yep—before you ever dip a brush, what you do before the fun part is what makes the difference between “wow, that looks high-end” and “why does this look streaky and patchy?”
To achieve a stunning look, faux finish surface prep cannot be overlooked.
I know prep isn’t glamorous. It’s not Instagram-worthy. But friend to friend? Prep is about 80% of a professional faux finish result. And skipping it is the #1 reason DIYers get frustrated and think, “Maybe I’m just not good at this.” (Spoiler alert: you are good—you just need better prep.)
Investing time in your faux finish surface prep will yield professional results.
So let’s break down the real-deal prep secrets I use on professional projects—so your faux finishes look smoother, richer, and way more expensive.
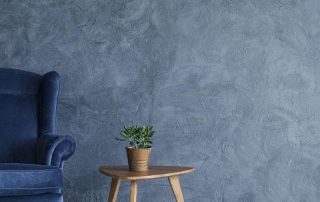
The Importance of Faux Finish Surface Prep
Clean First (Because Paint Hates Dirty Walls)
Before sanding, priming, or painting—clean the surface. Always.

Walls, cabinets, furniture, and doors collect things you can’t always see: dust, grease, hand oils, hairspray (bathrooms, I’m looking at you), and even residue from cleaners. If paint can’t grab the surface, it won’t stick properly—and that leads to peeling, fisheyes, and uneven finishes.
Effective faux finish surface prep includes cleaning and sanding to ensure optimal adhesion.
Quick tip from your new faux-finishing bestie:
Use a gentle degreaser or TSP substitute, rinse well, and let everything fully dry. Clean might not feel exciting, but it’s a game changer.
Light Sanding = Smoother, More Professional Results
You don’t need to sand like you’re refinishing hardwood floors—but a light scuff sanding is pure faux-finishing magic.

Sanding helps:
- Knock down texture and imperfections
- Give primer and paint something to grip
- Make your finish look smoother and more high-end
I like to use a fine-grit sanding sponge because it’s easy to control and gets into curves and corners. Think of sanding like giving your surface a little spa facial—nothing aggressive, just enough to make it glow. ✨
Prime Like a Pro (This Is Not Optional, Friend)
If you want your faux finish to last and look amazing, primer is your best friend.

Primer does a few important things:
- Blocks stains and old colors from bleeding through
- Creates a consistent base color
- Helps your faux layers glide on more evenly
- Improves adhesion so your finish doesn’t chip or peel
And here’s a pro secret most people don’t talk about:
A good primer can actually make your faux finish look richer and more realistic—especially for woodgrain, marble, metallics, and textured techniques. This is my favorite primer, it literally sticks to everything.
Remember, good faux finish surface prep also leads to a more durable finish.
Sand Between Coats (Yes, Really)
This is where a lot of DIYers skip—and where pros quietly win.

Thorough faux finish surface prep will help your layers adhere better and last longer.
Lightly sanding between coats with a sanding block,especially when you’re working with furniture.
- Knocks down dust nibs
- Smooths brush or roller marks
- Helps the next layer lay flatter
- Creates that buttery-smooth finish everyone loves
It takes just a few minutes, but it makes your work look like it was done by someone with 20+ years of experience. (Ask me how I know 😉)
Taping Tricks That Save Your Sanity
Good taping can mean the difference between crisp, clean lines and a “why is paint bleeding everywhere?” moment.

Pro taping tips:
- Use high-quality painter’s tape
- Burnish (press down) the edge with a putty knife or credit card
- Seal the edge with base coat color before applying your faux layer
- Remove tape while paint is slightly tacky for the cleanest lines
This one trick alone can take your faux finish from DIY to designer-level.
Why Prep Is 80% of a Professional Faux Finish
Consider your faux finish surface prep as the foundation of your artistic creation.
Here’s the truth most people don’t want to hear:
If prep is rushed, even the most beautiful faux technique won’t save it.
But when prep is done right?
Your glaze blends better.
Your metallics look smoother.
Your textures are more intentional.
Your finish lasts longer.
And your work looks polished instead of patchy.
Remember, faux finish surface prep is what separates the amateurs from the pros.
Prep is what makes people say, “Who did this?!” instead of “Did you do this yourself?” (in that tone we all know 😂)
When done correctly, faux finish surface prep ensures your project stands out.
Final Thoughts From Your Faux-Finishing Friend
In conclusion, don’t underestimate the impact of proper faux finish surface prep.
If you’ve ever felt frustrated with a faux finish that didn’t turn out how you imagined, I want you to hear this:
It’s probably not your talent. It’s probably your prep.
Make faux finish surface prep a priority for your next project.
Start treating prep like part of the art—not the annoying step before the fun—and I promise your results will level up fast.
And hey, if you ever want more pro tips, techniques, and behind-the-scenes tricks, stick around. I’ve got lots more to share, and I’m cheering you on every step of the way. 💛
If you haven’t signed up for my weekly blog, you’re missing out. Grab it here!
XOXO Cheryl,


Artzy Fartzy Creations. Oh Yes you can DIY!

How to Decoupage Furniture with Napkins: Step-by-Step Process
How to Decoupage Furniture with Napkins: Easy Step-by-Step Guide for [...]

#1 Way to Prevent Paint Bleed-Through on Denim Jackets
How to Prevent paint bleed through denim jackets If you’ve [...]

How to Paint a Checkered Pattern on Tile (Makenzie Childs Inspired)
How to Paint Checkered Pattern on Tile: Step-by-Step [...]

Best roller for painting cabinets
If you’ve ever stood in the paint aisle [...]

Contents
Recent Reads

#1 Way to Prevent Paint Bleed-Through on Denim Jackets
How to Prevent paint bleed through denim jackets If you’ve [...]

How to Paint a Checkered Pattern on Tile (Makenzie Childs Inspired)
How to Paint Checkered Pattern on Tile: Step-by-Step [...]
