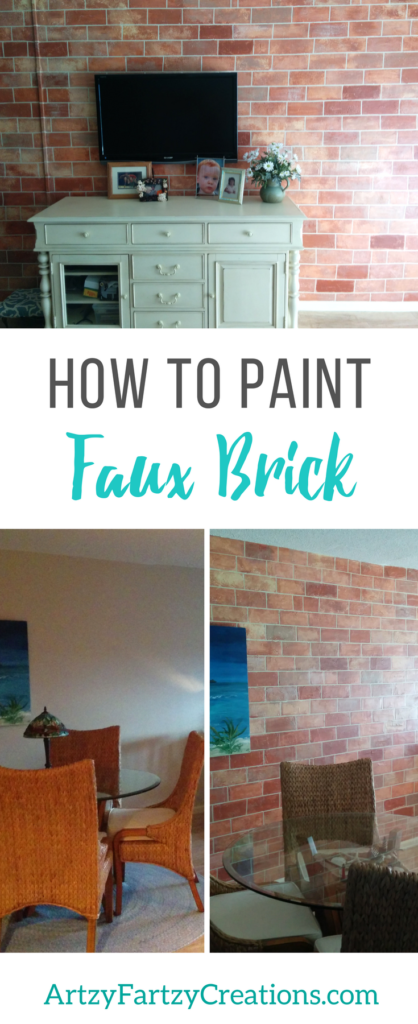
Painting Faux Brick is an easy technique and very inexpensive to create. I will admit, it is a little time consuming, but worth the time and effort you put into it.
It looks so real, you will have to walk up to it and touch it and even then, you’ll stand there scratching your head.
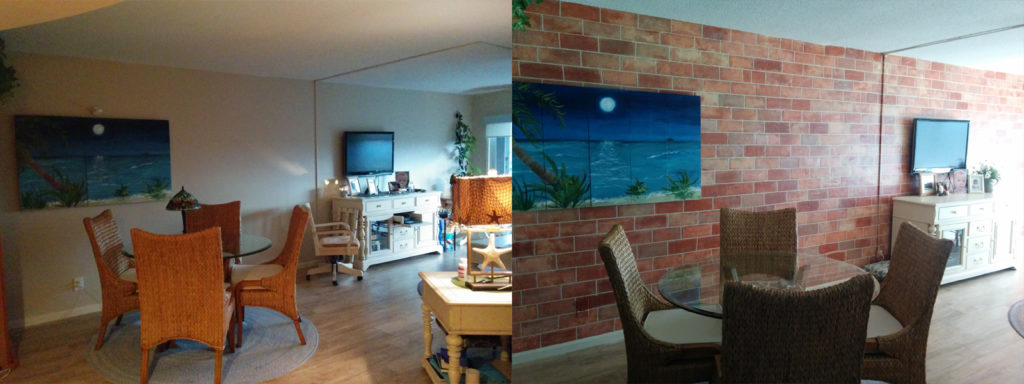
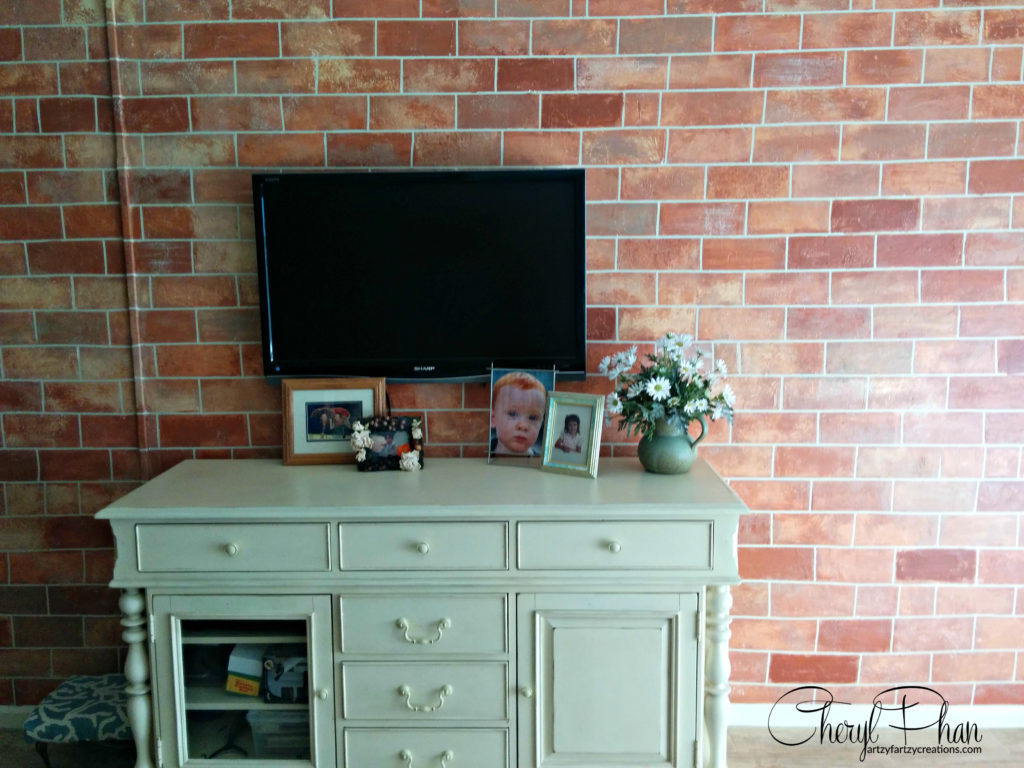
Here is the room before & after!
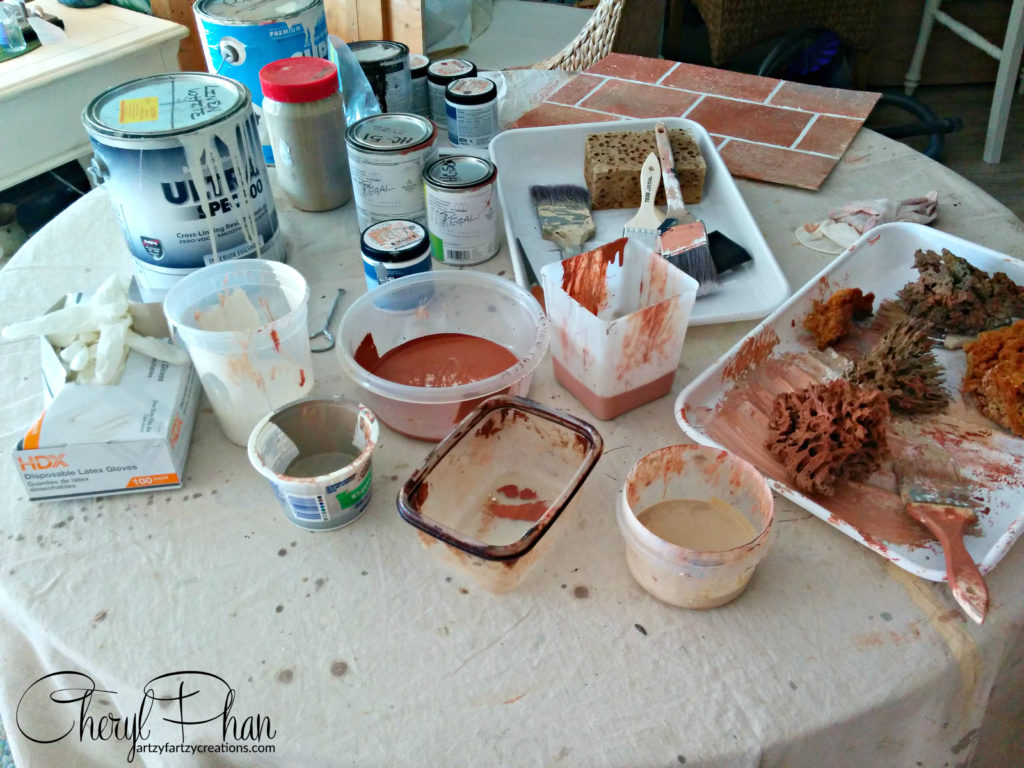
Faux Brick Supplies
I provided a few affiliate links for your shopping convenience.
- ¼ Tape or 12mm Tape for grout line (your choice)
- Tape measure
- Chalk (art Supply Store)
- Sea Sponge
- Assorted paint colors for brick (home Improvement Store)
- Primer tinted Gray
- Joint Compound (Drywall mud) (Home Improvement Store)
Step #1:
Paint the wall with tinted Primer. I use a primer instead of paint because I want the drywall mud to have a good adhesion.
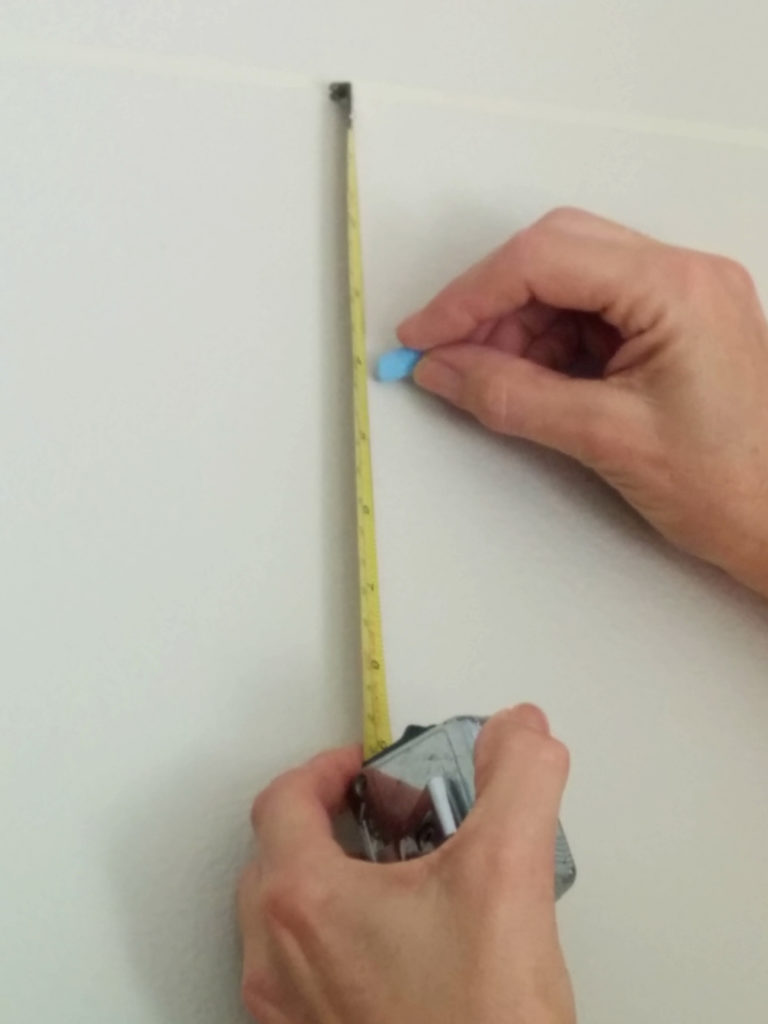
Measure the width of the brick from one end of the wall to the other.

Step #2:
Measure the width of the brick and add the tape to the wall from ceiling to floor.
Don’t worry about the lines being perfectly straight. It will look more authentic if they are a little off.
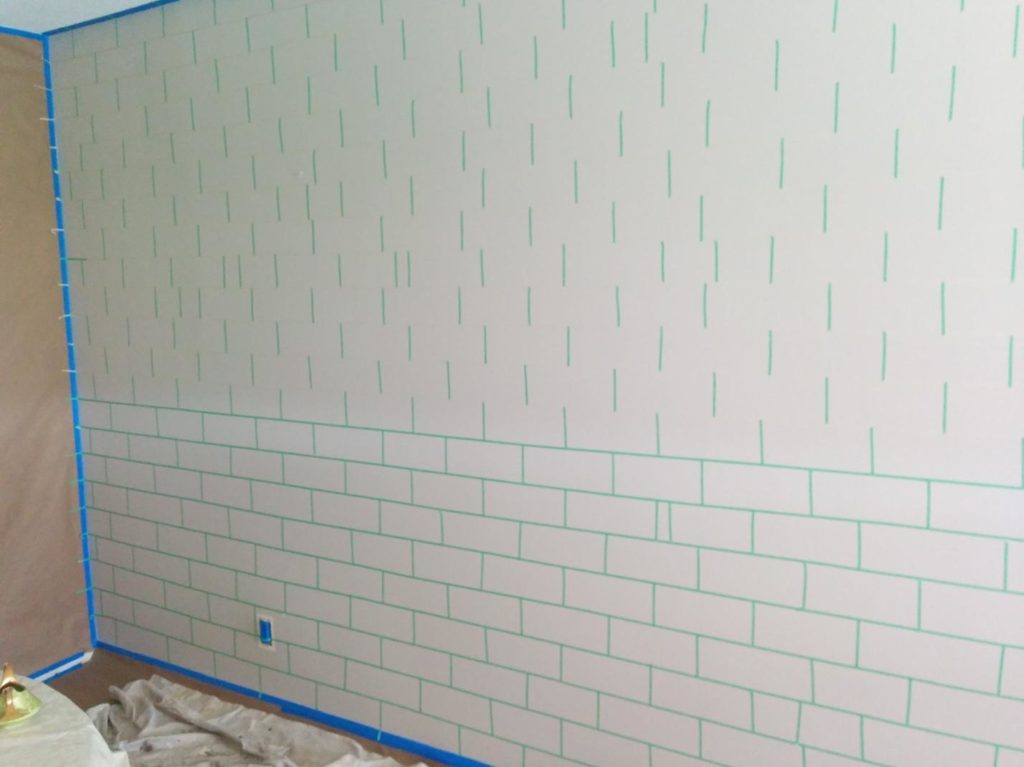
Apply small strips of tape to create each brick. Notice they are lined up in the middle of the brick on the bottom.

Step #3
Apply the dry wall mud about 1/4“ thick with a spatula or trowel. Remove the drywall mud so you can see the tape. (This will be removed later). Let dry completely.
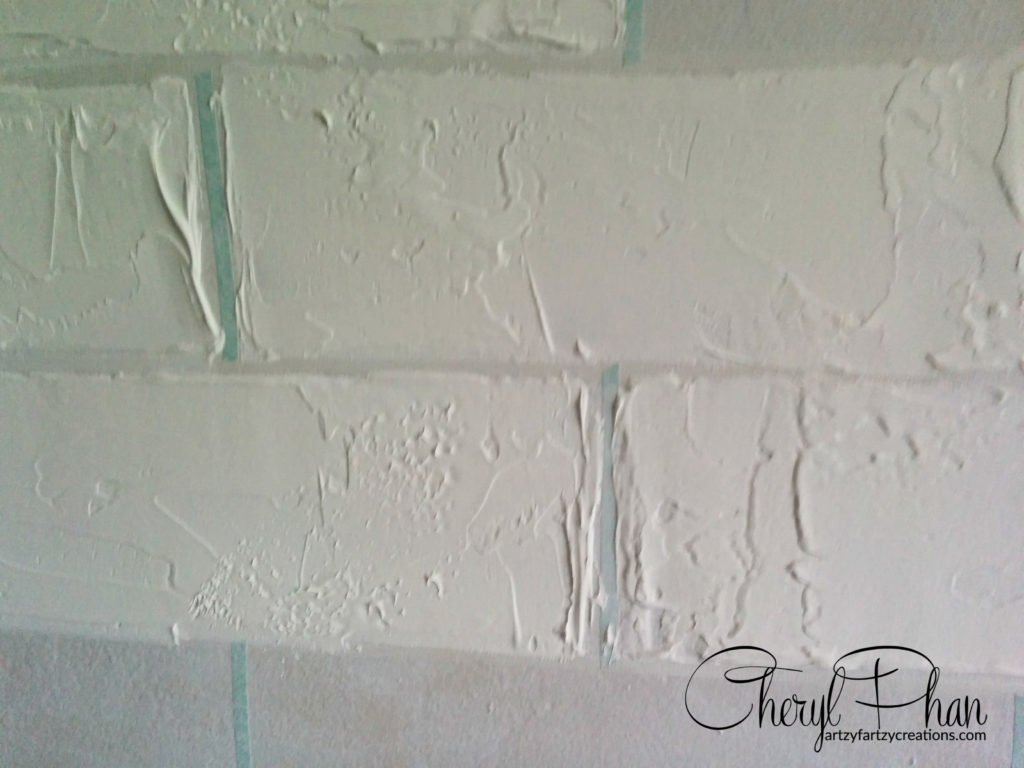
To create different textures while the plaster is still wet. Use the spatula and other tools such as, a textured roller, knife and anything else you find in your tool chest that might make interesting textures.
Step #4
If you don’t have leftover paint in your garage that you can use, buy sample paint or OOPS paint at your local hardware store. I used a combination of 6 different colors to create my brick wall. I would suggest going online and look up different brick walls to find the one that you like the best to help with color selections.
Make some bricks darker than others and just play with the colors. It’s a lot of fun and you will see your wall come to life right before your eyes.
Step #5
Once you’re done painting the entire wall, remove the tape. You might need a pick to pull the tape away from the wall.
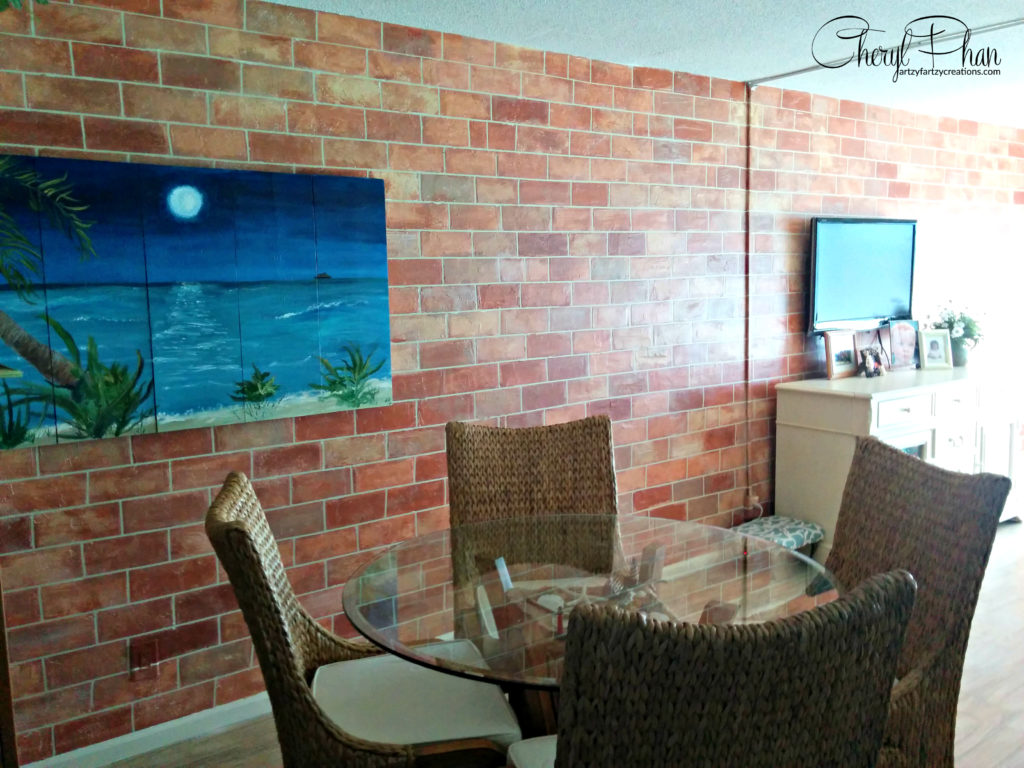
Then sit back and enjoy your beautiful wall.
If you want to learn how to start making money with your hobby get the details HERE
If you want to learn DIY Tricks and Tips get my weekly blog HERE
HAPPY PAINTING

Artzy Fartzy Creations. Oh Yes you can DIY!

How to Repurpose Old Furniture Into a Cozy Dog Bed
DIY Small Dog Bed Tutorial -How to [...]

Master- How To Paint Perfect Horizontal Stripes Like a Pro
Want to know my secret pro tip to paint horizontal [...]

How to Paint Columns to Look Like Marble
Creating a marble faux finish on columns is easier [...]

How to Price Handmade Items for Profit: A Step-by-Step Guide
Let’s break this down so it’s easy to understand. [...]

Easy Three-Step Process to Stain Your Exterior Door with Gel Stain
Are you tired of your front door looking dull [...]

How to Paint a Metal Table in 1- Easy Step
Ready to transform your old metal table into a stunning [...]
Contents
Recent Reads

Best Cordless Spray Gun Ever: My Go-To Painting Tool for a Smooth, Flawless Finish
Cordless paint spray gun lovers, this one’s for [...]

How to Start a Creative Business Online with Excellence
How to Start a Creative Business Online Woman painting [...]

Best Way to Clean Oil Paint Brushes and Keep Bristles Soft
How to Clean Oil Paint Brushes the Right [...]