So… you want to master the one-step wall glaze technique?

Girl, you’re in the right place — and don’t worry, this isn’t some intimidating “only-the-pros-can-do-this” tutorial. I’m about to walk you through a simple one-step glazing technique that’ll make your walls look like you hired a high-end artist (even though it’s just little ol’ you with a rag and some glaze).
With a little practice, you can achieve the perfect one-step wall glaze that transforms your space.
I’ve been doing this for years, and let me tell you — with the right steps, anyone can get that gorgeous finish that makes people stop and say, “Wow… did you really do that?”
This tutorial covers the one-step wall glaze method that can elevate your home decor.
BTW, I have a complete supply list for you!
____________________________________________________________________
Why a One-Step Wall Glaze Is the Secret Sauce for a Designer Finish
You know those stunning textured walls you see in model homes or fancy resorts? Chances are, they’re glazed. Glazing a wall adds dimension, depth, and a soft, aged look that plain paint just can’t give you.
The best part? You don’t need fancy tools or expensive supplies. A little glaze, a base coat, and a piece of cloth — and you’re in business.
Plus, this simple one-step glazing process is a total game-changer if you want to give your walls a custom finish without spending a fortune.
Embrace this one-step wall glaze technique to enhance your living area without breaking the bank.


Step One: Start with a Smooth Base Coat (Because Nobody Likes a Rough Start)
Applying base coat for wall glaze
Before you even think about glaze, you’ve got to prep that wall like a boss.
✅ Patch any holes or nicks (we all have them — life happens).
✅ Sand smooth so your finish looks flawless.
✅ Apply a solid, even base coat in your color of choice.
Pro tip:
I love using a soft neutral like cream or taupe — it gives the glaze something warm to play with.

Step Two: Apply the One-Step Wall Glaze Like a Pro
Applying the one-step wall glaze creates an elegant finish that is sure to impress.
How to apply glaze to walls
By mastering the one-step wall glaze, you can bring a sophisticated touch to any room.
Now comes the fun part — glazing!
You’ll want to use a good quality brush or roller for this step.
I like to start in a corner and work my way out in small sections.
✅ Brush or roll the glaze onto the wall in a thin layer.
✅ Don’t stress if it looks a little messy — we’re about to fix that!
Use one part paint to 2 parts glazing medium

Step Three: The Magic is in the Wipe (Yes, Really)
How to remove excess glaze
The beauty of the one-step wall glaze is in its simplicity and effectiveness.
This is where the magic happens — and trust me, you’ll feel like a total artist!
Grab a clean, lint-free cloth, bunch it up, and lightly blot or wipe the glaze in random patterns.
✅ You’re softening the look and creating that aged, textured effect.
✅ Keep stepping back to check your work — you’ll know when it feels right.
Transform your walls with this easy glazing technique — apply glaze, wipe, and reveal a stunning hand-finished look!
Step Four: Don’t Forget to Dance Back and Admire Your Work!
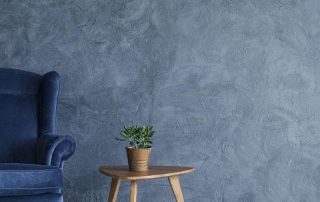
Finished glazed wall ideas
After the glaze dries (which usually takes a couple of hours), you’ll want to take a good look at your masterpiece.
After applying the one-step wall glaze, you will be amazed at the transformation.
This is the part where I usually say, “Dang… I did that!” 😄
Your wall will have that soft, hand-finished look with tons of character.
Taking the time to perfect your one-step wall glaze technique will yield stunning results.
Remember, the key to achieving stunning results lies in the one-step wall glaze technique.

Common Mistakes with One-Step Wall Glaze (and How You Can Totally Avoid Them)
By avoiding common mistakes with the one-step wall glaze, you can ensure a flawless finish.
✔️ Using too much glaze: A little goes a long way!
✔️ Skipping the prep: Don’t paint over a damaged wall (your finish will highlight every flaw).
✔️ Overworking the glaze: Once you start blotting, don’t go back over the same area too much-it will muddy the look
✔️ Don’t overlap the glaze, paint next to where you stopped
Ready to Glaze Like a Pro? Let’s Do This!
Now that you’re ready, let’s dive into the world of one-step wall glaze!
So, are you feeling confident yet? I hope so — because this simple, fun, and affordable glazing process is something anyone can master with a little practice (and maybe a little dance party while you work).
If you’re ready to give your home a designer look without a designer price tag, this is your sign to grab a brush and start glazing.
The one-step wall glaze method is your ticket to a professional-looking space.
👉 Want more tips and tricks on decorative finishes? Sign up for my weekly blog and learn how to turn your creative skills into a money-making business.
Let’s make your walls — and your wallet — happy!
Here’s your supply list
Here’s your supply list
Paint: Buy at any hardware store
From my paintbrush to yours, you’ve totally got this!
Remember, the one-step wall glaze can turn any room into a masterpiece.
P.S.
Your hobby isn’t “just” a hobby — it’s a gift. And yes, it can become a business. Visit my mini-course marketplace and learn how to make money doing what lights you up.
Cheryl,

Artzy Fartzy Creations. Oh Yes you can DIY!

How to Prevent Paint Bleed-Through on Denim Jackets
How to Prevent paint bleed through denim jackets If you’ve [...]

How to Paint a Checkered Pattern on Tile (Makenzie Childs Inspired)
How to Paint Checkered Pattern on Tile: Step-by-Step [...]

Best roller for painting cabinets
If you’ve ever stood in the paint aisle [...]


Gold Leafing 101: (Step-by-Step DIY Gold Leafing Guide for Beginners)
How to Apply Gold Leaf: 6-Step DIY Guide [...]
Contents
Recent Reads

How to Paint a Checkered Pattern on Tile (Makenzie Childs Inspired)
How to Paint Checkered Pattern on Tile: Step-by-Step [...]


Best roller for painting cabinets
If you’ve ever stood in the paint aisle [...]